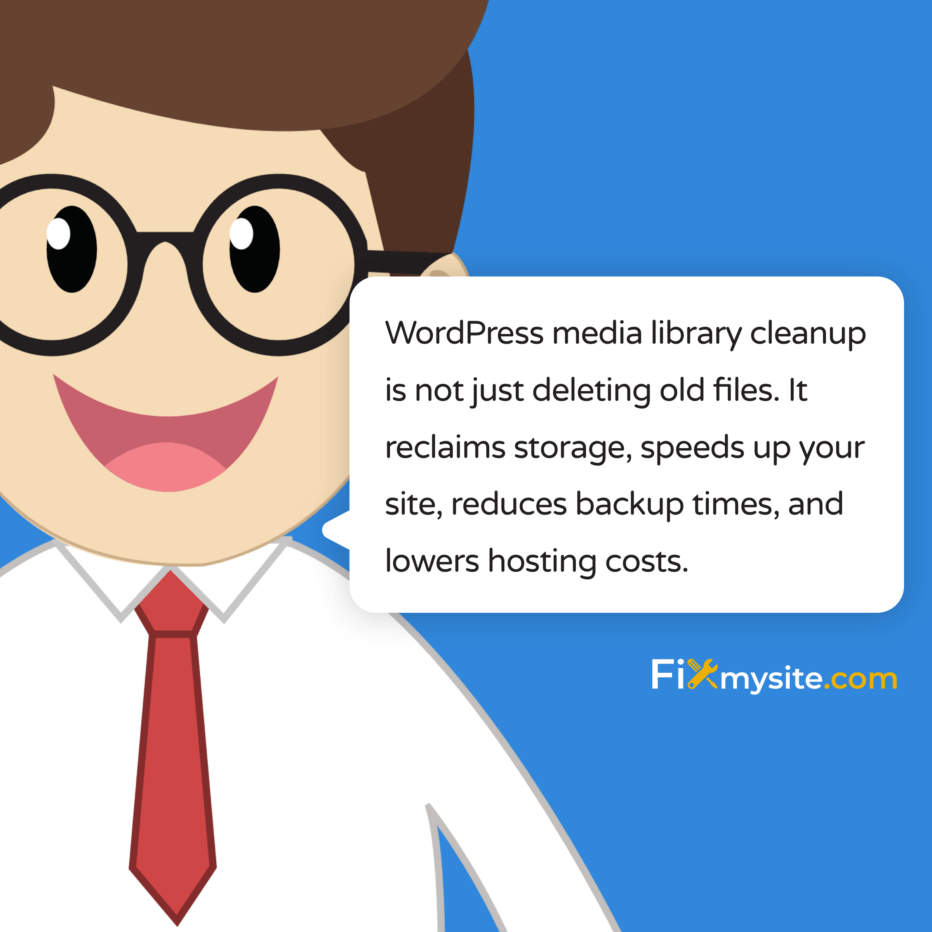
WordPress media library cleanup is not just about deleting old files. It is about reclaiming storage space, speeding up your site, reducing backup times, and cutting hosting costs.
You need to understand the difference between unused and unattached images. You need to back up your website before you delete anything. You need to choose between manual cleanup and plugin based methods based on your site size and technical comfort level.
This guide covers everything from why cleanup matters to how to safely remove media files. You will learn multiple cleanup methods, plugin comparisons, and best practices for keeping your media library organized long term. We will walk through manual cleanup steps for smaller sites and automated approaches for larger installations with page builders, WooCommerce, or custom fields.
Your WordPress media library affects more than just storage. Every unused image adds to your backup file size, slows down your hosting account, and makes site management harder. When you clean up properly, you improve performance and make future maintenance easier.
Why WordPress Media Library Cleanup Matters
Your WordPress media library grows every time you upload an image. WordPress creates multiple sizes of each image automatically, which means one upload can create five or six files on your server.
This happens for every single image. Over months or years, this adds up fast.
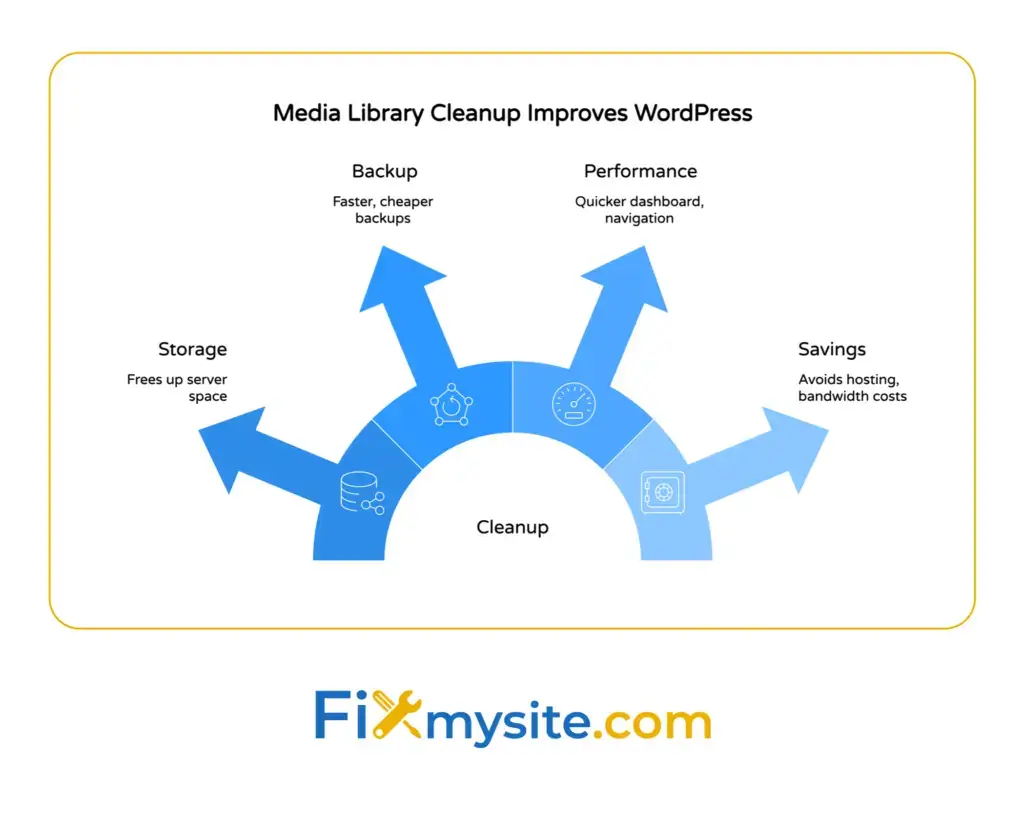
Storage optimization, faster backups, cost savings, and improved site performance motivate most WordPress users to clean their media libraries. These benefits compound over time as your site grows.
Storage space fills up faster than most people realize. A WordPress site with 500 uploaded images might actually have 2,500 files in the uploads directory when you count all the automatic sizes. That takes up gigabytes of server space.
Backups take longer when your media library is bloated. If your backup includes 5GB of unused images, you wait longer for backups to complete. You also use more backup storage, which can cost extra money depending on your hosting plan.
Site performance suffers in subtle ways too. Server load increases when WordPress has to manage thousands of unnecessary files. Database queries slow down when the media library contains excessive records. These small delays add up to slower page loads and frustrated visitors.
Storage Space and Hosting Costs
Every unused image takes up storage space you pay for. Shared hosting plans typically limit storage to 10GB or 20GB. Once you hit that limit, you need to upgrade to a more expensive plan.
Cleanup gives you breathing room. Deleting 2GB of unused media files might save you from a hosting upgrade for another year.
Storage space also affects your backups. Most backup solutions store your entire uploads folder. If half of those files are unused, you waste backup storage and bandwidth on files you do not need.
Backup Size and Speed
Smaller media libraries create smaller backups. Smaller backups complete faster and use less storage in your backup location.
If you back up to cloud storage, you might pay per gigabyte. Removing unused media files reduces those ongoing costs.
Backup restoration gets faster too. When you need to restore your site after a problem, smaller backup files download and restore more quickly. This means less downtime.
Website Performance Impact
Media library size does not directly slow down your front end page load times. Visitors only download the images you actually display on pages.
But cleanup helps in other ways. Your WordPress dashboard loads faster when the media library has fewer files to display. Media library pages become more responsive and easier to navigate.
Database performance improves slightly too. Fewer media records mean faster database queries when WordPress searches for attachments. This matters more on larger sites with thousands of posts and images.
Regular cleanup also prevents future performance problems. Catching unused files early keeps your media library manageable before it becomes overwhelming.
What Clutters Your WordPress Media Library
Understanding what creates clutter helps you prevent it. WordPress and plugins create media files in ways you might not expect.
Not all clutter is bad. Some files serve important purposes even if they are not directly visible on your site.
Automatic Image Sizes
WordPress automatically generates multiple versions of every image you upload. By default, it creates thumbnail, medium, and large sizes in addition to your original file
Your theme might add custom image sizes too. Page builders like Elementor or Divi often create their own optimized versions. WooCommerce adds product image sizes.
One uploaded image can become six separate files on your server. If you upload an image and never use it, all six versions waste storage space.
You cannot avoid this behavior. WordPress needs these sizes for different contexts. But understanding it helps you see why cleanup matters so much.
Unused and Unattached Images
Unused images are files uploaded to your media library but not displayed anywhere on your site. They exist in your uploads folder and database, but no post, page, or widget uses them.
Unattached images are files not assigned to any post or page. When you upload an image directly to the media library instead of through a post editor, WordPress marks it as unattached.
These two categories overlap but are not identical. An image can be unattached but still used in a widget. An image can be attached to a draft post you never published.
We will explore this distinction in detail in the next section.
Duplicate Images
Duplicate images happen when you upload the same file multiple times. Maybe you forgot you already uploaded a logo. Maybe you uploaded a photo, edited it, and uploaded the edited version too.
WordPress treats each upload as a separate file. It does not check if identical files already exist. This creates true duplicates that waste storage space.
Some duplicate images serve purposes though. You might intentionally upload different versions of the same photo for A/B testing or seasonal variations.
Identifying which duplicates to delete requires careful review. Automated duplicate detection helps, but you still need to verify before deletion.
Old Featured Images and Replaced Content
When you change a featured image, WordPress keeps the old one in your media library. When you update a blog post and swap out photos, the old images remain uploaded.
These files are technically unused now. But they might still appear in your media library history or old post revisions.
Most of these old files can be safely deleted. But check your post revisions first if you might want to roll back content changes.
The Difference Between Unused and Unattached Images
People often confuse unused and unattached images. They sound similar but mean different things. Understanding this distinction prevents you from accidentally deleting files you actually need.
Unattached images are not linked to any specific post or page in your WordPress database. Unused images are not displayed anywhere on your live site.
What Unattached Images Really Means
When you upload an image through a post editor and insert it into that post, WordPress attaches it to that post ID. The database records this relationship.
When you upload an image directly to the media library without going through a post, WordPress leaves it unattached. No post ID gets assigned.
Unattached does not mean unused. That unattached image might appear in a widget, theme header, page builder element, or custom field.
Deleting all unattached images would break those implementations. This is why you cannot rely on attachment status alone to identify safe deletions.
What Unused Images Actually Means
Unused images do not appear anywhere on your public facing website. No post, page, widget, or custom field currently displays them.
WordPress built in Media Library features allow basic manual cleanup without plugins, but identifying truly unused files requires scanning your entire site database and file system.
An image can be attached to a post but still unused if that post is in the trash or never published. An image can be unattached but heavily used in widgets and theme settings.
True unused images are safe to delete. But identifying them accurately requires comprehensive scanning beyond what manual review can achieve.
Why This Distinction Matters for Safe Cleanup
If you delete based on attachment status alone, you risk breaking your site. Widgets lose images. Theme headers disappear. Page builder sections show broken image icons.
Safe cleanup requires scanning actual usage across your entire site. You need to check posts, pages, custom post types, widgets, theme settings, page builder data, and custom fields.
This is where plugins become essential. Manual checking across all these locations takes hours and you will still miss things. Plugins automate this comprehensive scan.

Important: Backup Before You Begin
Do not skip backups. Seriously. Even experienced WordPress users make mistakes during cleanup.
Always back up your website before deleting images and test plugins on a staging site to preview removals and prevent broken images or data loss. This single step prevents catastrophic mistakes.
One wrong click can delete images you need. Plugins can misidentify used images as unused. Database scans can miss theme or plugin integrations.
Backups let you undo mistakes. Without them, deleted media files are gone forever.
What to Back Up
You need two types of backups for media library cleanup. Back up your database and back up your files, especially the wp-content/uploads directory.
Database backups preserve your media library records and attachment relationships. File backups save the actual image files from your server.
Most backup plugins handle both automatically. If you use manual backups, make sure you get both pieces.
Backup Methods That Work
Use a WordPress backup plugin like UpdraftPlus, BackupBuddy, or Duplicator. These create complete site backups you can restore easily.
Store backups off your server. Cloud storage like Google Drive or Dropbox works well. This protects you if your entire server fails, not just if cleanup goes wrong.
If you have FTP access, download your wp-content/uploads folder directly to your computer. This gives you a local copy of all media files.
Export your database through phpMyAdmin if you prefer manual backups. Save the SQL file somewhere safe before you start cleanup.
Testing on Staging Sites
Staging sites let you test cleanup safely. You can run cleanup plugins, see what gets flagged for deletion, and verify nothing breaks.
Create a staging copy of your live site. Run your cleanup process there first. Check your pages to make sure all images still display correctly.
Once you confirm everything works, repeat the process on your live site. This two-step approach catches problems before they affect real visitors.
Many hosting providers offer built-in staging environments. Check your hosting control panel for one-click staging options.

Method 1: Manual Media Library Cleanup
Manual cleanup works well for smaller WordPress sites with a few hundred images or less. You review each image individually and decide what to delete.
This method takes more time but gives you complete control. You see exactly what gets deleted and when.
Step 1: Switch to List View
Open your WordPress media library. Click the list view icon in the upper right corner. List view shows more information than grid view.
You will see upload dates, file names, and which post each image is uploaded to. This information helps you identify candidates for deletion.
Sort by date to see your oldest uploads first. These are most likely to include unused files from old content.
Step 2: Identify Unattached Images
In list view, look at the Uploaded to column. Images showing Unattached might be unused, but you need to verify this manually.
Click on each unattached image to open its details. Look for the Uploaded to field in the right sidebar. If it says Unattached, check whether any pages or widgets use it.
Visit your website in a new tab. Use browser search to look for the image file name on various pages. Check your widgets in Appearance → Widgets.
Only delete unattached images you confirm are truly unused.
Step 3: Search for Old or Irrelevant Images
Use the media library search box to find images by keyword. Search for terms like old, backup, test, or temp.
Review images from more than two years ago unless they are still relevant. Old event photos, outdated screenshots, and replaced logos are good candidates.
Check file names for patterns like image-copy, filename-2, or duplicate. These often indicate unintentional duplicates.
Step 4: Delete Images Safely
Hover over an image in list view and click Delete Permanently. WordPress will ask you to confirm.
Deleted images go to the trash first if you use certain plugins, but WordPress core deletes media immediately. There is no trash folder for media files by default.
This is why backups are critical. Once you click delete, the file is gone unless you have a backup.
After deleting each batch, visit your website front end. Check that pages still display correctly. Make sure no broken image icons appear.
Limitations of Manual Cleanup
Manual cleanup cannot detect usage in page builders, custom fields, or theme settings reliably. You might miss images used in Elementor sections or ACF fields.
It takes a long time on larger sites. Reviewing 2,000 images manually could take days.
You might accidentally delete images you need. Human error happens, especially when reviewing hundreds of files.
For these reasons, plugin based cleanup becomes necessary for most WordPress sites.
Method 2: Using Media Cleaner Plugin
Media Cleaner is one of the most popular WordPress media library cleanup plugins. It scans your entire site to identify truly unused files.
Plugin based cleanup provides reliable methods for most sites by scanning databases, posts, pages, custom fields, and file systems to identify unused files. This automated approach saves hours compared to manual review.
The plugin checks posts, pages, custom post types, widgets, and many popular page builders. It identifies images not referenced anywhere.
Installing Media Cleaner
Go to Plugins → Add New in your WordPress dashboard. Search for Media Cleaner. Click Install Now, then Activate.
After activation, you will see a new Meow Apps menu item. Click it to access Media Cleaner settings.
The free version works well for most sites. The Pro version adds filesystem scanning and additional compatibility checks.
Configuring Scan Settings
Before your first scan, review the Media Cleaner settings page. Choose between database scan and filesystem scan.
Database scan checks your WordPress database for image references. It looks in posts, pages, widgets, and plugin data. This method is faster and works for most sites.
Filesystem scan compares your uploads folder to your database. It finds files that exist on your server but are not tracked in WordPress. This catches orphaned files but takes longer.
Select which post types and custom fields to include in the scan. If you use page builders like Elementor or WooCommerce, make sure those integrations are enabled.
Running Your First Scan
Click the Start Scan button on the Media Cleaner dashboard. The plugin analyzes your entire site.
This process takes time on larger sites. A site with 5,000 images might take 10-15 minutes to scan. Let it run without closing your browser tab.
When the scan completes, you will see a list of potentially unused images. Review this list carefully before deleting anything.
Reviewing Flagged Images
Media Cleaner shows thumbnail previews of flagged images. Click on any image to see details about where it might be used.
Look for images you recognize as actively used. Page builder content, theme customizer images, and custom field values sometimes get missed.
Check any images you are unsure about manually. Visit pages where you think they might appear. Better safe than sorry.
Deleting or Ignoring Flagged Files
Select images you want to delete by checking their boxes. Click Delete to move them to the plugin trash.
Media Cleaner includes its own trash system. Deleted files go there first, not permanent deletion. This gives you a safety net.
If you find a flagged image that is actually used, click Ignore. This tells the plugin to skip it in future scans.
After deletion, visit your website front end. Check several pages to confirm images still display correctly. Look for broken image icons or missing graphics.
Recovering Deleted Images
If you deleted something by mistake, go to the Media Cleaner trash tab. You can restore any file from there.
Select the image and click Restore. It goes back to your media library immediately.
The trash does not hold files forever. Empty the trash permanently only after you have verified your site works correctly.
Pro Version Features
Media Cleaner Pro adds filesystem scanning, which finds files not tracked in your database at all. This catches orphaned files from failed uploads or manual FTP transfers.
It also includes better compatibility with more page builders and plugins. Advanced Custom Fields, WooCommerce, and other complex integrations get deeper scanning.
The Pro version costs money but saves time on larger or more complex WordPress installations.

Method 3: Alternative Cleanup Plugins
Media Cleaner is not the only option. Several other plugins offer media library cleanup with different features and approaches.
Each plugin has strengths and weaknesses. Your choice depends on your site size, technical comfort level, and specific needs.
Media Sweep Plugin
Media Sweep scans for unused images and offers bulk delete options. It checks posts, pages, custom fields, and widgets.
The plugin is free and lightweight. It does not add heavy database overhead.
Install it from the WordPress plugin directory. After activation, go to Tools → Media Sweep to run a scan.
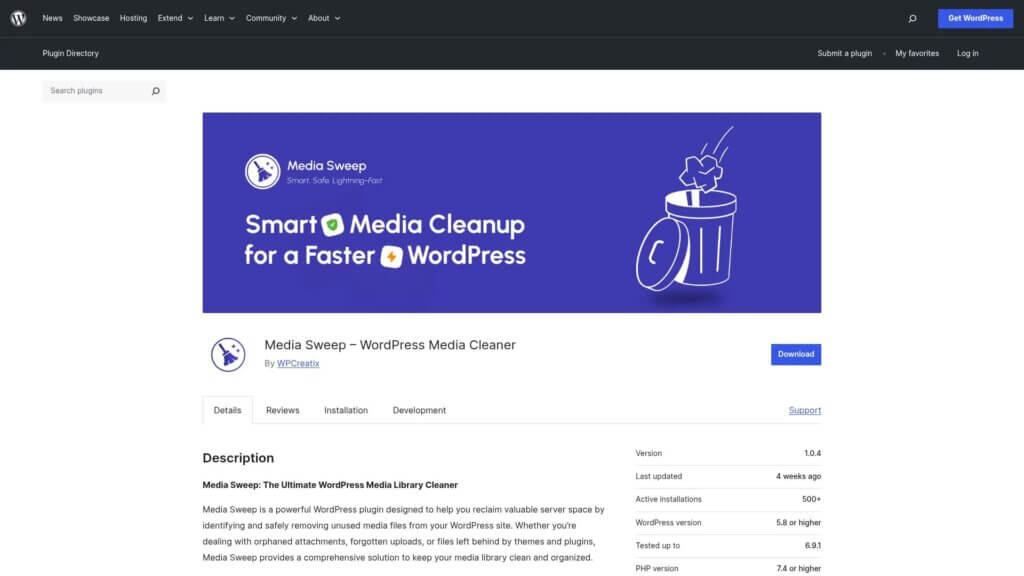
Media Sweep shows you exactly which files are unused and where it checked. You can review and delete in batches.
EWWW Image Optimizer Cleanup Features
EWWW Image Optimizer focuses on image optimization but includes cleanup tools. It can remove old optimized image versions and duplicates.
This works well if you already use EWWW for compression. The cleanup features integrate with optimization workflows.
You cannot use EWWW for comprehensive unused image detection though. It is better suited for cleaning up optimization artifacts, not general media library cleanup.
WP-Optimize Media Library Cleanup
WP-Optimize includes media library cleanup alongside database optimization and caching. It scans for unused images and orphaned files.
If you want an all-in-one optimization plugin, WP-Optimize bundles multiple tools together. You get cleanup, database optimization, and performance improvements in one package.
The free version has limited cleanup features. The premium version adds deeper scanning and automatic cleanup scheduling.
Using WP-CLI for Advanced Users
WP-CLI lets you manage WordPress from the command line. If you have SSH access to your server, you can use WP-CLI commands for media cleanup.
This approach requires technical knowledge. You need to be comfortable with command line tools and server access.
WP-CLI can query your database directly to find unused attachments. You can script bulk deletions based on specific criteria.
Most WordPress users do not need this method. Stick with plugins unless you have specific technical requirements.
Handling Page Builder and Plugin Compatibility
Page builders and advanced plugins often store image references in custom ways. Standard cleanup plugins might miss these.
If you use Elementor, Divi, WPBakery, Beaver Builder, or similar tools, you need to verify compatibility.
Elementor and Divi Considerations
Elementor stores content in custom post meta fields. Images used in Elementor sections might not appear in standard post content scans.
Make sure your cleanup plugin explicitly supports Elementor. Media Cleaner Pro does. Check documentation for other plugins.
Divi Builder has similar custom storage. Images in Divi modules need special scanning to detect usage.
Test thoroughly on staging if you use these builders. Check every page after cleanup to ensure sections still display images correctly.
WooCommerce Product Images
WooCommerce stores product images, gallery images, and variation images separately from regular post content. Cleanup plugins must check product meta fields.
Use plugins like WP Media Cleanup for larger sites, especially with page builders, WooCommerce, or custom fields. These integrations prevent accidental deletion of product images.
Never assume an image is unused just because your plugin flags it. Manually verify any product-related images before deletion.
Check your product pages after cleanup. Make sure all gallery images and variation photos still appear.
Advanced Custom Fields and Meta Boxes
Advanced Custom Fields stores images in post meta or options tables. Standard content scans will not find these references.
Your cleanup plugin needs ACF integration to detect usage properly. Media Cleaner Pro supports ACF. Verify other plugins do too.
Meta boxes and custom field implementations vary widely. If you use custom code or specialized plugins, test extra carefully.
Theme Customizer Images
Images set through the WordPress Customizer get stored in theme mods or options. These do not attach to posts at all.
Logos, header images, background images, and custom theme graphics often live here. Most cleanup plugins cannot detect this usage automatically.
Manually verify your theme customizer settings before running cleanup. Make a list of any images set there and exclude them from deletion.
Best Practices for Media Library Management
Prevention beats cleanup. Good habits keep your media library manageable without constant maintenance.
These practices save time and reduce the need for aggressive cleanup sessions.
Optimize Images Before Upload
Upload images at appropriate sizes for their intended use. Do not upload 4000px wide images when your content area is 800px wide.
Understanding proper image specifications helps prevent media library bloat from oversized files. Smaller uploads mean less storage used and faster page loads.
Use image compression before upload. Tools like TinyPNG or ShortPixel reduce file sizes without visible quality loss.
This prevents your media library from filling with huge files unnecessarily. Smaller uploads also mean faster uploads and better performance.
Use Descriptive File Names
Rename images before upload. Use names like blue-widget-product-photo.jpg instead of IMG_1234.jpg.
Descriptive names help you identify images later when reviewing for cleanup. You will immediately recognize what blue-widget-product-photo.jpg contains.
This also helps with SEO. Search engines use file names as ranking signals for image search.
Delete Unused Images Immediately
When you remove an image from a post, delete it from the media library right away. Do not let unused images accumulate.
Make this a habit during content updates. Every time you swap an image, delete the old one immediately.
This prevents clutter from building up over time. Regular small cleanups beat massive cleanup projects.
Use Image Optimization Plugins
Image optimization plugins like recommended image optimization tools compress uploads automatically. They reduce file sizes without manual work.
Many also convert images to modern formats like WebP, which save storage space and bandwidth.
Optimization and cleanup work together. Smaller optimized images mean less storage waste even before cleanup.
Regular Cleanup Schedules
Schedule media library cleanup quarterly or twice per year. Do not wait until storage problems force you to act.
Regular cleanup sessions stay manageable. Cleaning 50 unused images every three months beats dealing with 500 at once.
Add cleanup to your WordPress maintenance routine alongside backups and updates. Consistent maintenance prevents emergencies.
Monitor Storage Usage
Check your hosting storage usage monthly. Most hosting control panels show disk space consumption.
If you notice unusual storage increases, investigate immediately. You might have a plugin creating excessive log files or duplicate uploads.
Monitoring helps you catch problems early before they affect site performance or require emergency cleanup.
Troubleshooting Common Cleanup Problems
Even with careful cleanup, problems can happen. Know how to fix common issues quickly.
These solutions help you recover when something goes wrong.
Broken Images After Cleanup
If images disappear from pages after cleanup, your plugin deleted files that were actually used. This happens when plugins miss page builder or custom field usage.
Restore from your backup immediately. This is why we emphasized backups earlier.
If you used Media Cleaner, check the plugin trash. Restore the missing images from there.
After restoring, mark those images as ignored in your cleanup plugin so they do not get flagged again.
Plugin Scan Hangs or Times Out
Large media libraries can overwhelm cleanup plugins. Scans might hang or fail with timeout errors.
Increase your PHP memory limit and max execution time. Add these lines to your wp-config.php file:
define('WP_MEMORY_LIMIT', '256M');
@ini_set('max_execution_time', 300);
If problems persist, scan in smaller batches. Some plugins let you limit scan scope to specific date ranges or post types.
Images Incorrectly Flagged as Unused
Plugins sometimes flag images as unused when they are actually referenced in widgets, theme settings, or custom code.
Always manually verify flagged images before deletion. Click through to pages where you think they might appear.
Use your browser developer tools to search page source code for image file names. This catches usage that plugins miss.
Mark verified used images as ignored in your plugin settings.
Database Errors During Cleanup
Cleanup plugins modify your database to remove media records. Database errors can occur if your database is corrupted or if permissions are wrong.
Run a database optimization before cleanup. Use WP-Optimize or WP-CLI to repair and optimize tables.
Check your database user permissions. The WordPress database user needs DELETE and UPDATE privileges.
If errors persist, contact your hosting provider. They can check for deeper database issues.
When to Get Professional Help
Sometimes media library cleanup requires expert help. Know when to stop DIY troubleshooting.
Complex sites with custom integrations benefit from professional review.
Large Enterprise Sites
Sites with tens of thousands of media files need careful handling. One mistake could break hundreds of pages.
Professional WordPress developers can audit your media library, identify safe deletions, and execute cleanup with proper testing.
They also set up better workflows to prevent future bloat.
Custom Coded Themes and Plugins
If your site uses custom code for image handling, standard plugins might not detect all usage patterns.
Developers can review your custom code and identify exactly which images are referenced. They can write custom scripts for safe cleanup.
This prevents broken layouts and missing graphics from custom implementations.
Recovery After Accidental Deletion
If you deleted critical images without backups, professional help might recover them. Some hosting providers keep automatic backups you can request.
Data recovery specialists can sometimes retrieve deleted files from server filesystems, though this gets expensive.
Prevention through backups beats expensive recovery. But if you are already in crisis, professionals can help.
Ongoing Maintenance Support
If you do not have time for regular cleanup, consider ongoing WordPress maintenance services. Professional teams handle cleanup, updates, backups, and security.
This frees you to focus on content creation and business growth instead of technical maintenance.
Managed WordPress care plans include scheduled cleanup as part of routine optimization.
Moving Forward with a Clean Media Library
You now understand why WordPress media library cleanup matters and how to do it safely. You know the difference between unused and unattached images. You have learned manual and plugin based cleanup methods.
Start with a complete backup. Always protect yourself before deleting anything.
For smaller sites, try manual cleanup first. For larger sites or complex builds with page builders and WooCommerce, use a dedicated cleanup plugin like Media Cleaner.
Make cleanup part of your regular routine. Quarterly reviews keep your media library manageable without overwhelming cleanup projects.
Optimize images before upload to prevent bloat. Delete unused files immediately when updating content. Monitor storage usage to catch problems early.
If you run into problems beyond your comfort level, professional help is available. Our WordPress support team can handle cleanup safely and set up better workflows for the future.
Your cleaner media library will improve site performance, reduce hosting costs, and make future maintenance easier. Take the first step today.