When WordPress stops sending emails, it is not a site-breaking emergency. It is frustrating, yes, especially when customers miss order confirmations or you miss contact form submissions.
But this is fixable. Take a breath and know that thousands of WordPress users face this exact problem every day.
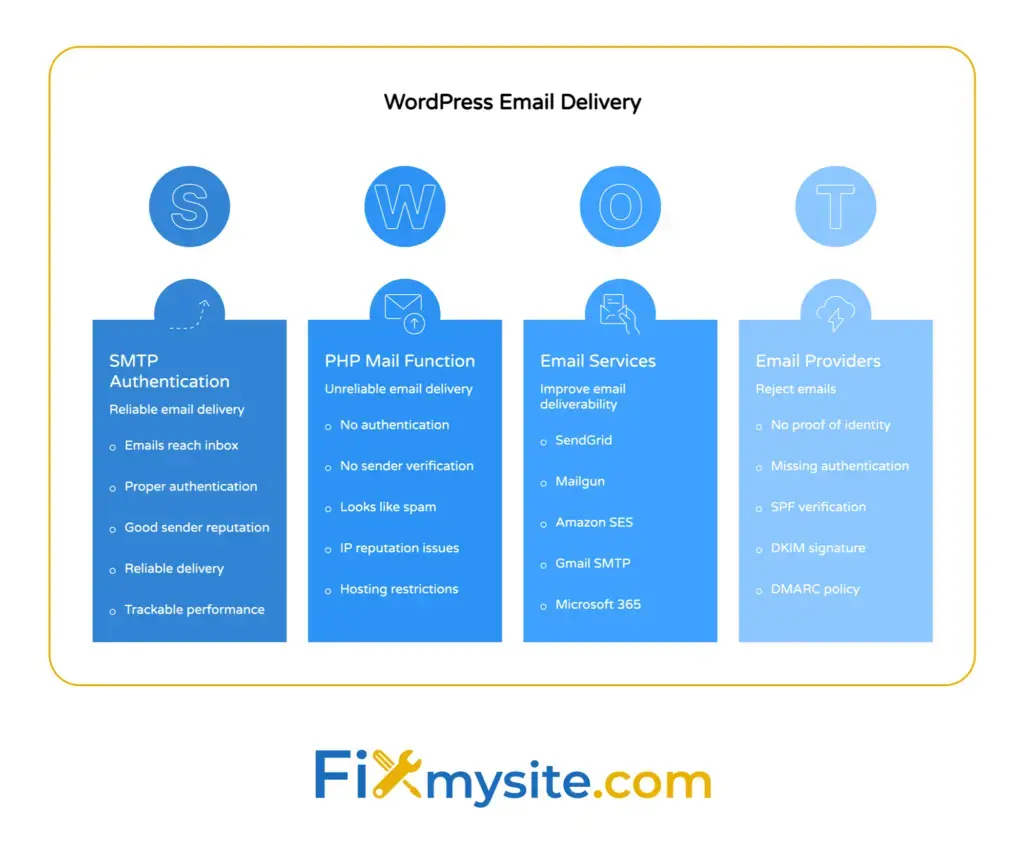
WordPress does not send emails the same way Gmail or Outlook does. The wp_mail() function in WordPress relies on PHP’s basic mail() function, lacking proper authentication. This means your site sends messages like an unsigned letter with no return address.
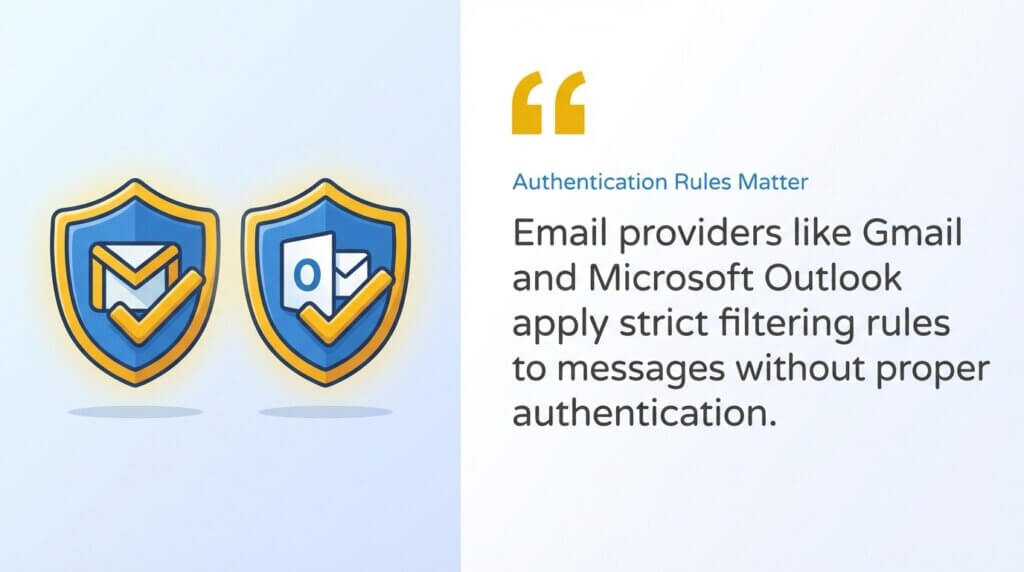
Email providers spot this immediately. They apply strict filtering rules to messages without proper authentication. Your emails either bounce or land in spam folders.
The fix involves three main steps. First, you test to confirm the problem. Second, you configure SMTP authentication so your emails have proper credentials. Third, you set up email authentication protocols like SPF, DKIM, and DMARC records.
You will also learn how to prevent emails from reaching spam folders, fix contact form issues, and address server limitations on shared hosting. By the end, your WordPress site will send emails reliably and reach the inbox every time.
Why WordPress Is Not Sending Emails
WordPress email problems stem from how the platform sends messages. The core issue is the PHP mail function that WordPress uses by default.
This function was designed decades ago for simple server communication. It does not include modern security features that email providers now require. Your WordPress site sends emails without proving who it is or where the message comes from.
Think of it like mailing a package without a return address. Delivery services become suspicious. They either refuse to deliver it or flag it as potentially dangerous.
The Authentication Problem
Email providers like Gmail and Microsoft Outlook apply strict filtering rules to messages without proper authentication. They check every incoming message for authentication signals. Messages lacking these signals get filtered aggressively.
Email providers like Gmail and Microsoft Outlook apply strict filtering rules to messages without proper authentication. This happens automatically with no human review.
Your contact form submissions appear suspicious because they lack sender verification. Order confirmations from WooCommerce get blocked. Password reset emails never arrive. The problem affects every email your WordPress site tries to send.
Shared Hosting Limitations
Shared hosting compounds the authentication problem. When your site shares an IP address with hundreds of other websites, your sender reputation depends on all of them.
Shared hosting environments implement strict email sending restrictions to protect their infrastructure. Hosts limit how many emails you can send per hour. They block certain ports commonly used for email. They restrict your ability to configure advanced settings.
One spammer on your shared server can damage the IP reputation for everyone. Email providers see hundreds of sites sending from the same IP address. They cannot distinguish your legitimate emails from potential spam.
Common Triggering Events
Email problems often appear suddenly after specific changes to your site. WordPress core updates sometimes change how the wp_mail function processes messages. Plugin updates can introduce conflicts with email handling.
Theme changes occasionally override email templates. Server migrations move your site to different IP addresses with different reputations. Hosting provider changes alter the server configuration completely.
These events expose the underlying weakness in the PHP mail function. The authentication problem existed before, but the change makes it visible. Now you need to address it properly with SMTP configuration and email authentication protocols.

How to Test If WordPress Emails Are Working
You need proof before you fix anything. Testing confirms whether WordPress has an email problem and helps you identify the specific issue.
Install a testing plugin to check email functionality. The most reliable option is Check Email or WP Mail SMTP. These plugins send test messages and show you detailed delivery reports.
Install and Run a Test Plugin
Go to your WordPress dashboard. Navigate to Plugins, then Add New. Search for “Check Email” or “WP Mail SMTP” in the plugin directory. Click Install Now, then activate the plugin.
Find the plugin settings in your WordPress menu. Look for a Send Test Email option. Enter your email address in the recipient field. Click Send Test Email and wait 60 seconds.
Check your inbox and spam folder for the test message. If it arrives in your inbox, WordPress is sending emails correctly. If it lands in spam, you have an authentication or reputation problem. If nothing arrives, WordPress is not sending emails at all.
Check the Email Log
Good testing plugins maintain logs of all email attempts. These logs show you which emails succeeded, which failed, and why they failed. Access the email log through the plugin settings.
Look for error messages in the log. Common errors include “Could not authenticate” or “Connection refused.” These messages tell you exactly where the problem occurs. Save this information before you start troubleshooting.
The log also shows you the email headers WordPress generates. Headers reveal technical details like the From address, Reply-To address, and any authentication signatures. Compare these headers to working emails from Gmail or your business email account.
Test Contact Forms Separately
Contact form plugins like Contact Form 7, WPForms, or Gravity Forms handle email differently than WordPress core. Test each form individually to isolate problems.
Submit a test message through each contact form on your site. Check whether these submissions generate emails. Contact form failures often indicate different problems than general WordPress email failures.
Some contact forms let you specify a From address that does not match your domain. Contact form plugins cause spoofing issues by misconfiguring sender information. This triggers spam filters aggressively because email providers see it as an attempt to impersonate another sender.
Now that you have confirmed the problem, you can start implementing fixes. The testing data you collected will guide which solutions to apply first.
Understanding the PHP Mail Function Problem
The PHP mail function sits at the core of WordPress email problems. This function determines how your site sends every email message. Understanding why it fails helps you appreciate why SMTP provides a better solution.
PHP mail was created when email was simpler and less regulated. Servers could send messages directly without proving their identity. Email providers accepted most messages as long as they followed basic formatting rules.
That world no longer exists. Modern email operates on a trust-but-verify principle. Every message must prove where it came from and who authorized it to be sent.
How PHP Mail Works
When WordPress needs to send an email, it calls the PHP mail function with the message content, recipient, and subject line. The function hands this information to your web server. Your server then attempts to deliver the message directly to the recipient’s email server.
This direct delivery bypasses email authentication systems. Your server does not log into an email account. It does not provide credentials. It simply announces “I have a message for this recipient” and tries to hand it off.
Recipient servers scrutinize these unauthenticated handoffs. They check whether your server is authorized to send email for your domain. They look for authentication signals that confirm the message is legitimate.
Why Authentication Matters
Without SPF, DKIM, and DMARC records, emails face heightened scrutiny and may be filtered into spam folders. These protocols work together to verify sender identity. SPF confirms your server is authorized to send email for your domain. DKIM adds a digital signature that proves the message was not altered in transit. DMARC tells receiving servers what to do when authentication fails.
PHP mail cannot implement these authentication methods on its own. It requires additional server configuration that most shared hosting environments do not provide. Even when hosts configure these settings, the PHP mail function does not use them effectively.
The Shared IP Reputation Problem
Email reputation works like a credit score. Email providers track which IP addresses send spam and which ones send legitimate messages. Your server’s IP address builds a reputation based on all the email it sends.
On shared hosting, hundreds of websites send email from the same IP address. One site sending spam damages the reputation for all the others. You have no control over the other sites sharing your IP address. Their behavior affects your email deliverability directly.
PHP mail forces you to use your hosting server’s IP address for all email. You cannot choose a different IP with a better reputation. You cannot separate your email sending from the shared hosting environment. This limitation alone causes most WordPress email problems on shared hosting.
SMTP solves these authentication and reputation problems by routing your email through a dedicated email service. That is the fix we will implement next.
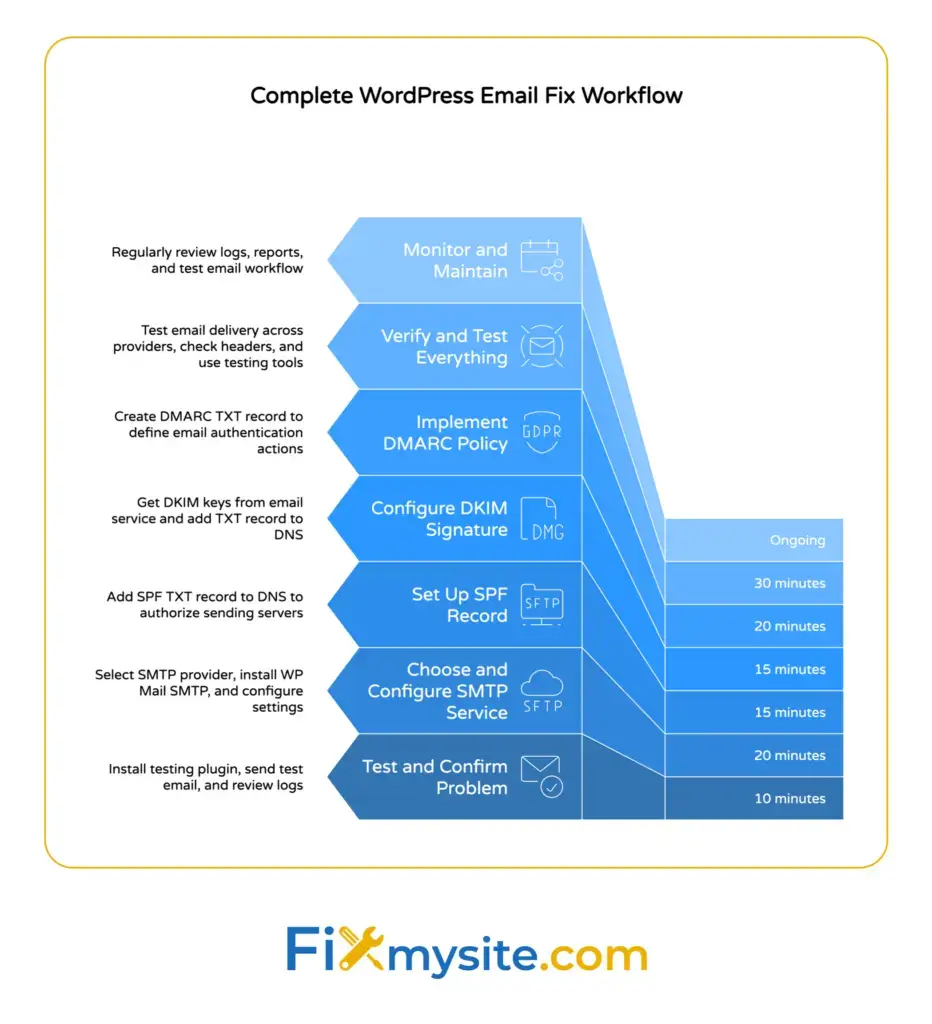
Fix Number 1: Configure SMTP for WordPress Email Delivery
SMTP authentication transforms how WordPress sends email. Instead of your web server attempting direct delivery, SMTP routes messages through a proper email service with credentials and authentication.
This is the single most important fix for WordPress email problems. SMTP provides the authentication signals that email providers require. It gives you control over sender reputation. It bypasses shared hosting limitations completely.
Choose an SMTP Service
You need an SMTP service to handle your WordPress email. Popular options include SendGrid, Mailgun, Amazon SES, or your email hosting provider’s SMTP server. Each service offers free tiers for small sending volumes.
Gmail and Microsoft 365 also provide SMTP access for their email accounts. If you already use these services, you can configure WordPress to send through your existing email account. This works well for low-volume sites sending fewer than 100 emails per day.
For WooCommerce stores or membership sites sending high volumes, choose a dedicated transactional email service like SendGrid or Mailgun. These services are designed for application-generated email. They provide detailed delivery reporting and handle high volumes reliably.
Install WP Mail SMTP Plugin
Go to your WordPress dashboard and navigate to Plugins, then Add New. Search for “WP Mail SMTP” in the plugin directory. Install and activate the free version of WP Mail SMTP.
The plugin adds an SMTP configuration interface to WordPress. You will enter your email service credentials here. Navigate to WP Mail SMTP in your WordPress menu to access the settings.
Choose your email service from the mailer list. WP Mail SMTP includes preconfigured settings for popular services like Gmail, SendGrid, and Mailgun. Select your service and the plugin will show you which settings to configure.
Configure SMTP Settings
You need four pieces of information from your email service. First is the SMTP server address, usually something like smtp.gmail.com or smtp.sendgrid.net. Second is the port number. Configurations often require using port 587 for SMTP instead of port 465 to prevent failures.
Third is your username, typically your full email address or an API username from your email service. Fourth is your password or API key. Get these credentials from your email service’s SMTP settings page.
Enter these four values into WP Mail SMTP. Enable SSL or TLS encryption, which secures the connection between WordPress and your email service. Set the From Email to match your domain, like admin@yoursite.com. Set the From Name to your site name or business name.
Save your settings and send a test email using the plugin’s test function. Check your inbox to confirm the message arrives. Check the email headers to verify it shows proper authentication signatures from your SMTP service.
Verify the Configuration
Send test messages to different email providers. Try Gmail, Outlook, and Yahoo to confirm delivery across major platforms. Check whether messages arrive in the inbox or spam folder. Look at the full email headers to see authentication results.
Test your contact forms again. Submit test messages through each form and verify they generate emails. Test password reset emails by requesting a password reset for a test user account. Test order confirmation emails by placing a test order through WooCommerce.
Monitor the WP Mail SMTP email log for the first few days. Watch for any failed messages or authentication errors. Address any configuration issues immediately before they affect real user communications. If you need help with complex SMTP configurations, consider professional WordPress support.
With SMTP configured, your WordPress site now sends authenticated email through a proper email service. Next, we will strengthen this authentication with SPF, DKIM, and DMARC records.
Fix Number 2: Set Up Email Authentication Records
SMTP gives WordPress proper credentials for sending email. Email authentication records tell receiving servers those credentials are legitimate. Both work together to maximize email deliverability.
Three protocols handle email authentication. SPF authorizes which servers can send email for your domain. DKIM adds a cryptographic signature that proves message authenticity. DMARC instructs receiving servers how to handle messages that fail authentication checks.
Configure SPF Records
SPF stands for Sender Policy Framework. It is a DNS record that lists which mail servers are authorized to send email for your domain. Email providers check this record when they receive messages claiming to come from your domain.
Log into your domain registrar or DNS hosting provider. Navigate to the DNS management section. Look for TXT records or SPF records. Create a new TXT record with these details.
The record name should be your domain, like yoursite.com. The record value depends on which email services you use. For SendGrid, the value looks like “v=spf1 include:sendgrid.net ~all”. For Gmail, it looks like “v=spf1 include:_spf.google.com ~all”.
If you use multiple email services, you can include them all in one SPF record. SPF records allow a maximum of 10 DNS lookups before authentication fails. Keep your SPF record simple to avoid hitting this limit.
Set Up DKIM Signing
DKIM stands for DomainKeys Identified Mail. It adds a digital signature to your email headers. This signature proves the message was not modified after you sent it. It also confirms the message actually came from your authorized email service.
Your SMTP service generates DKIM keys for you. Log into your email service dashboard. Look for DKIM settings or domain authentication. The service will provide a DNS record to add to your domain.
Copy the DKIM record details. Go back to your DNS management interface. Create a new TXT record using the name and value your email service provided. The record name usually looks like “default._domainkey.yoursite.com”.
Save the DNS record and wait for propagation. DNS changes can take up to 48 hours to spread globally. Most changes complete within a few hours. Your email service will verify the DKIM record is active once propagation completes.
Implement DMARC Policy
DMARC stands for Domain-based Message Authentication, Reporting, and Conformance. It builds on SPF and DKIM by telling email providers what to do when messages fail authentication. It also sends you reports about authentication failures.
Create a DMARC record in your DNS settings. The record name is “_dmarc.yoursite.com”. The simplest DMARC policy starts with monitoring mode, which looks like “v=DMARC1; p=none; rua=mailto:dmarc@yoursite.com”.
This policy tells email providers to deliver all messages but send you reports about authentication results. Review these reports for a few weeks. Look for legitimate messages that fail authentication. Fix any configuration issues before you strengthen the policy.
After you confirm all legitimate email authenticates properly, change the policy to quarantine or reject. Quarantine puts unauthenticated messages in spam. Reject blocks them completely. Start with quarantine to catch any remaining configuration issues.
Verify Authentication is Working
Send test emails to Gmail and check the full message headers. Look for authentication results near the top of the headers. You should see “PASS” for SPF, DKIM, and DMARC. Any “FAIL” results indicate configuration problems that need immediate attention.
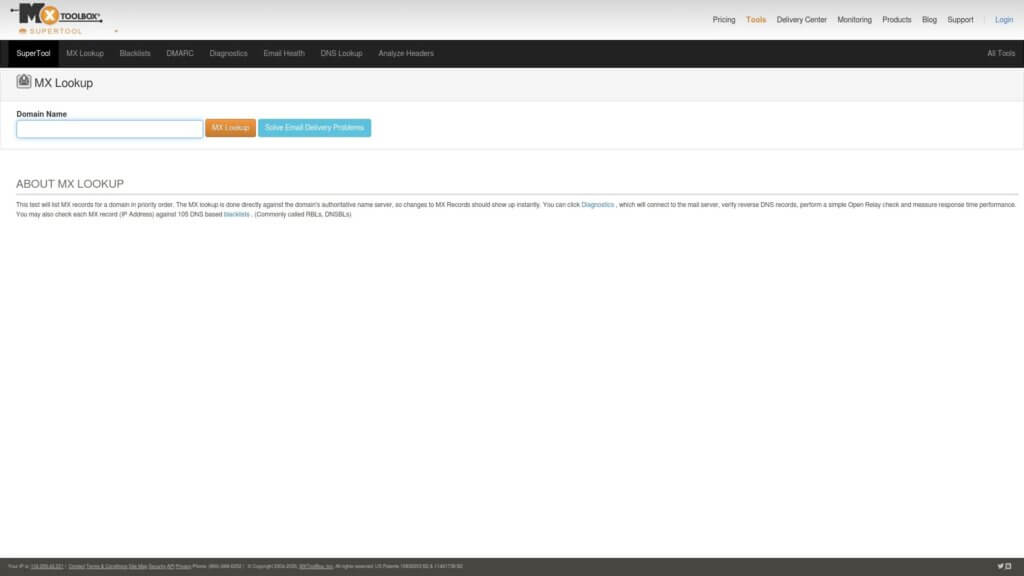
Use online tools like MXToolbox to verify your DNS records. These tools check whether your SPF, DKIM, and DMARC records are formatted correctly and propagated globally. They identify syntax errors that could cause authentication failures.
Monitor your DMARC reports for the first month. These reports show you how email providers are treating your messages. They reveal any servers sending unauthorized email using your domain. They confirm your legitimate email is authenticating properly.

Fix Number 3: Prevent Emails from Going to Spam
Authentication solves the technical requirements for email delivery. Avoiding spam folders requires additional attention to content, sender reputation, and engagement signals.
Email providers use hundreds of factors to decide inbox versus spam placement. Authentication is necessary but not sufficient. You need to build positive sender reputation and avoid spam trigger patterns.
Optimize Your From Address
Use a From address that matches your domain. Never use a generic Gmail or Yahoo address for WordPress emails. Email providers flag this as potential spoofing immediately.
If your domain is yoursite.com, use from addresses like noreply@yoursite.com, info@yoursite.com, or orders@yoursite.com. These addresses must match the domain you configured in your SPF and DKIM records. Mismatches cause authentication failures and spam filtering.
Avoid no-reply@ addresses if possible. While technically functional, they signal one-way communication that some spam filters downgrade. Use a monitored address like hello@yoursite.com or support@yoursite.com instead. Set up email forwarding if you cannot monitor the inbox directly.
Write Better Email Content
Spam filters scan email content for common spam patterns. Avoid ALL CAPS text in subject lines or email bodies. Avoid excessive punctuation like “!!!” or “???” that signals promotional content.
Limit the use of spam trigger words like “free”, “guarantee”, “act now”, or “limited time”. These words are not banned, but high concentrations trigger spam filters. Use them sparingly and naturally within sentence context.
Balance text and images in your emails. Messages with only images and no text look like spam. Include enough readable text that spam filters can analyze content quality. Aim for at least 200 words of text for every large image.
Include a physical mailing address in transactional emails. While not legally required for transactional messages, adding your business address improves deliverability. It signals legitimacy to both spam filters and recipients.
Manage Your Sender Reputation
Email providers track how recipients interact with your messages. High open rates and low spam complaints build positive reputation. Low engagement and frequent spam reports damage reputation quickly.
Send emails only to people who requested them. Never purchase email lists or add people without permission. These practices generate spam complaints that destroy sender reputation permanently. The average email deliverability rate across major platforms is 83.1%. Poor sender reputation drops your rate far below this average.
Remove unengaged recipients from your email list. If someone has not opened your emails in six months, stop sending to them. Continuing to send to unengaged recipients signals poor list quality to email providers. It reduces deliverability for your entire list.
Monitor your spam complaint rate through your SMTP service dashboard. Complaint rates above 0.1 percent indicate serious problems. Investigate why recipients are marking your messages as spam. Address the root cause before your sender reputation deteriorates further.
Warm Up New Email Infrastructure
When you first configure SMTP or authentication records, start with low sending volumes. Send 50 to 100 emails per day for the first week. Gradually increase volume over two to four weeks until you reach normal levels.
This warm-up period builds sender reputation with email providers. Sudden high volumes from a new configuration look suspicious. Email providers may throttle or block your messages until they establish your sending patterns are legitimate.
Focus on your most engaged recipients during warm-up. Send to people who regularly open and interact with your emails. Their positive engagement signals help establish good reputation faster. Save less engaged recipients for after warm-up completes. For help implementing these spam prevention strategies, check out our guide on WordPress email troubleshooting.
Fix Number 4: Address Contact Form Email Issues
Contact forms generate some of the most important emails your WordPress site sends. Missing contact form submissions means lost business opportunities. Fortunately, contact form email problems usually have simple solutions.
Most contact form issues stem from configuration errors in the form plugin itself. These errors occur separately from general WordPress email problems. You can fix contact form emails even if other WordPress emails work fine.
Fix From Address Spoofing
Contact form plugins often try to use the form submitter’s email as the From address. Someone fills out your contact form using their Gmail address, so the plugin sets From: theirname@gmail.com. This creates immediate spoofing problems.
Your server is not authorized to send email from gmail.com. Gmail’s SPF record does not include your server. Email providers see this as an attempt to impersonate a Gmail user. They block or spam the message aggressively.
Fix this by configuring your contact form to use your domain for the From address. Set From: to something like forms@yoursite.com or noreply@yoursite.com. Set Reply-To: to the form submitter’s email address instead. This lets you reply to the submitter while avoiding spoofing issues.
Configure Contact Form 7 Email Settings
If you use Contact Form 7, edit your form and scroll to the Mail tab. Look for the From field. Change it from [your-email] to a static address on your domain like forms@yoursite.com.
In the Reply-To field, use [your-email] or the form field that captures the submitter’s email. This preserves the ability to reply directly to form submissions. The From address authenticates properly while Reply-To provides convenient response functionality.
Save your form settings and submit a test message. Check whether the email arrives and whether it shows proper authentication in the headers. Verify you can reply to the message using the Reply-To address.
Fix WPForms Email Configuration
WPForms uses a slightly different configuration interface. Edit your form and go to Settings, then Notifications. Look for the From Email setting. Change it from {field_id=”3″} or similar dynamic values to a static address on your domain.
WPForms automatically sets the Reply-To header to the submitter’s email. You do not need to configure this separately. Just fix the From Email and the plugin handles the rest correctly.
Enable notification email logs in WPForms settings. This feature tracks all notification attempts and shows you detailed error messages when sends fail. Use these logs to troubleshoot any remaining delivery issues.
Test Gravity Forms Email Delivery
Gravity Forms provides the most flexible email configuration among major form plugins. Edit your form and go to Settings, then Notifications. Click on your notification to edit it.
In the From Email field, select either a static email address or use merge tags to build an address on your domain. The From Name can be dynamic, but the From Email must authenticate against your domain. Set the Reply-To field to {User Email:1} or the appropriate merge tag for the submitter’s email field.
Gravity Forms includes built-in logging. Enable logging in Forms, then Settings, then Logging. Set the logging level to include all events. Submit test forms and check the logs for any SMTP errors or delivery failures. For persistent contact form issues that resist troubleshooting, our WordPress support team can diagnose and fix configuration problems quickly.
Handle Special Characters in Form Submissions
Form submissions containing special characters sometimes break email formatting. Accented characters, emojis, or non-English text can cause encoding problems. These problems prevent email delivery or corrupt message content.
Most modern form plugins handle UTF-8 encoding correctly by default. If you experience problems with special characters, verify your form plugin is updated to the latest version. Check that your SMTP configuration uses UTF-8 encoding for message transmission.
Test your forms with various types of special content. Submit test messages containing accented characters, quotes, and emojis. Verify these characters appear correctly in the received email. Fix any encoding issues before they affect real form submissions.
Fix Number 5: Resolve Server and Hosting Limitations
Shared hosting environments create specific challenges for WordPress email delivery. Understanding these limitations helps you work around them or decide when to upgrade your hosting.
Hosting providers restrict email functionality to prevent spam abuse. One compromised site could send millions of spam messages. Hosts protect their infrastructure and IP reputation by limiting what all sites can do.
Understand Email Rate Limits
Most shared hosting plans limit how many emails you can send per hour. Common limits range from 100 to 500 emails per hour. Exceeding these limits triggers automatic blocks or queuing that delays your messages.
For emails exceeding hosting provider’s limit, shared providers queue them and send gradually, causing delays. Your WooCommerce order confirmation might arrive three hours late. Password reset emails could take hours to deliver.
Check your hosting plan documentation for specific rate limits. Contact your hosting support if you regularly approach these limits. They may offer higher-tier plans with increased limits. Alternatively, switching to SMTP through a dedicated email service bypasses hosting rate limits completely.
Identify Blocked SMTP Ports
Some hosts block outgoing connections on common email ports. Port 25 is frequently blocked because spammers abuse it. Port 465 and 587 are sometimes blocked on budget hosting plans. These blocks prevent direct SMTP connections from your WordPress site.
Test port connectivity using an SMTP testing plugin or by attempting to configure SMTP. If connections fail immediately, your host may block the required ports. Contact hosting support to confirm port availability.
If ports are blocked, you have three options. First, ask hosting support to unblock the ports for your account. Second, use an SMTP service that supports alternative ports. Third, upgrade to a hosting plan that allows unrestricted SMTP access.
Check for Server Resource Restrictions
Shared hosting limits server resources like CPU time and memory. Email functions consume these resources. Sites sending high email volumes may hit resource limits that cause timeouts or failures.
Monitor your server error logs for resource limit messages. Look for errors mentioning memory exhaustion or maximum execution time. These errors often occur during batch email sends like newsletter delivery or mass notifications.
Reduce resource consumption by spreading email sends over longer periods. Instead of sending 1000 emails at once, send 100 every ten minutes. Use queue management plugins that throttle email delivery to stay within resource limits.
Evaluate When to Upgrade Hosting
Some email problems cannot be solved without better hosting. If you regularly hit rate limits, experience port blocks, or face resource restrictions, consider upgrading to VPS hosting or managed WordPress hosting.
VPS and managed hosting provide dedicated resources and more flexible email configurations. They allow higher sending volumes. They give you control over server settings that affect email delivery. They often include better IP reputation management.
Calculate the cost of email delivery problems versus hosting upgrade costs. Missing customer orders or delayed notifications damage your business. If hosting limitations cause frequent problems, the upgrade investment usually pays for itself quickly. If you are experiencing ongoing email issues related to your hosting environment, consider our WordPress migration service to move to better infrastructure.
Fix Number 6: Troubleshoot WooCommerce Email Problems
WooCommerce adds complexity to WordPress email delivery. The plugin generates many critical transactional emails. Order confirmations, shipping notifications, and customer invoices all depend on reliable email delivery.
WooCommerce email problems often have unique causes beyond general WordPress email issues. Understanding these specific problems helps you fix them faster.
Verify WooCommerce Email Settings
Navigate to WooCommerce, then Settings, then Emails in your WordPress dashboard. Review the sender options at the top of the page. The From name and From email address must match your domain and SMTP configuration.
Check each individual email template. WooCommerce includes separate templates for new orders, processing orders, completed orders, customer invoices, and more. Each template has enable/disable settings and recipient configuration. Verify the templates you need are enabled.
Look at the email template customization. Some themes override WooCommerce email templates. Customized templates sometimes contain errors that break email formatting or delivery. Test with the default WooCommerce templates to rule out customization issues.
Fix Order Status Email Triggers
WooCommerce emails may fail due to orders remaining in pending status. Each email template triggers based on specific order status changes. New order emails send when status changes to processing. Completed order emails send when status changes to completed.
If orders stay in pending status, the corresponding emails never trigger. Check your payment gateway integration. Verify payment confirmations update order status correctly. Test the complete checkout process with small test orders.
Some payment gateways require webhook configuration for status updates. PayPal IPN and Stripe webhooks must be configured correctly. If webhooks fail, orders remain pending and emails do not send. Check your payment gateway logs for webhook delivery failures.
Address Email Template Compatibility
WooCommerce email templates use HTML formatting. Some SMTP services or email clients strip HTML or render it incorrectly. This causes broken formatting or missing content in customer emails.
Send test orders to multiple email addresses using different providers. Check Gmail, Outlook, Apple Mail, and mobile email apps. Verify templates render correctly across all platforms. Fix any formatting issues before they affect real customers.
Consider using plain text email templates for critical notifications. Plain text always delivers reliably and renders identically everywhere. Reserve HTML templates for marketing emails where formatting matters more than delivery certainty.
Monitor Email Queue Performance
WooCommerce queues emails during high-traffic periods. The queue prevents server overload during flash sales or high-order volume events. Queue problems cause delayed or missing emails even when email configuration is correct.
Check your WooCommerce action scheduler under WooCommerce, then Status, then Scheduled Actions. Look for pending email actions that are overdue. Large numbers of pending actions indicate queue processing problems. Clear stuck actions and investigate why they are not processing.
Install a queue management plugin if you regularly experience queue issues. These plugins provide better queue monitoring and automatic retry for failed sends. They help ensure critical order emails deliver even during traffic spikes. For complex WooCommerce email configuration, our team provides expert WordPress support to ensure reliable order notifications.
Preventing Future Email Problems
Once you fix WordPress email delivery, you need systems to keep it working. Email configuration can break when plugins update, hosting changes, or server settings shift.
Monitoring and maintenance prevent problems before they affect your users. A few simple practices keep email flowing reliably long term.
Set Up Delivery Monitoring
Configure your SMTP service to send you daily delivery reports. These reports show send volume, delivery rates, and failure patterns. Review them weekly to catch problems early.
Install an email log plugin that tracks all WordPress email activity. Review the logs after any site changes. Look for new failure patterns or authentication errors. Address issues immediately before they compound.
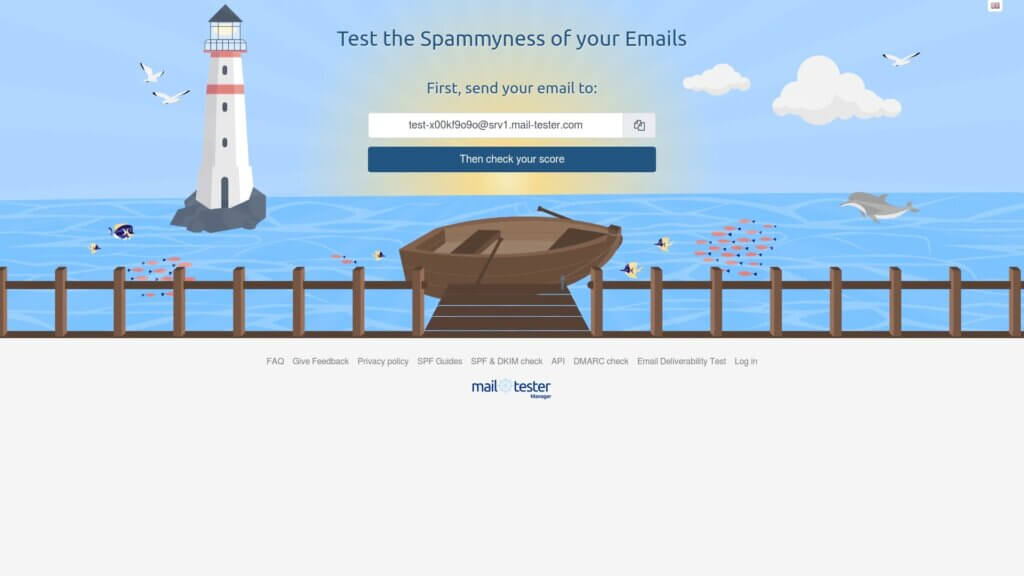
Create test email monitors that send automated test messages daily. Services like Mail Tester check your emails and give you a deliverability score. Monitor these scores for sudden drops that indicate new problems.
Maintain Your Email Authentication
Review your SPF, DKIM, and DMARC records quarterly. Verify they still match your current email service configuration. Update records when you change email services or add new sending sources.
Check your DMARC reports monthly. Look for new failure patterns or unauthorized sending attempts. Investigate any unexpected authentication failures before they damage sender reputation.
Monitor your sender reputation using tools like Google Postmaster Tools or Microsoft SNDS. These free services show how major email providers view your sending domain. Watch for reputation declines and fix the causes immediately.
Plan for Plugin and WordPress Updates
Test email functionality after every WordPress core update, SMTP plugin update, or contact form plugin update. Updates sometimes change email handling in ways that break your configuration. Catching these changes immediately prevents extended outages.
Keep your SMTP plugin updated to the latest version. Plugin developers regularly improve authentication handling and fix compatibility issues. Running old versions increases the chance of future email problems. For help maintaining reliable email delivery over time, consider WordPress care plans that include proactive monitoring and updates.
Document your complete email configuration. Record your SMTP settings, authentication records, and special configurations. This documentation speeds up troubleshooting when problems occur. It also helps if you need to migrate to new hosting or restore after a site issue.
Review and Update Contact Information
Verify your WordPress admin email address receives emails correctly. This address gets important WordPress notifications about updates, security issues, and site problems. If it breaks, you miss critical alerts.
Test password reset functionality monthly. Request a password reset for a test user account. Verify the email arrives promptly. This simple test confirms your most critical user-facing email still works.
Check all automated email sequences quarterly. Test contact forms, account registration emails, order confirmations, and any automated marketing emails. Verify the complete user journey from trigger to inbox delivery.
WordPress email problems are frustrating but fixable. SMTP configuration, authentication records, and proper settings create reliable email delivery. Regular monitoring and maintenance keep everything working long term. Your site can send emails as reliably as professional email services when configured correctly. If you need help with any of these fixes, our WordPress support team is ready to get your emails flowing again.