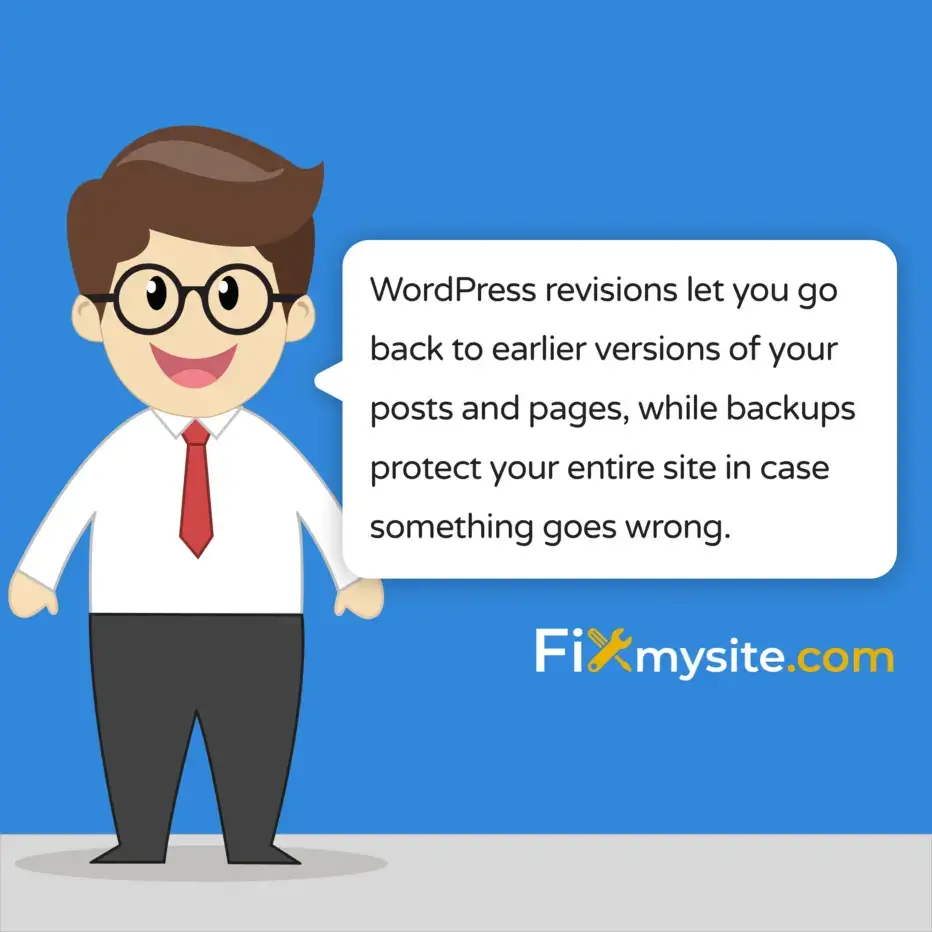
WordPress revisions automatically save every change you make to your posts and pages. Backups protect your entire site from disaster. These two features work together to keep your content safe, but they solve different problems.
WordPress creates a new revision every time you click update. That includes manual saves and automatic ones. WordPress creates an autosave every sixty seconds during active editing. These revisions live in your database, tracking every edit you make.
Backups capture your entire site at a specific moment in time. They include your database, files, themes, plugins, and uploads. If something breaks, you can restore everything from a backup. That gives you protection revisions alone cannot provide.
We understand that managing these features can feel overwhelming at first. You might worry about database size, performance issues, or losing important changes. Take a deep breath. This guide walks you through everything step by step. You will learn how to view revisions, restore previous versions, manage storage, and set up reliable backups that protect your work.
What Are WordPress Revisions and How They Work
WordPress revisions are snapshots of your content at different points in time. Every time you save a post or page, WordPress stores that version in your database. This happens automatically in the background while you work.
The system tracks two types of saves. Manual saves happen when you click the save draft or update button. Autosaves happen while you type. WordPress creates an autosave every sixty seconds during active editing. This protects you if your browser crashes or you lose your internet connection.
Each revision includes the complete content of your post or page. That means the title, body text, excerpt, and all custom fields. WordPress also records who made the change and exactly when it happened. This creates a detailed history of your content over time.
Why WordPress Stores Revisions
Revisions protect you from accidental deletions and unwanted changes. If you delete a paragraph by mistake, you can restore it from an earlier version. If a team member overwrites your work, you can see exactly what changed and when.
The revision system also helps with collaborative editing. Multiple people can work on the same post without losing track of who changed what. You can compare versions side by side to see the differences clearly.
For larger sites, revisions serve as an audit trail. You can review the complete history of any post or page. This helps with quality control and accountability on busy websites with multiple contributors.
The Database Storage Model
WordPress stores each revision as a separate entry in the wp_posts table. This is the same table that holds your published posts and pages. Each revision gets its own post_id and links back to the original post.
The system marks revisions with a special post_type called revision. This keeps them separate from your regular content. Your database queries ignore revisions unless you specifically look for them.
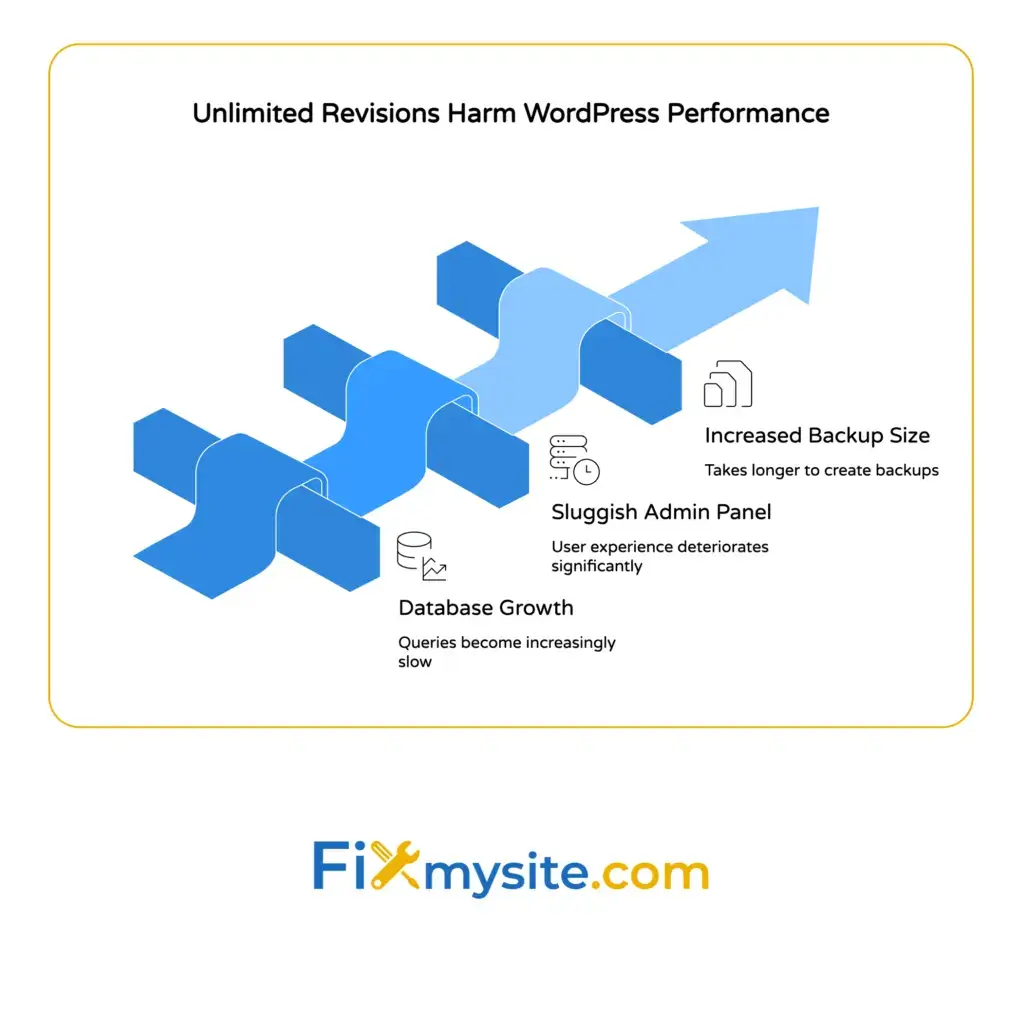
Over time, revision storage can add up. A website with eight hundred pages and one hundred revisions per page results in more than eighty thousand entries in the database devoted solely to revision history. This is why managing revisions matters for performance.
How to Access and View Your WordPress Revisions
Finding your revisions is simple once you know where to look. The WordPress editor displays them in the sidebar area, right where you can access them quickly while editing.
Open any post or page in the WordPress editor. Look for the revisions count in the right sidebar. It appears in the settings panel, usually near the publish settings. The number tells you how many saved versions exist for this content.
Click on the revisions link to open the comparison screen. This shows you the complete history of your post or page. You will see a slider that lets you move between different versions chronologically.
Using the Block Editor to Browse Revisions
The Block Editor (also called Gutenberg) puts revisions in the settings panel on the right side. Click the settings icon if the panel is not visible. Then scroll down to find the revisions meta box.
The interface shows you how many revisions exist and when the most recent one was saved. Click browse to open the full revision browser. This takes you to a dedicated screen where you can examine each version in detail.
The revision browser uses a slider control to navigate through versions. Drag the slider left to see older versions or right to see newer ones. Each position on the slider represents a specific save point in your content history.
Using the Classic Editor Interface
The Classic Editor shows revisions in a meta box below the main content area. If you do not see it, click screen options at the top right corner. Make sure the revisions checkbox is enabled.
The meta box lists the total number of revisions and the date of the most recent save. Click the browse link to open the comparison view. This works exactly like the Block Editor version, just in a different location on the screen.
Both editors use the same underlying revision system. The only difference is where the interface elements appear on your screen. The functionality and data remain identical regardless of which editor you use.

How to Compare WordPress Revisions
Comparing revisions shows you exactly what changed between different versions. WordPress highlights additions in green and deletions in red. This makes it easy to spot differences at a glance.
The comparison screen displays two columns side by side. The left column shows the older version. The right column shows the newer version. Changed text appears highlighted so you can see modifications clearly.
Use the slider at the top to select which versions you want to compare. By default, WordPress compares consecutive versions. But you can also compare any two versions by selecting specific points on the slider.
Reading the Visual Differences
Green highlights indicate text that was added in the newer version. Red highlights with strikethrough text show what was removed. Unchanged text appears in regular black without any highlighting.
The comparison includes all content fields. You can see changes to the title, body content, and excerpt. Custom fields also appear if they were modified between versions.
At the top of each column, you will see the author name and timestamp. This tells you who made the changes and when. This information helps you track down who changed what, especially on sites with multiple editors.
Comparing Non-Consecutive Revisions
The slider lets you skip between versions without viewing every single change. Click and drag to any point on the timeline. The left column updates to show the earlier version you selected.
You can also use the compare any two revisions checkbox. This appears near the top of the screen. When enabled, you get two sliders instead of one. Set each slider to a different point in time to compare those specific versions.
This feature helps when you need to review major changes across many edits. Instead of clicking through dozens of small updates, you can jump directly to the versions that matter for your review.
How to Restore a Previous WordPress Revision
Restoring a revision replaces your current content with the selected older version. This is useful when recent changes need to be undone completely. The process takes just a few clicks.
Open the revision browser as described in the previous sections. Use the slider to find the version you want to restore. Review the content carefully to make sure it is the correct version.
Click the restore this revision button at the top of the screen. WordPress immediately replaces your current content with the selected version. The page updates and returns you to the regular editor.
What Happens During Restoration
When you restore a revision, WordPress creates a new revision. That new revision is an exact copy of the older version you selected. Your current content is not deleted. It becomes another revision in the history.
This means you cannot lose work by restoring an old version. If you restore by mistake, you can immediately restore back to the previous current version. The entire history remains intact and available.
The restored content replaces everything in the main content area. That includes the title, body text, and excerpt. Custom fields also revert if they were part of the revision data.
After Restoration Steps
After restoring a revision, review the content carefully before publishing. Make sure the restored version contains everything you need. Check for any missing elements or formatting issues.
If something is not right, you can restore a different revision. Or you can manually edit the content to fix specific problems. The flexibility lets you combine old content with new updates as needed.
Once you are satisfied, click update to publish the restored version. This saves the content and makes it live on your site. The restoration is now complete and your visitors will see the updated content.
Understanding User Permissions for Revisions
Not all WordPress users can access revisions. The ability to view and restore revisions depends on user roles and capabilities. This protects your content from unauthorized changes.
Administrators and Editors can view and restore revisions for all posts and pages. They have full access to the revision history across your entire site. This makes sense because these roles are responsible for content management.
Authors can only view and restore revisions for their own posts. They cannot access revision history for content created by other users. This maintains appropriate boundaries between different content creators.
Capability Requirements
WordPress uses the edit_post capability to control revision access. If a user can edit a post, they can view its revisions. If they cannot edit the post, they cannot see the revision history either.
Contributors can view revisions for their own draft posts. However, they cannot restore revisions because they lack permission to publish content. The restore button simply does not appear for contributor role users.
Custom user roles inherit these rules based on their capabilities. If you use a plugin to create custom roles, make sure to assign edit_post capabilities appropriately. This ensures your team members can access revisions when needed.
Multi-Author Site Considerations
On sites with many authors, revision permissions help maintain content integrity. Each author can track their own work without interfering with others. Editors can oversee everything and resolve conflicts when needed.
The author information in each revision shows who made each change. This creates accountability and makes it easy to contact the right person about specific edits. The timestamp adds another layer of tracking.
For maximum security, limit Editor and Administrator roles to trusted team members only. These roles have powerful revision access that could affect published content. Regular authors should use the Author role for their day to day work.
How to Limit the Number of Revisions Stored
Limiting revisions reduces database growth and improves site performance. WordPress stores unlimited revisions by default, but you can set a specific maximum. This keeps your database lean while still providing version history protection.
The WP_POST_REVISIONS constant controls how many revisions WordPress keeps. You set this in your wp-config.php file. The change applies site wide to all posts and pages.
To limit revisions, add a line to wp-config.php before the line that says “stop editing.” Use this code: define(‘WP_POST_REVISIONS’, 5); This example keeps the five most recent revisions and deletes older ones automatically.
Choosing the Right Revision Limit
Most sites work well with three to ten revisions per post. This provides enough history to recover from mistakes without excessive database storage. Consider your workflow when choosing a number.
High traffic blogs with frequent updates might need more revisions. Ten to twenty revisions give you a longer history window. This helps when multiple editors work on the same content throughout the day.
Simple sites with infrequent updates can use fewer revisions. Three to five revisions are plenty if you only update content occasionally. This minimizes database overhead while maintaining basic protection.
Disabling Revisions Completely
You can disable revisions entirely by setting WP_POST_REVISIONS to false. Use this code: define(‘WP_POST_REVISIONS’, false); This stops WordPress from creating new revisions for any content.
Disabling revisions is not recommended for most sites. You lose the safety net that protects against accidental deletions and unwanted changes. The performance gain is minimal compared to limiting revisions to a reasonable number.
If you do disable revisions, make sure you have excellent backup coverage. You will need backups to recover from content mistakes because revision history will not be available. This is covered in detail in the backup sections of this guide.

How to Delete Old WordPress Revisions
Deleting old revisions cleans up your database and can improve performance. This is especially helpful if you have been running WordPress for years without any revision limits. The cleanup removes unnecessary data that accumulates over time.
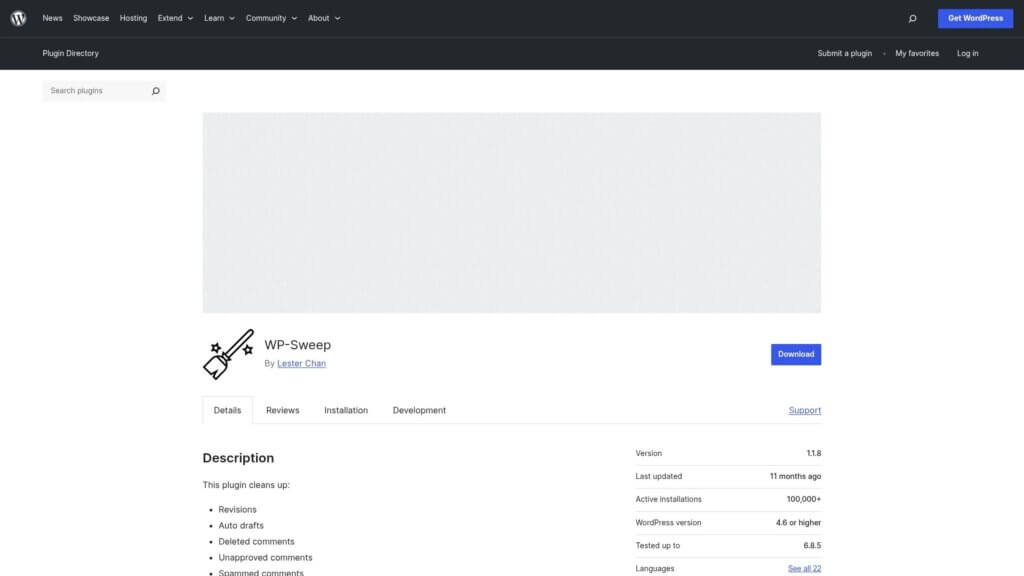
Several plugins make revision cleanup simple and safe. WP-Optimize and WP-Sweep are popular options. Both let you delete old revisions with a single click through an easy interface.
Before deleting revisions, create a complete database backup. This protects you if something goes wrong during the cleanup process. You can restore your database from backup if needed.
Using WP-Optimize to Clean Revisions
Install and activate the WP-Optimize plugin from the WordPress plugin directory. Navigate to WP-Optimize in your admin menu. Click the database tab to see optimization options.
Look for the clean all post revisions option. Check the box next to it. You can also choose to clean revisions older than a specific number of weeks. This keeps recent revisions while removing old ones.
Click run optimization to start the cleanup process. The plugin shows you how many revisions were deleted. The process usually takes just a few seconds, even on large sites with thousands of revisions.
Manual Database Cleanup
Advanced users can delete revisions directly through the database. This requires access to phpMyAdmin or another database management tool. Use this SQL query: DELETE FROM wp_posts WHERE post_type = ‘revision’;
Make absolutely certain you have a complete database backup before running manual queries. A mistake in the database can break your entire site. If you are not comfortable with SQL, use a plugin instead.
After deleting revisions manually, optimize your database tables. This reclaims the freed space and improves performance. Run the OPTIMIZE TABLE wp_posts command to complete the cleanup.
The Difference Between Revisions and Backups
Revisions and backups serve different purposes, even though both involve saving your content. Understanding the distinction helps you implement a complete protection strategy for your WordPress site.
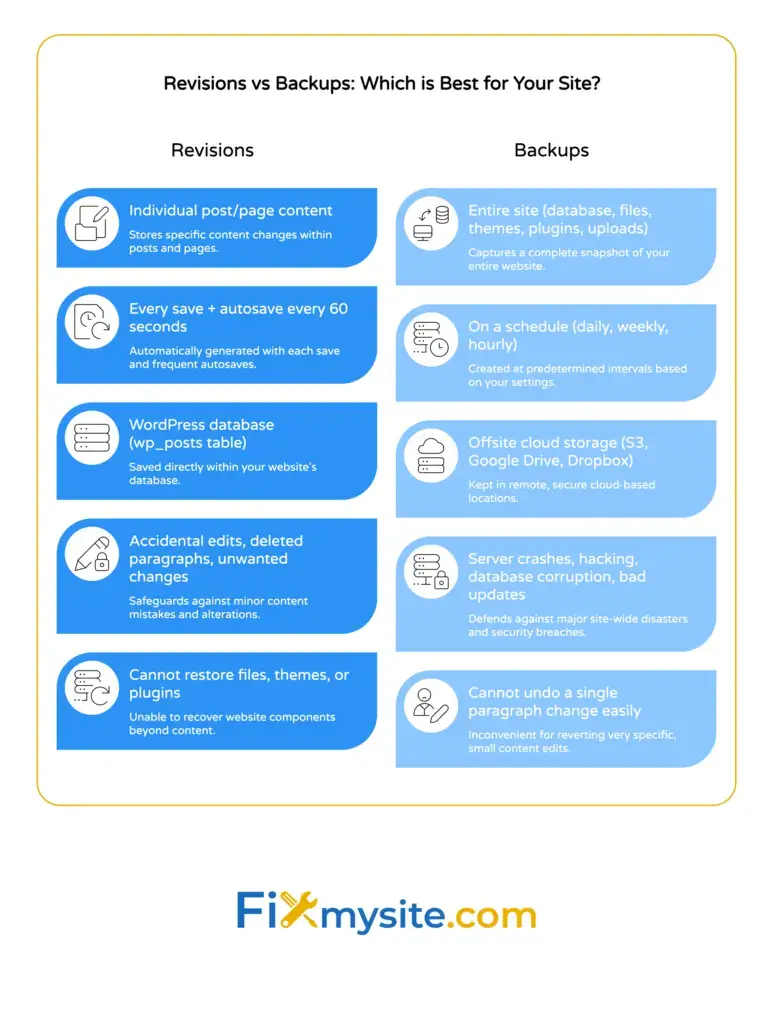
Revisions track changes to individual posts and pages over time. They help you undo edits and see who changed what. But revisions only cover content. They do not protect your themes, plugins, uploads, or database settings.
Backups capture your entire site at a specific moment. That includes your complete database, all files, themes, plugins, and uploaded images. If your server crashes or you get hacked, backups let you restore everything.
What Revisions Cannot Protect Against
Revisions live in your database alongside your regular content. If your database gets corrupted or deleted, you lose both your content and your revisions. They do not provide protection from server failures or hacking attacks.
File changes are not covered by revisions. If someone deletes your theme files or a plugin breaks your site, revisions cannot help. You need backups to restore files and get your site working again.
Security breaches can affect your entire database, including stored revisions. A malicious user with database access could delete both your content and its revision history. Offsite backups protect against this scenario.
How Revisions and Backups Work Together
The best protection strategy uses both revisions and backups. Revisions handle day to day content recovery and editorial workflow. Backups protect against catastrophic failures and security incidents.
Set reasonable revision limits to keep your database lean. Then implement automatic backups that run daily or weekly. Store backups offsite so they survive server problems.
This two layer approach gives you fast recovery for content mistakes and complete protection for serious problems. You get the benefits of both systems without the drawbacks of relying on just one.
How to Set Up Automated WordPress Backups
Automated backups protect your site without requiring you to do anything manually. The backup system runs on a schedule you set, creating copies of your entire site regularly. This ensures you always have recent backups available.
UpdraftPlus offers automated backup creation and cloud storage integration. Jetpack VaultPress Backup provides real-time backup capabilities and full WooCommerce support. Both plugins work well for different site types and budgets.
Install your chosen backup plugin from the WordPress plugin directory. Configure it to run automatic backups on your preferred schedule. Connect it to a cloud storage service like Dropbox, Google Drive, or Amazon S3.
Choosing Your Backup Frequency
Most active blogs and smaller e-commerce sites benefit from daily backups. This strikes a good balance between protection and server resource usage. You can restore to yesterday’s version if something goes wrong today.
Sites with infrequent updates can use weekly backups. If you only publish new content once a week or less, weekly backups provide adequate protection. This reduces storage costs and backup processing time.
High traffic e-commerce sites need more frequent backups. Some sites run backups every few hours to minimize data loss from orders and customer accounts. Real-time backup solutions work best for these situations.
Backup Storage Best Practices
Three copies of data are stored in two different types of storage media, with one copy located offsite. This follows the 3-2-1 backup rule used by professionals worldwide.
Store one backup copy on your server for quick restores. Keep another copy in cloud storage like Amazon S3 or Google Drive. Save a third copy on a different cloud service or your local computer.
Never rely on server backups alone. If your hosting company has a catastrophic failure, server based backups might disappear with everything else. Offsite storage protects you from this scenario completely.
How to Restore Your Site from a Backup
Restoring from backup brings your entire site back to a previous working state. This helps when your site breaks after a bad update, gets hacked, or suffers database corruption. The process varies depending on which backup solution you use.
Most backup plugins include a restore feature built into their interface. Log into your WordPress admin panel if possible. Navigate to your backup plugin settings and find the restore option.
Select which backup you want to restore from the available list. The plugin shows you the date and time each backup was created. Choose a backup from before the problem started.
The Restoration Process
Click the restore button to start the process. The plugin uploads the backup files to your server and replaces your current database and files. This can take several minutes depending on your site size.
Do not close your browser or navigate away during restoration. Wait for the completion message before doing anything else. Interrupting the process can leave your site in a broken state.
After restoration completes, test your site thoroughly. Check that your content appears correctly, your theme works, and your plugins function properly. Visit several different pages to verify everything restored successfully.
Restoring When WordPress is Completely Broken
Sometimes your site is so broken you cannot access the admin panel. In this case, you need to restore manually through your hosting control panel or FTP.
Download your backup files from your cloud storage to your computer. Extract the files if they are in a compressed format. Connect to your server using FTP or your hosting file manager.
Upload the backup files to your server, replacing the broken files. Import the database backup using phpMyAdmin or your hosting database tools. This restores both your files and your database to the backup state.
Advanced Revision and Backup Strategies
Advanced strategies help professional sites maintain better control over content history and disaster recovery. These techniques go beyond basic revision management and backup scheduling.
Development, staging, and production environment separation assists in testing updates safely. Test plugin updates and theme changes on staging first. Only move changes to production after verifying they work correctly.
Git-based version control combined with WordPress revisions provides developers with sophisticated code and content change tracking capabilities. This works especially well for custom development projects and agency workflows.
Incremental Backup Systems
Incremental backups only save what changed since the last backup. This reduces backup size and speeds up the backup process significantly. The first backup is complete, and subsequent backups only capture new or modified files.
Most enterprise backup solutions support incremental backups. They automatically detect which files changed and only back up those files. This makes hourly or real-time backups practical even for large sites.
Restoration from incremental backups requires the initial full backup plus all incremental changes. Your backup software handles this automatically. The process takes longer than restoring a single full backup but provides more granular recovery points.
Backup Testing and Verification
Creating backups is not enough. You need to verify they actually work when needed. Test your backups regularly by performing restoration on a test server or local environment.
Set a quarterly schedule to test your backup restoration process. Download a recent backup and restore it to a staging site. Verify all content, files, and functionality work correctly after restoration.
Document your restoration process while testing. Write down each step required to get your site back online. This documentation saves valuable time during an actual emergency when stress levels are high.
Database Optimization and Performance Impact
Database optimization keeps your site running fast even as revisions and content accumulate. Regular maintenance prevents performance degradation over time. This becomes more important as your site grows.
WordPress stores all content in database tables. Each revision adds another row to the wp_posts table. Over months and years, this creates substantial database growth that can slow down queries.
Optimization removes unnecessary data and reorganizes tables for better performance. This includes deleting spam comments, cleaning transient options, and yes, managing old revisions. The combined effect improves page load times and admin responsiveness.
Running Regular Database Maintenance
Schedule monthly database optimization to maintain peak performance. Use WP-Optimize or a similar plugin to automate the process. Set it to run during low traffic hours to minimize impact on visitors.
The optimization process includes several tasks. It removes old revisions, deletes spam comments, cleans expired transients, and optimizes table structure. Each task contributes to better overall database health.
After optimization, monitor your site speed using tools like Google PageSpeed Insights or GTmetrix. You should see modest improvements in database query times. If you do not, check your hosting resources and consider upgrading if needed.
Monitoring Database Size Growth
Track your database size over time to catch problems early. Most hosting control panels show database size in the database management section. Check this monthly and note any unusual growth.
Normal database growth follows your content publishing schedule. If you publish ten posts per month, expect steady gradual growth. Sudden jumps in size indicate a problem like spam, plugin issues, or runaway revisions.
When database size grows unexpectedly, investigate immediately. Check for spam comments, examine revision counts, and review plugin storage patterns. Address the root cause rather than just deleting data to free space.
Creating a Complete Protection Strategy
A complete protection strategy combines revisions, backups, and proactive maintenance. This three part approach gives you maximum safety for your WordPress content and site functionality.
Set revision limits to keep your database manageable. Five to ten revisions per post provides good protection without excessive storage. Add this configuration to your wp-config.php file and monitor revision accumulation.
Implement daily automated backups with offsite storage. Use a reliable backup plugin that supports cloud integration. Test your backups quarterly to ensure they actually work when needed.
Your 30 Day Implementation Plan
Week one: Set up your backup plugin and configure daily automated backups. Connect cloud storage and verify the first backup completes successfully. Test that backups appear in your cloud storage account.
Week two: Add the WP_POST_REVISIONS constant to your wp-config.php file. Set it to a reasonable limit like five or ten revisions. Clean existing old revisions using WP-Optimize or similar plugin.
Week three: Document your restoration process by testing a backup restore on a staging site. Write down each step. Store this documentation where your team can access it during an emergency.
Week four: Schedule monthly database optimization tasks. Set calendar reminders to check backup status and database size. Review your protection strategy and adjust as needed based on site growth.
Getting Professional Help
Some WordPress site owners prefer to outsource backup and security tasks. Professional help ensures everything is configured correctly and monitored regularly. This gives you peace of mind without technical stress.
Our WordPress care plans include automated backups, security monitoring, and database optimization. We handle the technical details while you focus on your business. Plans start with basic maintenance and scale up to fully managed hosting.
If you need immediate help with revisions or backup issues, our website repair service can help. We troubleshoot problems quickly and get your site back on track. Whether you lost content or cannot access revisions, we are here to support you.
Do not wait until disaster strikes to think about protection. Set up your revisions and backups today. Your future self will thank you when you need to recover from a mistake or server problem. You have got this, and we are here if you need us.