Every day, in the vast expanse of the internet, thousands of websites are blacklisted. Unfortunately for webmasters, getting blacklisted can have a detrimental effect on a website. A fall in traffic and search engine rankings, harsh browser warnings and hosting suspension are just some of the consequences of being blacklisted.
What is a Blacklist?
In short, “Blacklists” are lists of websites, domains, and IP addresses that have been flagged for distributing harmful content.
The lists are maintained by blacklisting authorities. Authorities include search engines, ISPs, and antiviruses.
Where each authority has an interest in protecting their users and network.
For instance, antivirus companies can protect their clients’ computers by denying access to sites that are known for distributing illicit software, drive-by-downloads, and malicious payloads.
For website owners, the most important blacklisting authority is Google.
The Safe Browsing division of Google is responsible for the safety of over 3 billion daily users across the company’s suite of services, which include:
- Chrome
- Google Search
- Gmail
- Google Ads
- Android
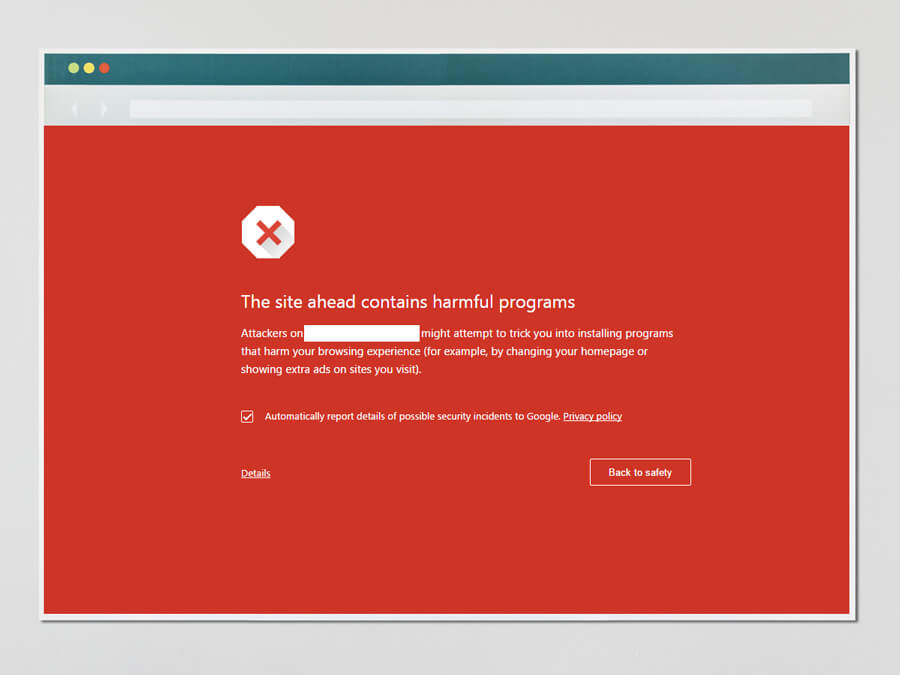
When an unsafe website is detected, Safe Browsing will flag the site and show warnings on Google Search and in Chrome (as well as other web browsers).
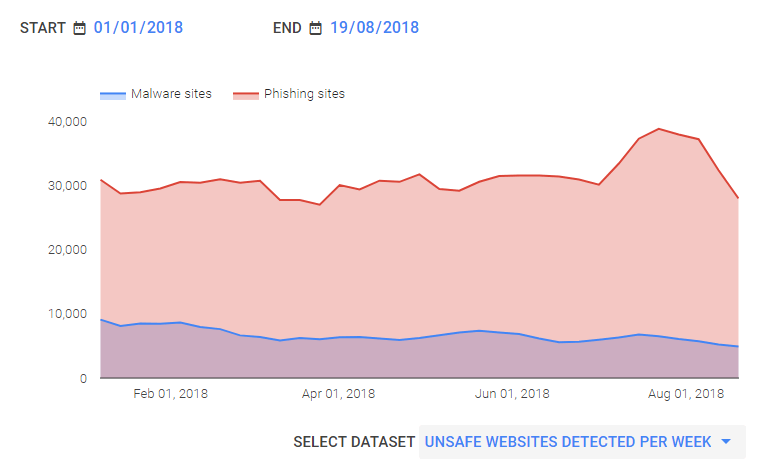
At the time of writing this article, August 2018, Google was flagging an average of 30,000 phishing websites and nearly 10,000 malware infected websites per week.
Basically, it’s in Google’s interest to make information safely accessible and being blacklisted is definitely not in your interest!
Why am I Blacklisted?
If your website is blacklisted, it’s likely that your website was hacked or flagged for sending out spam mail.
How do I know if I have been hacked?
If your website runs on the popular WordPress content management system, install and scan your installation with one of the following malware removal plugins.
The scan results will indicate if any infected files were discovered on your website.
For non-WordPress users, consider one of the following 11 malware scanning tools.
Unfortunately, getting blacklisted is not necessarily your fault — especially if you’re on a shared server with a shared IP address. For instance, it may be that another site on your server was purposefully sending out spam emails. The same concept applies if your hosting provider’s network is infected with malware.
Blacklist Check
Now that we have a better understanding of blacklists and assessed if our website is hacked, it’s time to check if we have been blacklisted and, if so, by which authorities. To save time, we’ll employ 3 online scanning tools.
If your website is blacklisted, the respective service will warn you accordingly.
1. Google Safe Browsing

Google’s Safe Browsing technology examines billions of URLs per day looking for unsafe websites. Every day, their system discovers thousands of new unsafe sites, many of which are legitimate websites that have been compromised. When an unsafe website is discovered, warnings are shown on Google Search and in web browsers.
2. VirusTotal
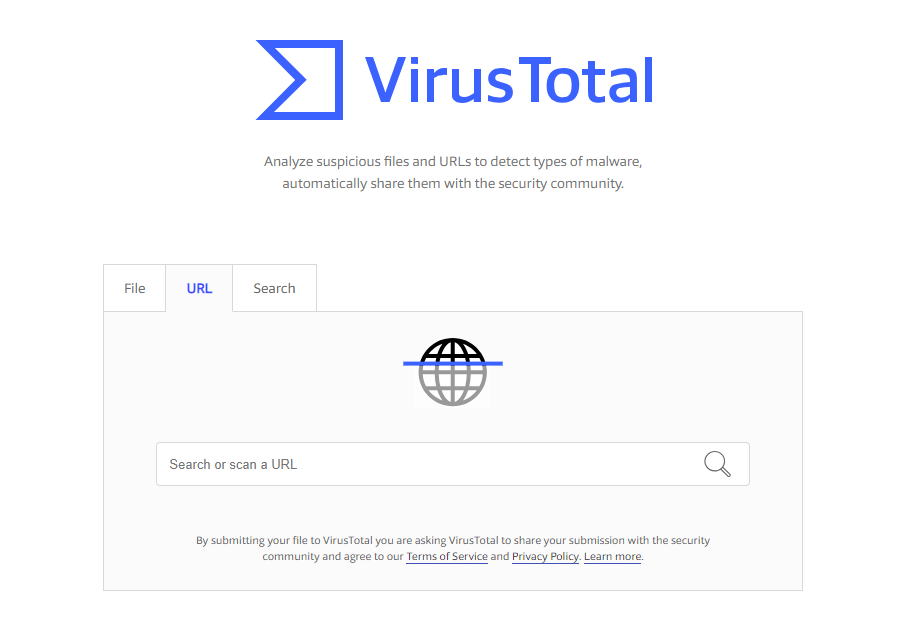
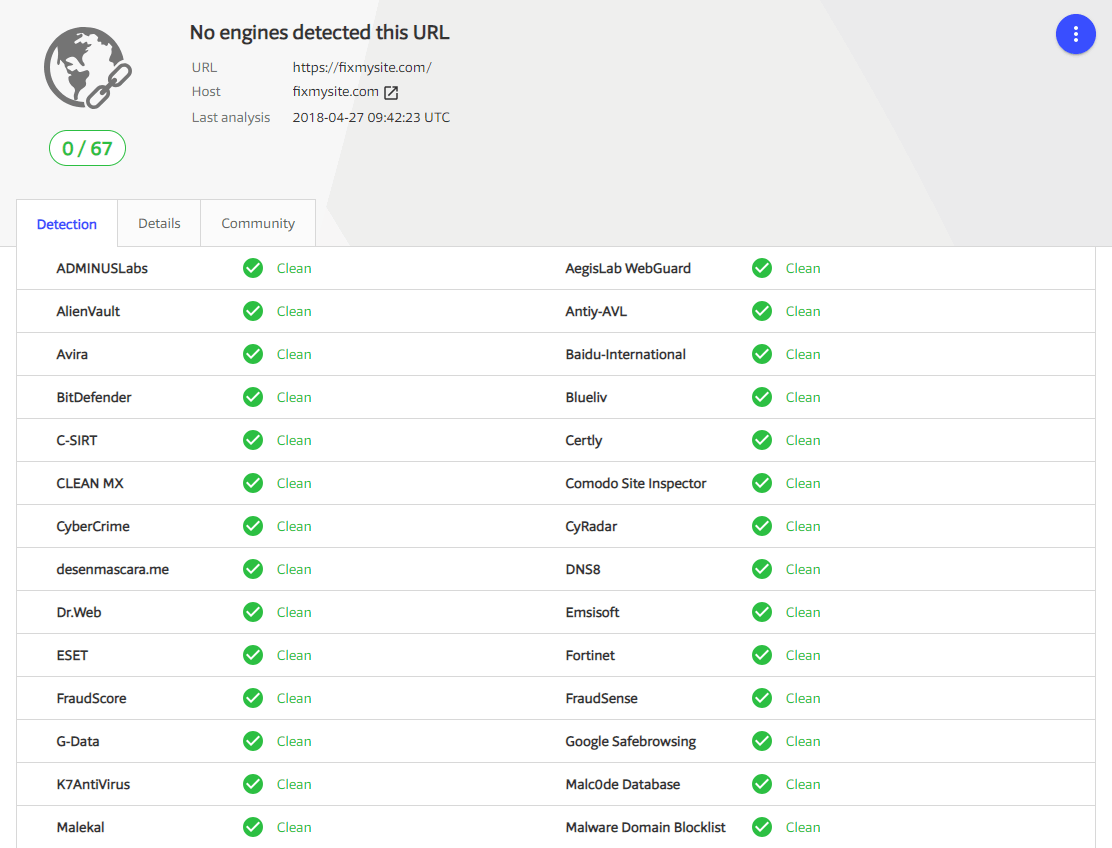
VirusTotal allows you to analyze suspicious files and URLs to detect types of malware and automatically share them with the security community. But beyond that, they also offer a super online scanning tool that checks 67 blacklists.
3. Sucuri SiteCheck
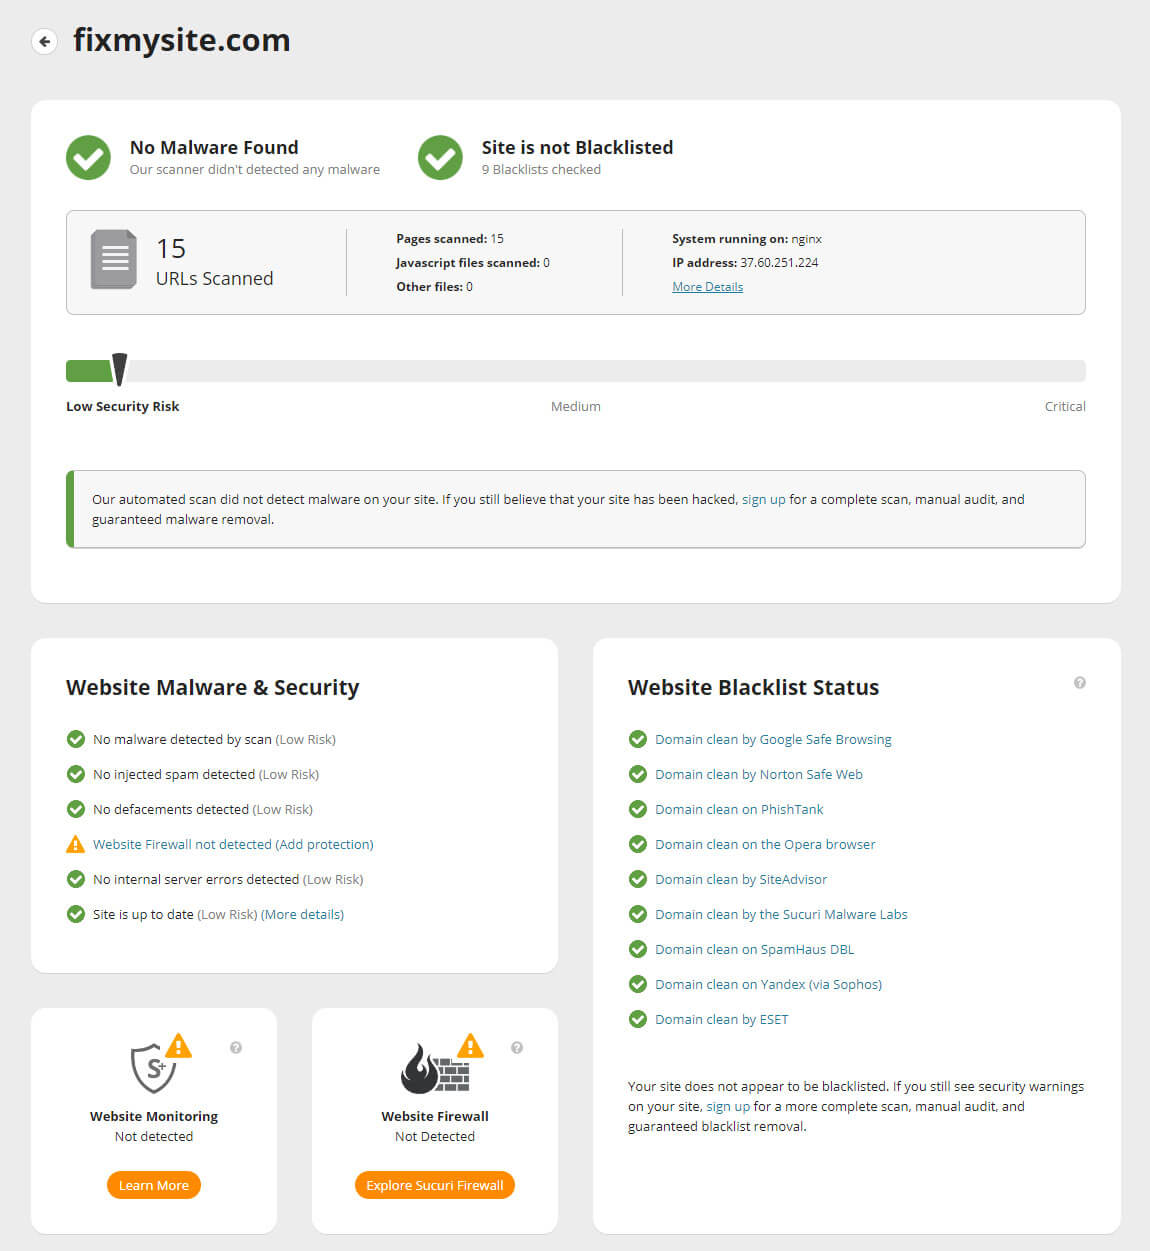
Sucuri’s website malware and security scanner is a free software that scans for known malware, blacklisting status, website errors, and out-of-date software. Sucuri will check your website’s status among 9 of the most important blacklisting authorities.
Blacklist Removal Guides
We have included 3 guides (Google, McAfee, and Norton) to assist you with the most popular blacklists.
However, before requesting a removal, it’s important to ensure that you have fixed your website and that it’s free of malware.
Submitting a faulty/infected website for review could further worsen the situation.
For WordPress users, we have a detailed 18 step guide on how to remove malware from a hacked website.
1. Google
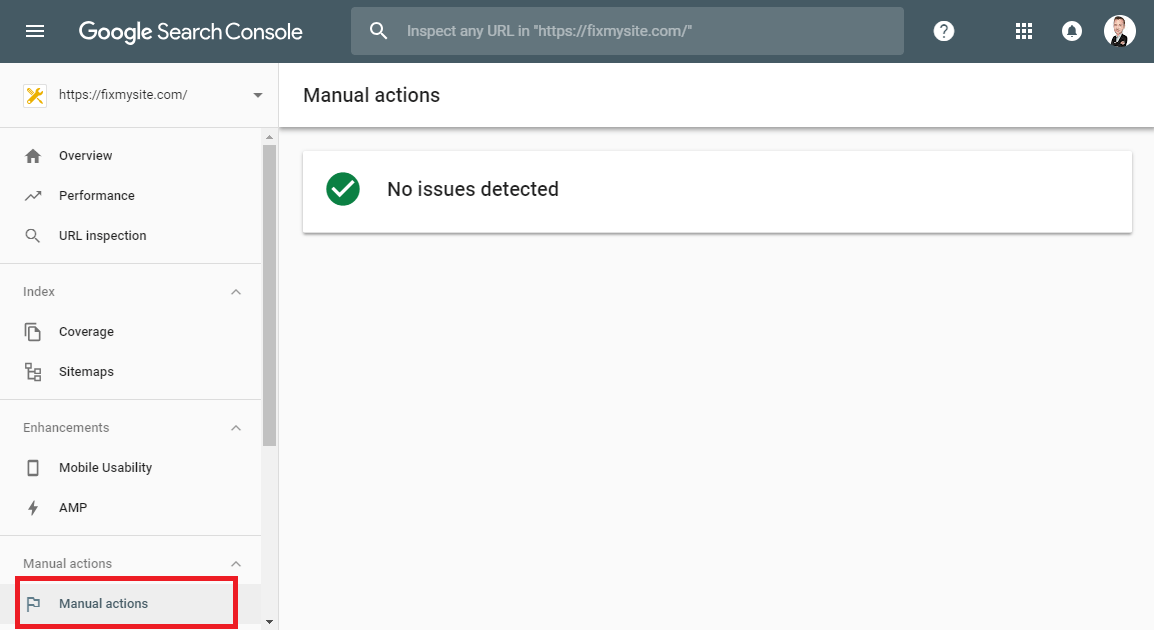
To remove a website from Google’s blacklist and subsequently remove the security warnings from web browsers, you will need a verified Google Search Console account.
Sign in to your account, and select the “Manual Actions” tab. If Google has detected a security issue with your website, it will list it there.
You will have the option to request a review and will be prompted to provide a detailed explanation on how you repaired the site.
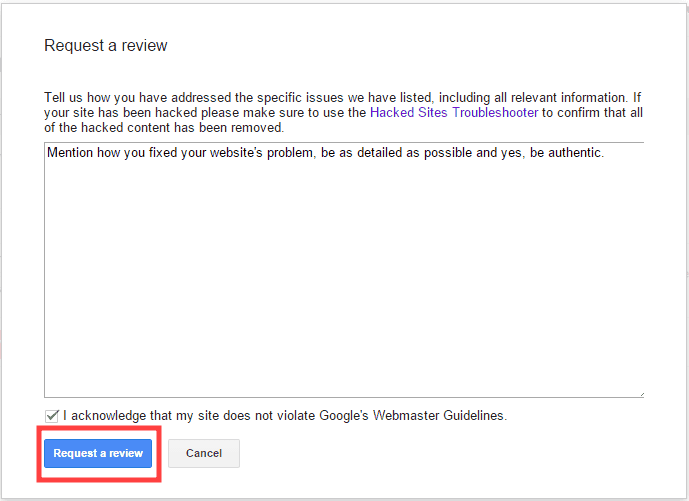
Submit your explanation and the best you can do is wait patiently for Google to review your website.
2. McAfee
McAfee’s review requests are handled through Trustedsource.org. These requests are usually addressed within an average of 3-5 business days – with some requests requiring additional review and taking longer.
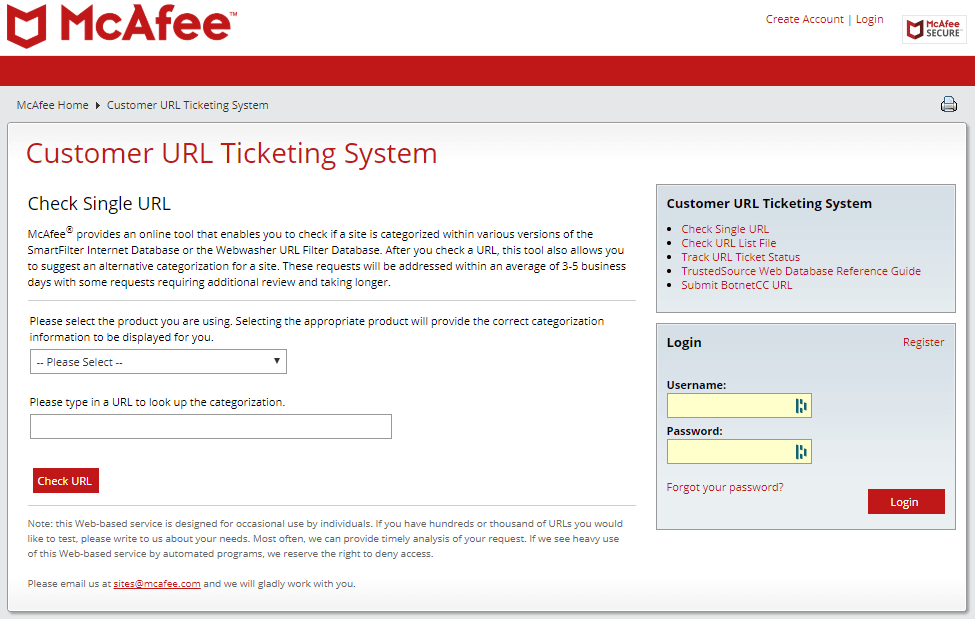
To submit your website, create an account. Once logged in, click “Check Single URL”.
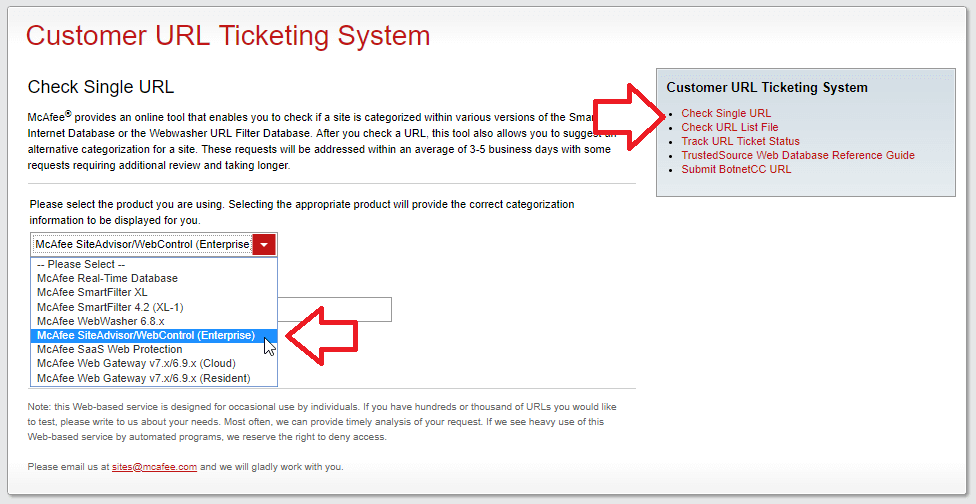
From the drop-down select “McAfee SiteAdvisor/WebControl”, and enter your website’s URL.
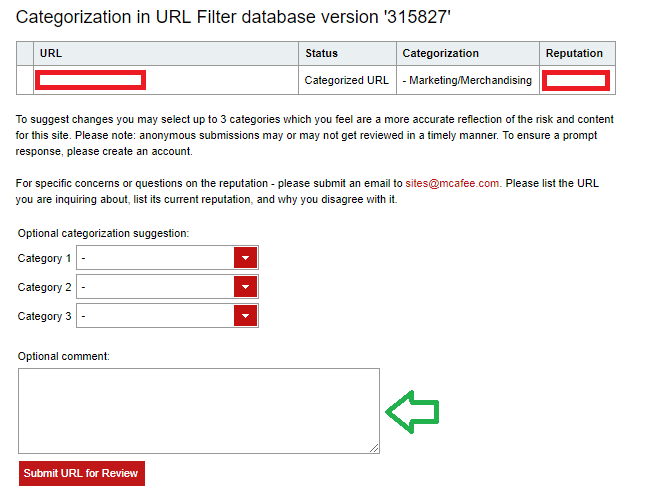
If you’re blacklisted, you will have a negative reputation. In the comment section, you can briefly describe the steps you have taken to remove the malicious content from your website.
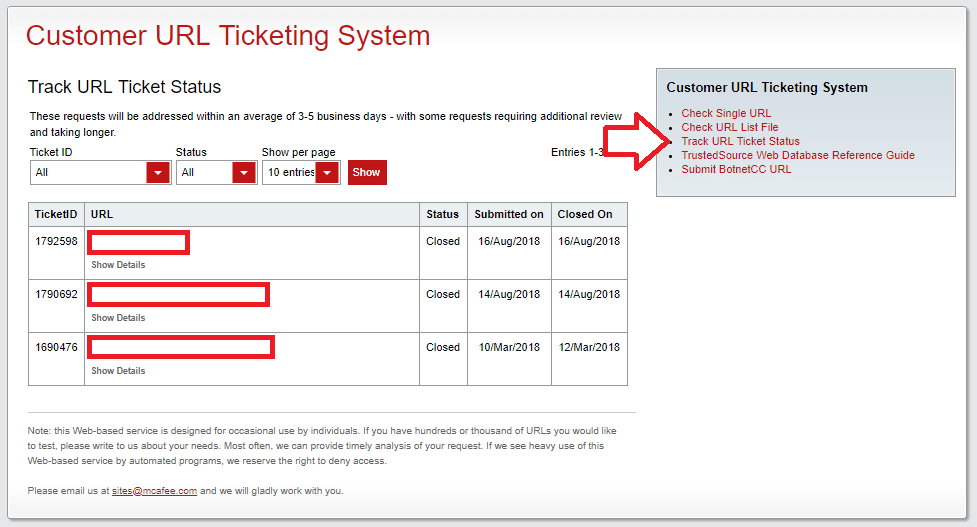
Once submitted, you can track the status of the review by clicking the “Track URL Ticket Status” link.
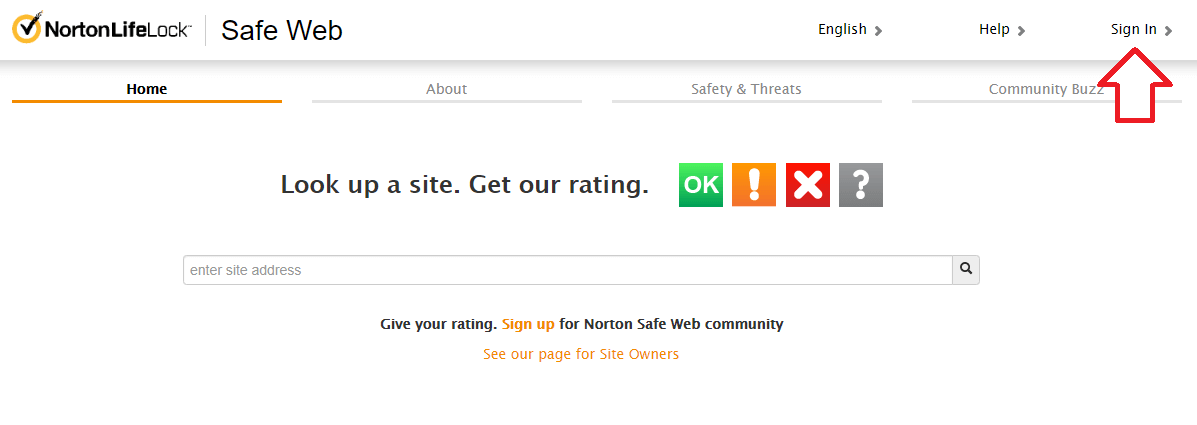
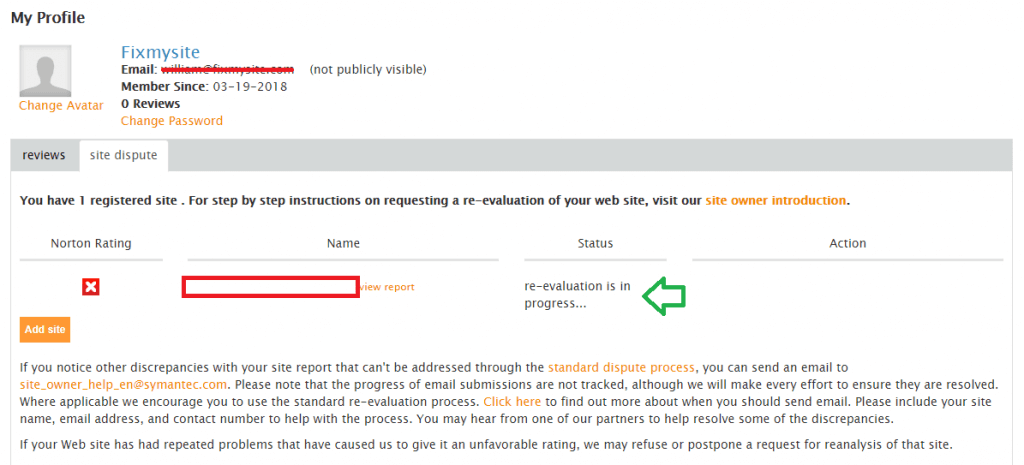
3. Norton
Another popular blacklist is maintained by Norton Safe Web. As with the other services, you will need to create an account. Once you have created an account, search Norton’s database to review the status of your site.
To dispute Norton’s rating, visit the “My Profile” section of the website. Select the “site dispute” tab, and click on the “Add site” to enter your URL.
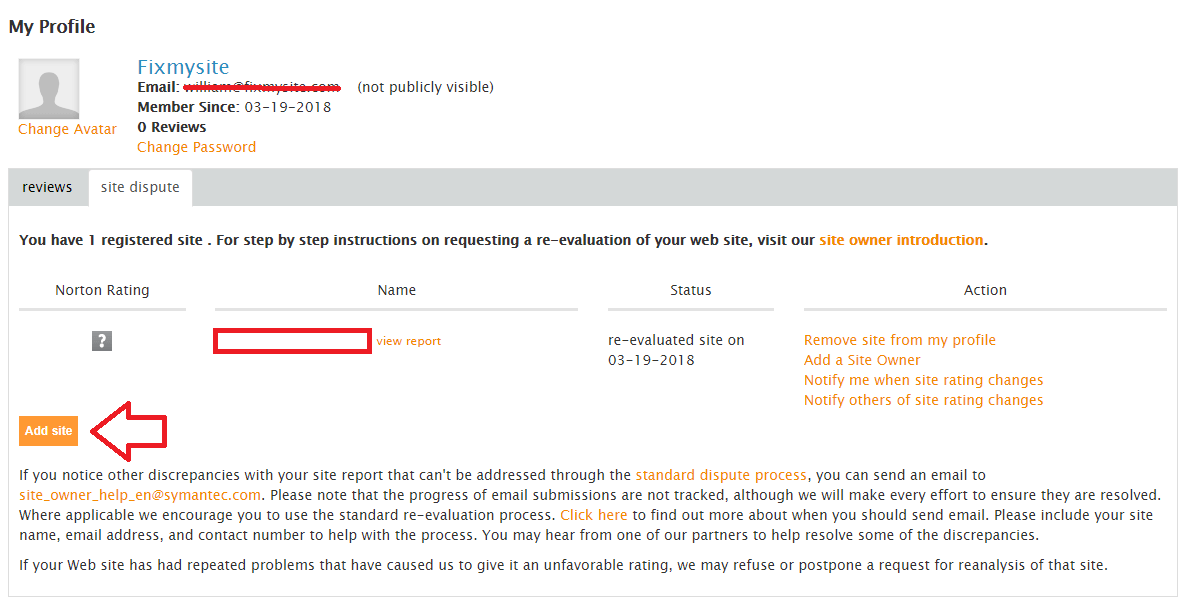
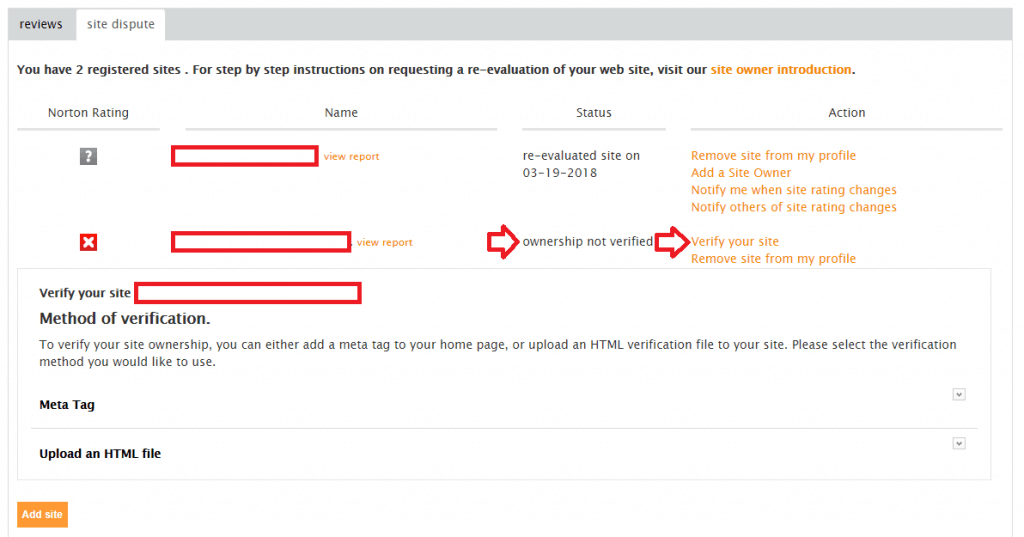
Once you have added the site, you’ll need to verify your ownership of the property. You can do so by uploading an HTML file or by adding a meta tag in the header of the website.
After verifying your ownership, you can proceeed to request a re-evaluation of the site.
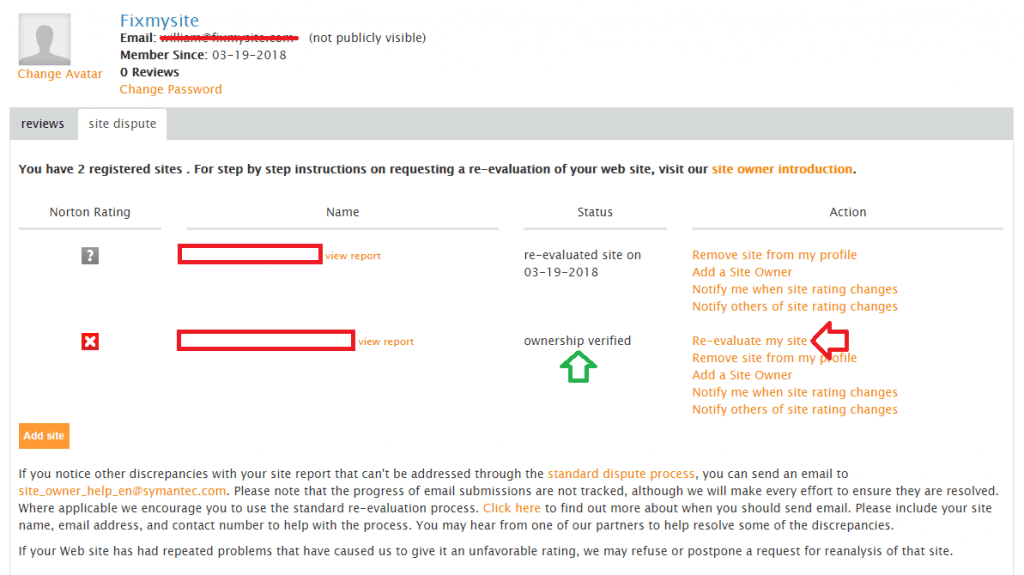
Enter a brief description of the measures you have taken to repair the breach and the steps you have taken enhance your website’s security.
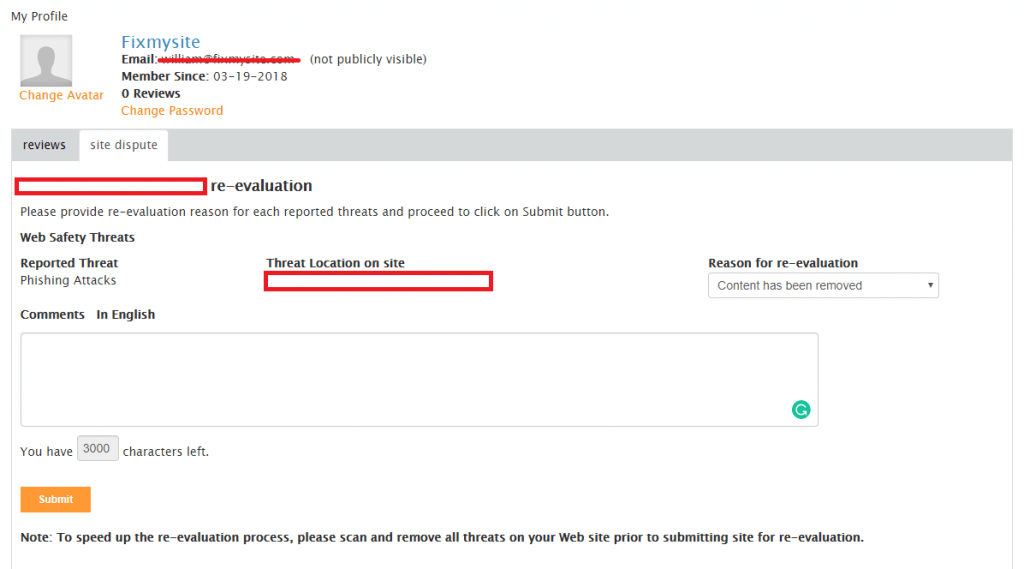
Hit the submit button, and your site will be queued for review.
Conclusion
In this short article, we included 3 popular examples of how to remove a website from a blacklist. Naturally, there are many more authorities, and each authority has its own way of processing requests.
Remember, it’s super important to ensure that you have fixed your website before you initiate the review process. A website that’s blacklisted for the second time will be harder to remove from the blacklist than first time offenders.