In the brick and mortar world, most businesses take security very seriously. I know that my local gym has CCTV cameras, an alarm system, fire, and theft insurance and employs a security company to check the premises at night. But back in the digital world, we tend to overlook our website’s security.
I understand that WordPress security is a bit of a sensitive topic. The stakes are high, information on the issue is sparse and pretty generic, and it’s also a highly technical – which scares off just about everybody except hardcore developers!
But, don’t worry! In this tutorial, I will show you how you can enhance your website’s security by installing and configuring the WordFence Security and Firewall plugin. The whole ordeal shouldn’t take you longer than 15 minutes. Trust me! It’s time well spent.
At Fixmysite.com, we install WordFence as a security optimization measure as part of our malware removal service. As of 2019, we installed the software on hundreds of websites and counting! It’s also featured as our top malware scanner for WordPress (has been since 2017)!
Before diving into the tutorial, I also want to touch base on why you should install a security plugin and why and how hackers compromise websites.
Your Website is more Valuable than you Think!
So you are probably wondering why on earth would a hacker be interested in my awesome pet manicure store? Well, let me evaluate!
Most hacks occur randomly. There are zillions of bots in the vast expanse of the internet crawling and searching for vulnerable systems. So if you are ever left holding the shorthand of the straw, try not to take it personally. Here are just some of the reasons why a hacker might be interested in your website.
- Redirect your traffic. We all know how difficult it is to get eyeballs on to our websites. Imagine if you’re in the pornography or gambling business, that’s twice as hard considering you can’t advertise on most platforms.
- Good old SEO. Yep, it’s pretty common for an intruder to drop a few discreet links leveraging your website’s authority.
- Phishing (not Fishing) for information. In a phishing attack, the malicious agent will attempt to acquire sensitive information like your users’ login details and credit card information by duping unsuspecting visitors onto a similar-looking site like yours (could be a similar checkout page for instance).
Makes sense, right? So the next question is how do they break in? Without getting into the details, hackers can take advantage of your website by:
- Taking advantage of weak passwords. It’s the oldest trick in the book. “1234”, “admin”, “starwars”, “newyork”, “honey”, “mylove” are all examples of horrible passwords.
- Exploiting vulnerable code. A WordPress website consists of the WordPress core, plugins and theme. If a vulnerability is discovered, it may be exploited.
- Hacking your hosting company. Yep, that’s also possible. Rather than go after individual websites. Hackers can target an entire network of sites by compromising a hosting company (not much you can do in this case).
WordFence to the Rescue!
WordFence is a stunning success! It’s by far the most popular WordPress security plugin. As a matter of fact, with +3 million active installations, it’s one of the most popular WordPress plugins. It’s also FREE!
Here is how WordFence can help improve your website’s security:
- Firewall. A web application firewall identifies and blocks malicious traffic.
- Malware scanner. The malware scanner checks core files, themes, and plugins for malware, bad URLs, backdoors, SEO spam, malicious redirects and code injections.
- Login security. Two-factor authentication (2FA) adds an extra layer of security to the login page.
- Other security tools. Other features include real-time traffic monitoring, IP blocking and more goodies!
I hope the brief overview was helpful, now let’s get on with the tutorial and install WordFence!
Install WordFence
Just like with most WordPress plugins, the installation is pretty straight forward.
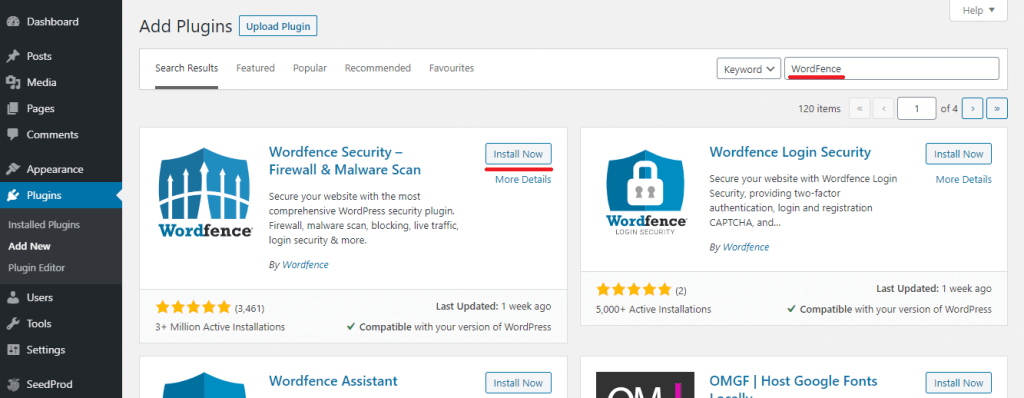
Open the WP-Admin area, head over to Plugin and Add New. Seach for WordFence and press the Install Now button.
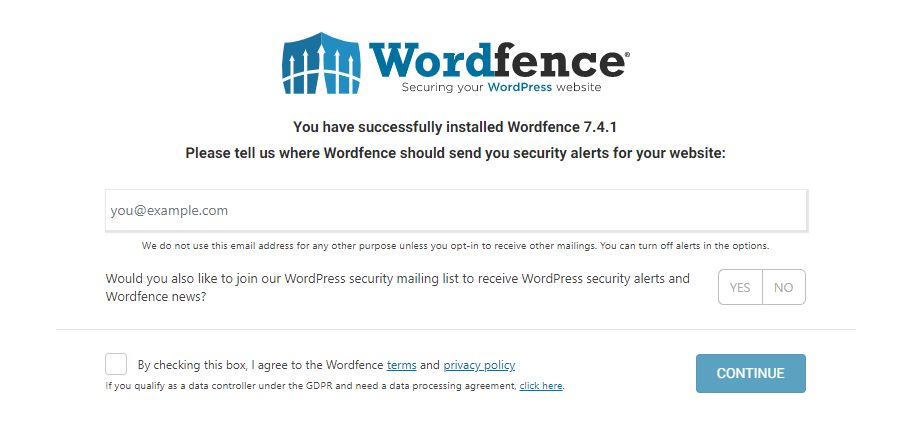
Wait for it to install. Once installed, you will be asked to enter your email address. Since WordFence will be sending security reports and updates, I suggest you enter an email address that you use! Agree to their terms and click continue.
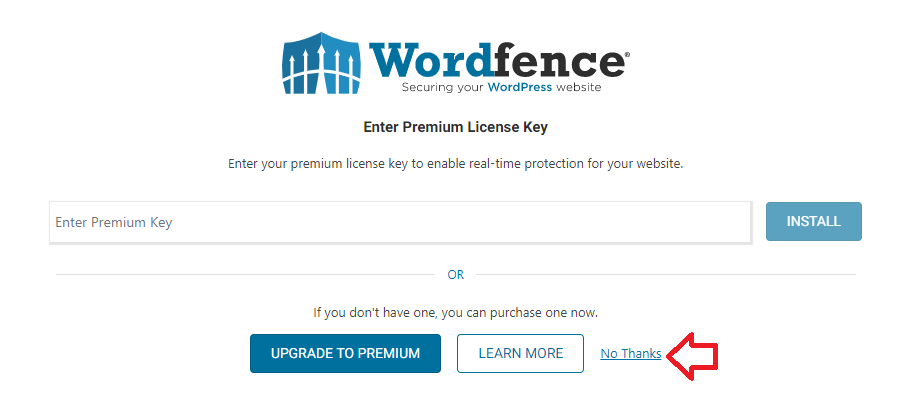
In the next screen, WordFence will ask you to enter an API key. If you purchased a premium account (more info here), enter it here. But since we’re using the free version in this tutorial, go ahead and click no thank you.
Voila! You just installed WordFence, and your site already better off! But now it’s time to get into the nitty-gritty.
Configuring the Firewall
Now things start getting interesting! I’m going to show you how to configure WordFence’s firewall.
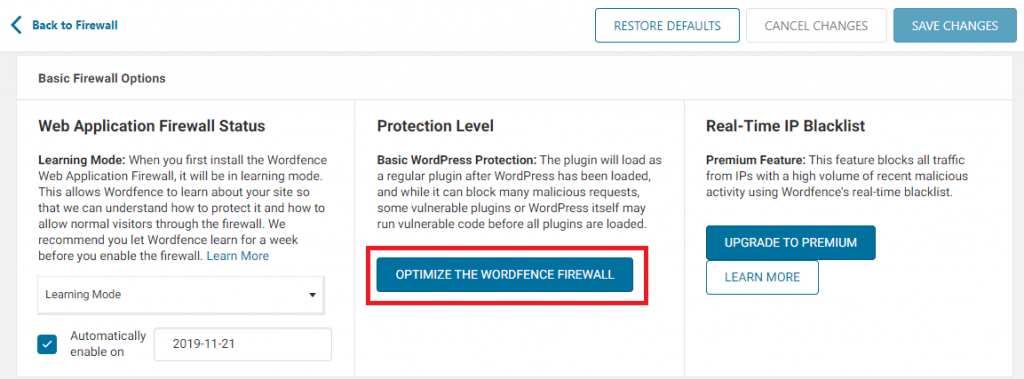
By default, the firewall is active. However, WordFence will load as a regular plugin after WordPress has been loaded, and while it can block many malicious requests, some vulnerable plugins or WordPress itself may run vulnerable code.
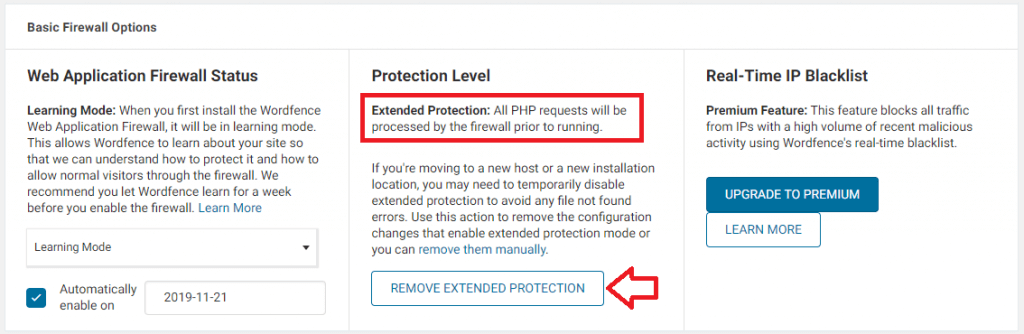
We want to ensure that WordFence runs before WordPress or any other PHP script is loaded. To do so, we’ll enable “Extended Protection”.
Head over to WordFence > Firewall > All Firewall Options. In the Protection Level box, click the big Optimize the WordFence Firewall button.
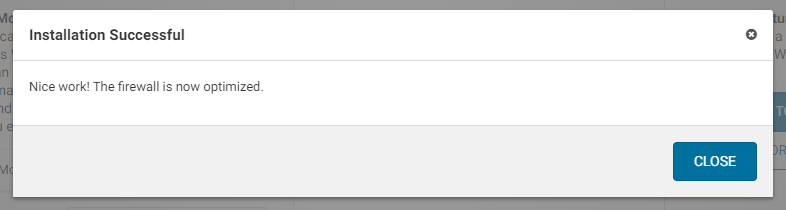
A pop-up wizard will appear, download your .htaccess file and click continue. If the installation is a success, the wizard will notify you accordingly.

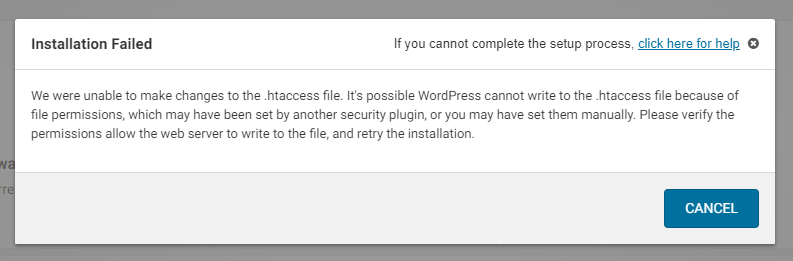
Granted, it’s not always soo easy! Sometimes you will have to do a little more work. If you run into trouble, see this article on troubleshooting the WordFence firewall or open a support ticket with us!
For example, in the screenshot below, WordFence is unable to write to the .htaccess file. Changing the file permissions of the .htaccess file to 644 will address the issue.
Brute Force Protection
Still with me!
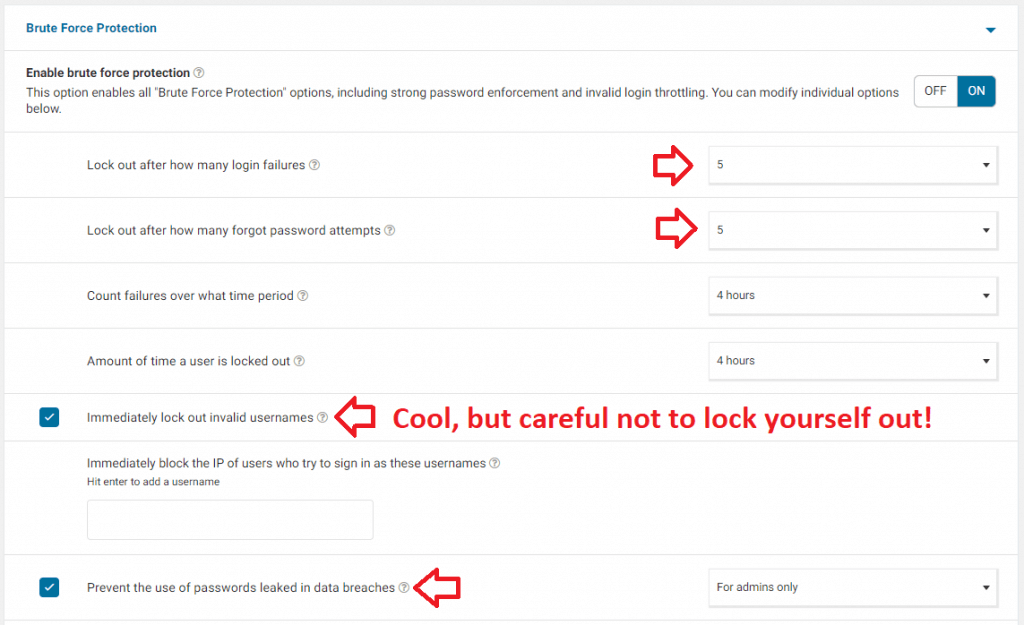
Scroll down the page, to the Brute Force Protection tab. Brute Force Protection protects your login page by limiting failed login attempts. In other words, let’s say a bot is trying to figure out your password by trying thousands of passwords, WordFence block will block the IP after a defined number of failed login attempts.
I like to limit the number of attempts to 5 over 4 hours.
You can also immediately lock out invalid usernames (use with caution) and force admins to use strong passwords.
Rate Limiting
In a similar manner to brute force protection, rate limiting limits, throttles, and blocks excess requests made to your to website.
So if a bot is crawling your website looking for a vulnerable exploit, WordFence can block it after a defined number of requests.
Adjust the settings to match your users’ activity. I like to throttle human activity to roughly 30 pages per minute and I certainly don’t want bots poking around 404 error pages – so I’m stricter with those settings.

Now press the Save Changes button in the top right-hand corner of the page, and you’re all set!
Running your First Scan
Straight out the box, the malware scanner rocks! WordFence will check core files, themes, and plugins for malware, bad URLs, backdoors, SEO spam, malicious redirects, and code injections.
To scan your website, visit WordFence > Scan > and press the start new scan button.
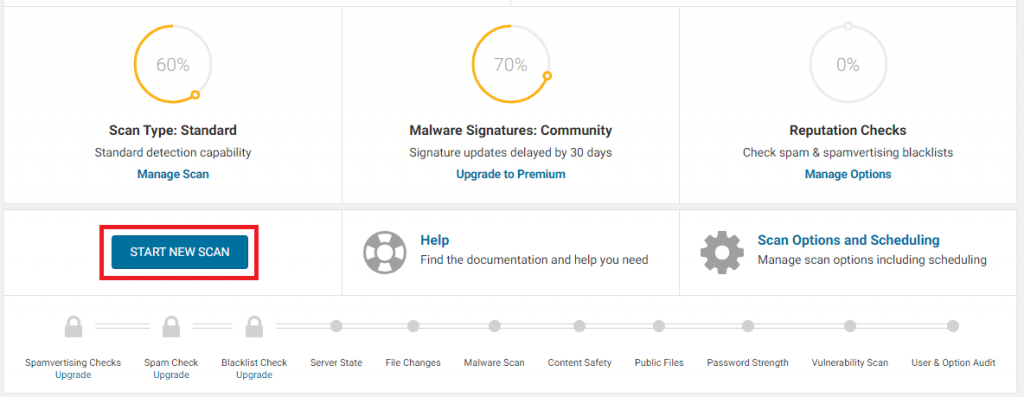
Grab a cup coffee, listen to a song on YouTube, and then get back to the scan page. The results of the scan will be listed below together with their severity.
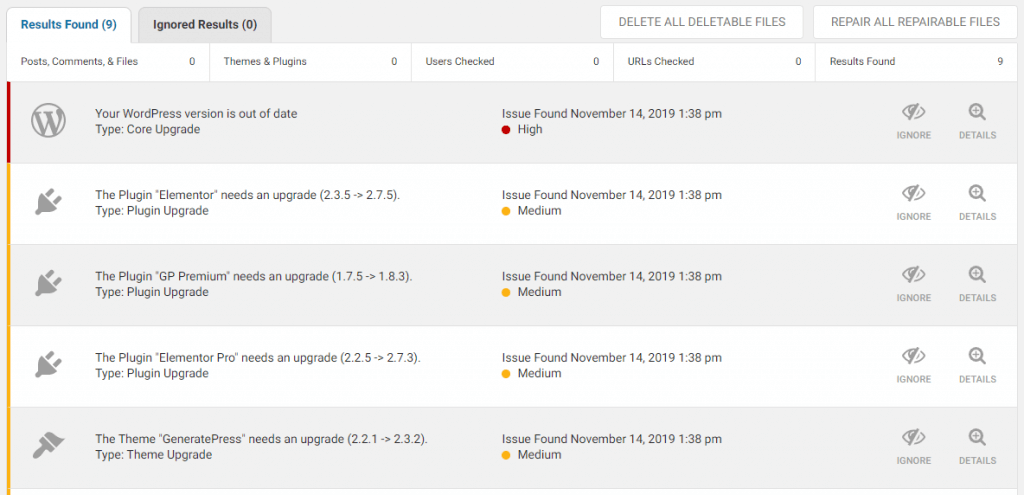
If you believe that your website is hacked, click on the Scan Options and Scheduling icon. By default, the scanner is set to Standard, but you can increase the thoroughness of the scan by setting it to High Sensitivity. Be aware the results may include false positives.

Help! I just scanned my website and it tells me I have been hacked!
First of all, take it easy! Check out this guide on how to remove malware from WordPress. You can also hire WordFence or a service like ours to fix it for you.
Notification Settings
Handy tip! WordFence loves sending emails. I don’t know about you, but I don’t like security emails (unless it’s important).
To change the notification settings, go to WordFence > All Options > Email Alert Preferences. Adjust the settings according to your preference.
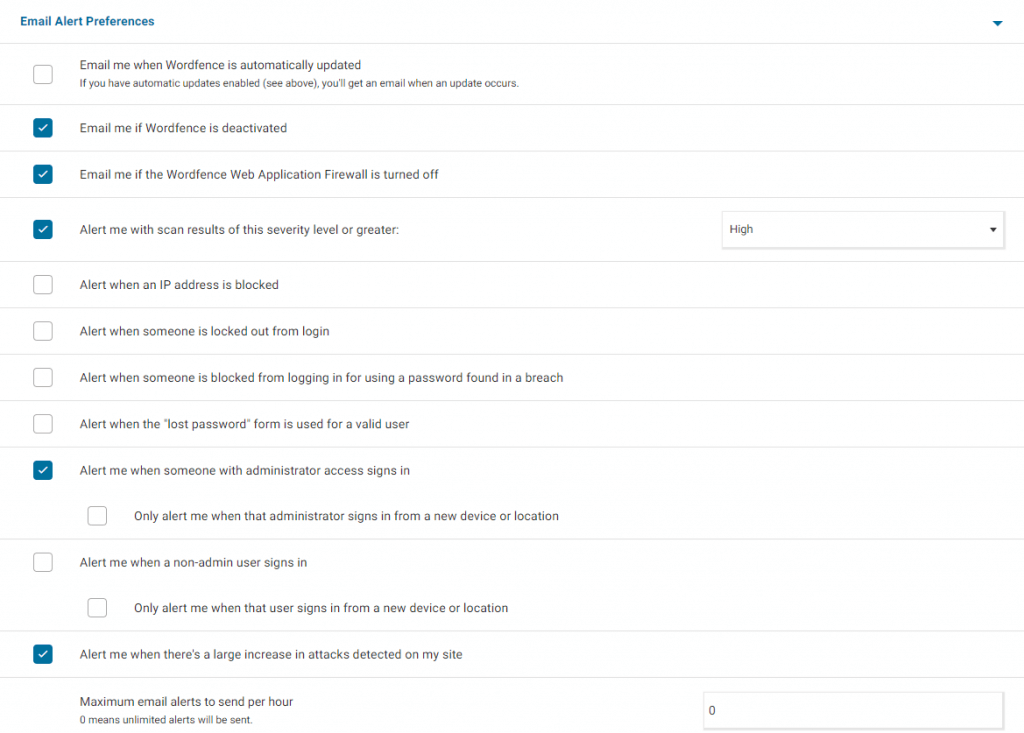
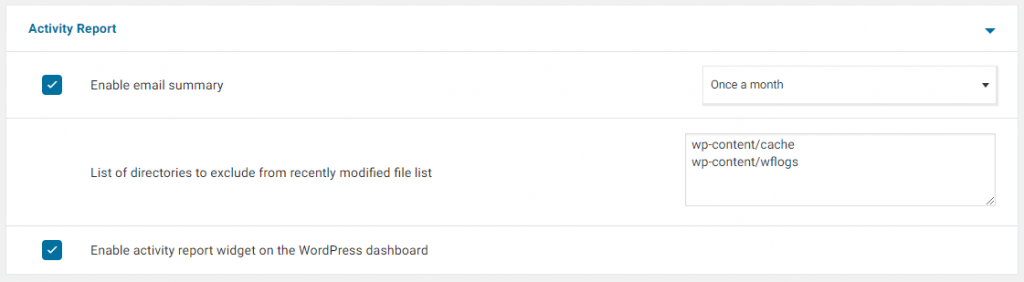
On the same page, I also opt for a monthly report rather than a weekly report.
Setting up Two-Factor Authentication
Setting up two-factor authentication is super simple!
The only prerequisite is an authenticator app. I use Authy!
In WordFence visit the Login Security page. Scan the QR code with the app, download the recovery code (put them somewhere safe) and press activate. That’s it!
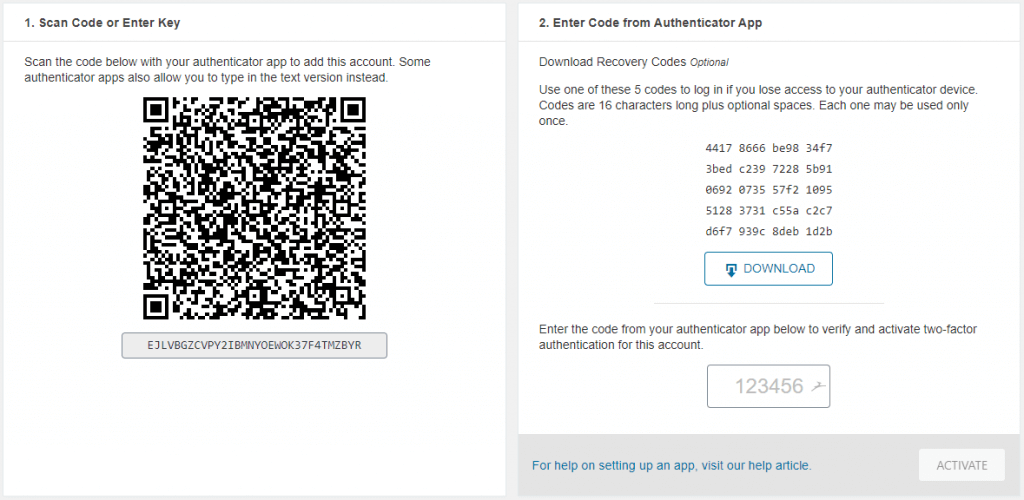
Two-factor authentication will add an extra verification step should an employee, colleague or thief get a hold of your passwords.
Upgrading to WordFence Premium?
Installing WordFence is free but for $99 per year, you can unlock their premium features.
Is it worth? Well, it certainly doesn’t harm! You can also read more about it on their website.
The main difference between the free and premium versions is that WordFence premium offers real-time protection, while malware signatures and firewall rules in the free version have a 30-day delay.
The premium version offers:
- Real-time IP blacklist (Monitors and blocks incoming traffic from blacklisted IPs but also checks if your domain or IP address is blacklisted – more about that topic here)
- Real-time firewall rule updates
- Real-time malware signature updates
Correctly configured, the free version unquestionably enhances your website’s security. It’s a lot better than having nothing installed. However, if you are looking for support and advanced features (popular with our clients is country blocking), then upgrading is probably the right thing for your business!
The End of a Long Tutorial!
 You made it! Congrats on making it to the end. Now that WordFence is installed, your website will be thanking you for taking care of it!
I do want to clarify that a website can still get hacked, even with a perfectly configured firewall. Unfortunately, there is no such thing as 100% secure.
Updating WordPress, your plugins and your theme is just as important! Besides, whenever WordFence discovers an issue it will email you with the details (you’ll want to investigate those).
So that’s it, folks!
If you have any questions about the plugin or WordPress security, please don’t hesitate to ask them in the comment section below.