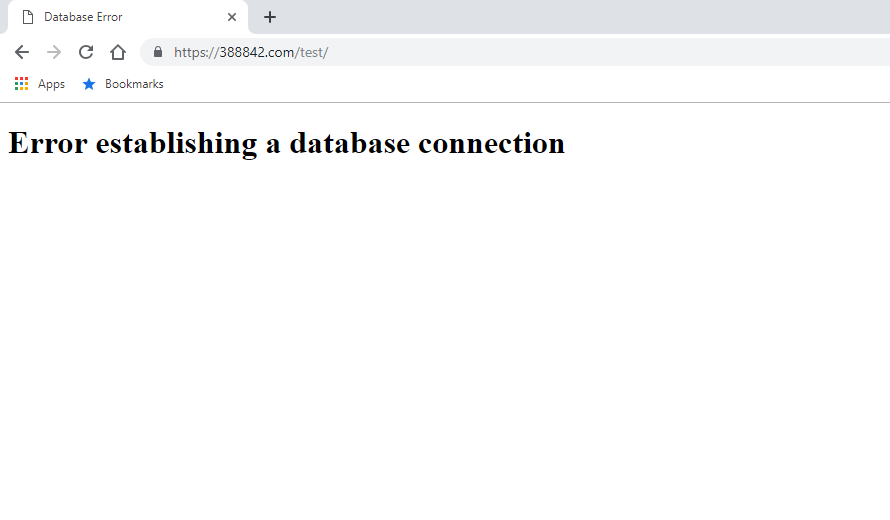
“Error establishing a database connection”…
…at the place of your beloved website. What a disaster!
As subtle as a brick!
Admittedly, it’s a scary message! There are no styles, no explanations, just a bare warning straight out of the DOS era. It can be especially frustrating when you encounter the issue without making any changes to the website.
First things first, DEACTIVATE PANIC MODE!
Let me assure you that the problem can be fixed.
It’s an error most WordPress site owners and developers will face at some point in their career.
Outlined in this article, are 5 steps you can take to troubleshoot the “Error establishing a database connection” (A.K.A. EEDC).
(click on the links to navigate the article)
- Contact your hosting company
- Check database login details
- Repair a corrupted database
- Create a new database user
- Check for corrupted files
Work systematically, and you should be able to restore your website to good operating order in no time!
Understanding the Error
I don’t want to reiterate the obvious, but the error is really self-explanatory – it’s an error establishing a database connection.
In non-technical terms, what exactly does this mean?
To better understand the issue, it’s important to know how WordPress and dynamic websites work. A dynamic website consists of two key parts, those are the website files and database.
The website files are written in the PHP programming language and make up the WordPress software.
The database is where all your website’s content is stored. That includes your posts, pages, settings, user data and any iota of information stored on your website.
To render your website, the two parts need to work together.
When a visitor visits a page – PHP code is executed requesting information from the database. The information is retrieved and then displayed to the visitor in the browser.
If for either reason the communication interrupted, WordPress won’t be able to retrieve any information from the database and will return a blank page with an ominous error message.
Common Causes
So why does a connection between a database and website fail? Here are 5 of the most common reasons, accompanied by steps you can take to troubleshoot your website.
Hosting Problems – There are a handful of reasons why a connection can go south on the web host’s end. For instance, a traffic spike could overload the database and render your website unresponsive. Likewise, they may be updating their hardware or software leaving you temporarily offline.
Corrupted Files – Your site’s files are made up of the WP core files, plugin and theme files. Often, when a website is hacked or when files are modified, WordPress fails to run correctly and returns an error.
Corrupted Database – To render your beautiful website, many parts work coherently together. Those are parts are constantly creating, reading, updating and deleting content from the database. It’s rather uncommon, but a hiccup on the backend will return a website error.
Database User Privileges – Every database has a user that is granted access to create, read, update and delete data. If your database’s user doesn’t have the necessary privileges to fetch data for the website, the website will return an error.
Database Credentials – Perhaps the most common cause and easiest to resolve is the use of incorrect MySQL login credentials.
Before Fixing
Changes to the database are permanent, that’s why we recommend you make a backup of your database before applying any of the suggested fixes.
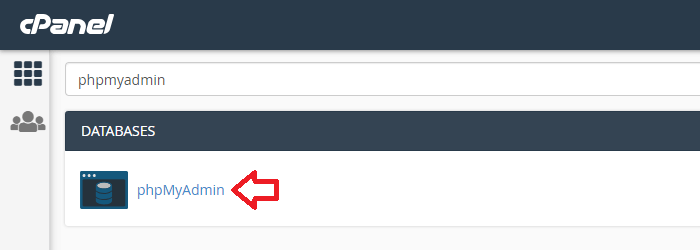
Most popular web hosting companies (E.g. SiteGround, Bluehost, HostGator, etc…) use cPanel as their hosting interface. In this article, we’ll also be working with cPanel.
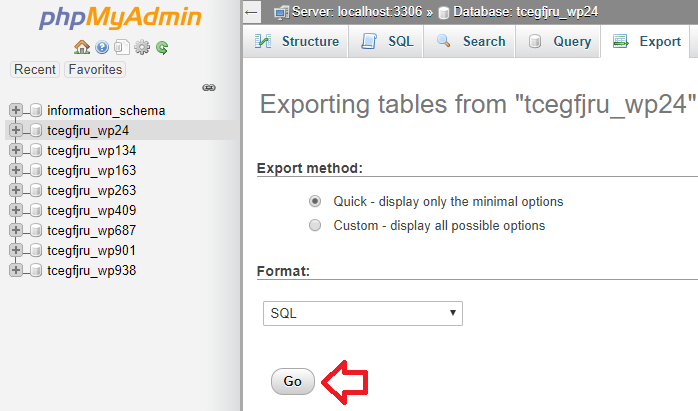
From the cPanel control panel, open PHPMyAdmin.
On the lefthand side, select the database you would like to download and click on the export tab located at the top of the page.
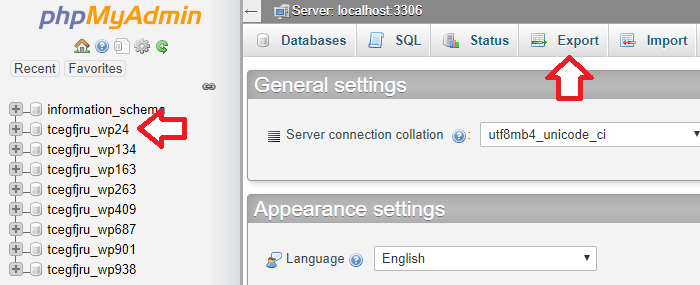
The default export method will work just fine. Select SQL as the format and press the go button to start the download.
5 Ways to Fix the “Error Establishing a Database Connection”
Without further ado, let’s take a look at 5 different steps you can take to troubleshoot your website.
Note! This guide is written in full transparency. The steps listed below are the ones we would follow if you hired us to fix your WordPress website!
1. Contact your Hosting Company
If you didn’t make any changes to your website and, out of the blue, your website isn’t working anymore. There is a good chance that the issue lies with the hosting company.
In any case, since we are working by process of elimination, it’s a good place to start.
Head over to the support section of your hosting company and initiate a chat session.
You can send them the following message:
Hi Team,
We have an “Error establishing a database connection” and would like to know if you’re having any issues on your end? Perhaps:
i) Traffic spike
ii) DDOS attack
iii) Hardware/software updatesThanks!
Most good hosting companies will inform you if they are experiencing any difficulties on their end.
If the hosting company is responsible for the downtime, all you can really do is wait for their update.
On the other hand, if you’re responsible for the error, head over to section 2 of this guide.
Tip! Ask the support staff to kindly fix the problem for you! There is a good chance they can restore your website to good operating order 🙂
Advanced Tip!
If you would like to check the status of your MySQL server, you can run the following two tests.
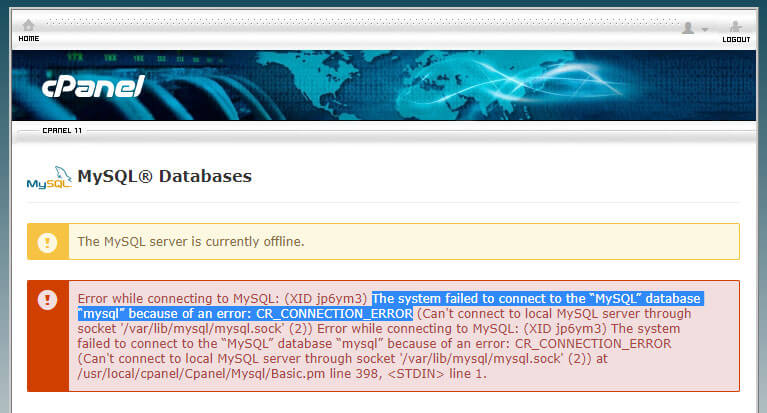
First, in cPanel, head over to the MySQL Databases sections. In some cases, when the service is down, an error message (like below) may be displayed.
Another option would be to run a MySQL connection test. You can run the following PHP script:
Simply fill out the variables (do verify that you have the correct details), upload the file to the root directory, and run it by opening it the browser.
If the script returns the message “Unable to Connect to localhost”, then something is wrong with your server.
On the flip side, if the script returns the message “There are 12 tables”, then you need to continue troubleshooting!
2. Check Database Login Details
The most common reason why web developers encounter the “Error establishing a database connection” is that they have incorrect login details in the wp-config.php file.
It’s especially common for webmasters who just migrated their WordPress website from one hosting environment to the other.
The wp-config.php file is arguably the most important file in a WordPress website! It’s where you store your database’s login details for your website to connect with it.
To repair our website, the second step we are going to take is to ensure that we are working with the correct login details.
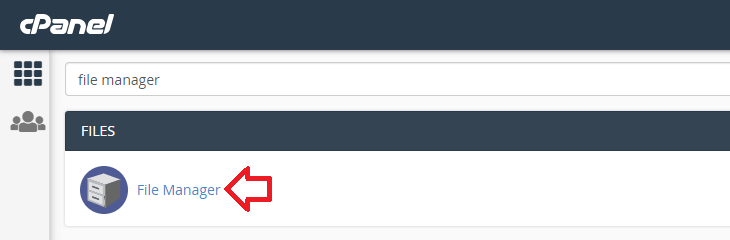
Head over to your hosting account and search for the file manager application and open it.
The wp-config.php is located in the root directory of your WordPress website.
So that will be in the “public_html” directory.
Download the file and open it your favorite text editor. Lines 20 to 40 should look something like this:
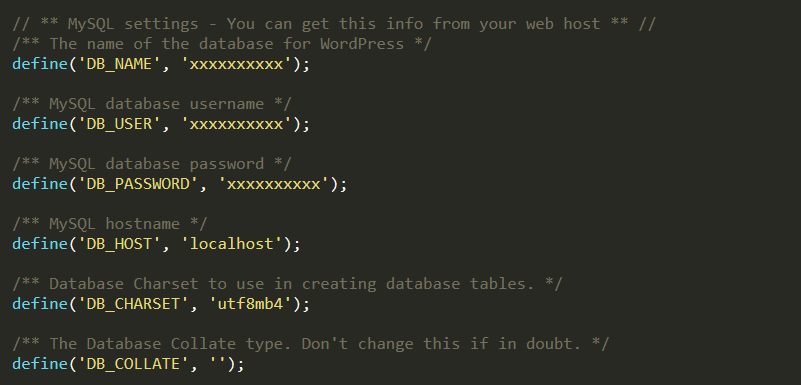
We’re interested in the following 4 lines.
define('DB_NAME', 'xxxxxxxxxx');
Defines the name of the database for WordPress.
define('DB_USER', 'xxxxxxxxxx');
Defines the MySQL database username.
define('DB_PASSWORD', 'xxxxxxxxxx');
Defines the MySQL database password.
define('DB_HOST', 'localhost');
Defines the MySQL hostname.
Database Name
First, we’ll start by verifying the database name (DB_NAME). Head back to the cPanel open PHPMyAdmin.
The database/s should be located on the right-hand side.
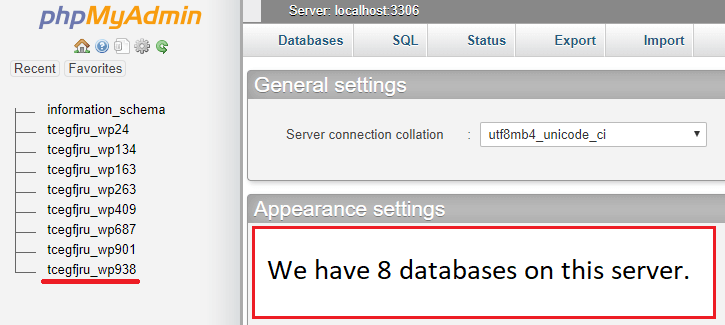
In this example, we have 8 databases. The last one’s name is “tcegfjru_wp938”. Copy and paste the name in the wp-config.php file, between the single quotes, where it asks you for DB_NAME.
Tip! If you have many databases, as we do, you can check that you are working with the correct one by opening the options table. The first two rows of the table (siteurl and home) should list your website’s URL.
Database User
The second line refers to the database user (DB_USER).
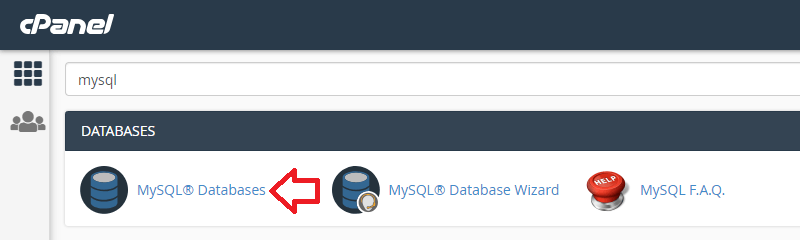
Once again, head back to cPanel and open the MySQL Databases application.
Scroll all the way down the page to “Current Users”.
The “Current Users” table lists the active users.
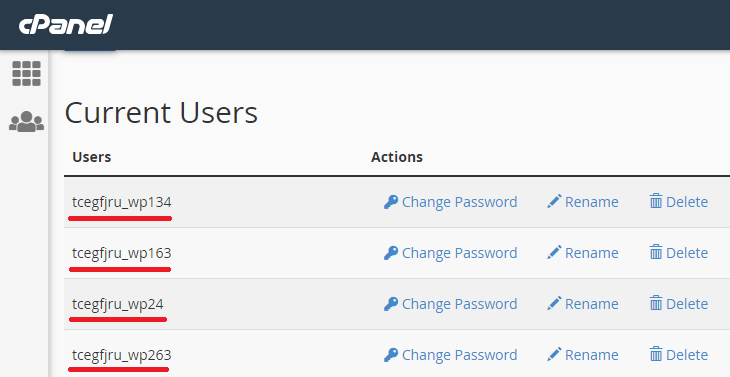
In most cases, the database username is the same as the database name – but not always.
If you don’t see any users, check out the last part of the guide where we create a new database user.
Database Password
The database password (DB_PASSWORD) refers to the database’s user password.
The quickest way to ensure that you have the correct password is to reset it!
Stay on the same page, and simply click the “Change Password” link.
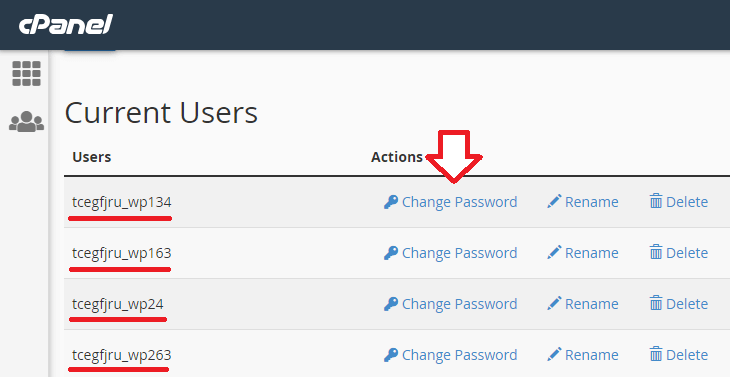
cPanel will automatically generate a strong password for you. Copy it and paste in your wp-config.php file.
Database Host
Finally, we have the database host (DB_HOST).
In many cases, this will be “localhost”. But it also depends on the hosting company.
Some Godaddy packages and Dreamhost, for instance, don’t use localhost.
In this case, check your hosting provider’s documentation or send them a quick email. They should get back to you in no time with your database’s host address.
3. Repair a Corrupted Database
In this part of the article, we’ll explore our options for repairing a corrupted database.
WordPress is a complex software with many parts communicating with the database. Though it’s rather rare, an error can occur breaking the backend.
To address the issue, we have two options.
- The first is to troubleshoot with WordPress’s built-in repair function.
- The second is to troubleshoot from cPanel and PHPMyAdmin.
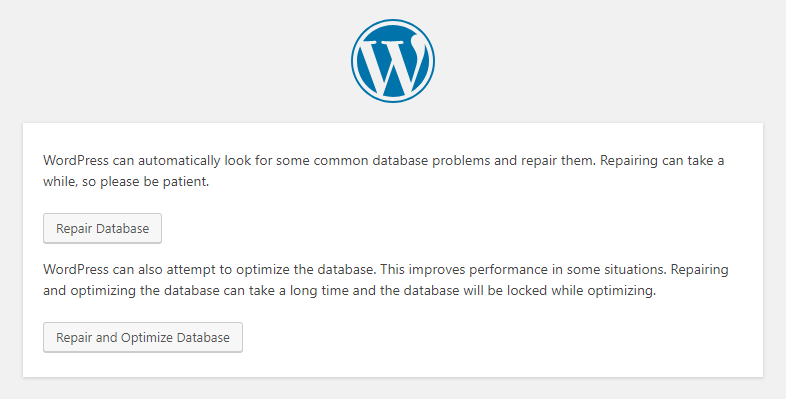
WordPress Fix
By now, we should be familiar with the wp-config.php.
Open the file, and paste the following snippet of code right before the line that says “That’s all, stop editing! Happy publishing.”.
define('WP_ALLOW_REPAIR', true);
Once you have uploaded the file, enter the following URL in your browser:
https://yourwebsite.com/wp-admin/maint/repair.php
WordPress will automatically look for some common database problems and repair them.

After running the function, don’t forget to remove the snippet of code from the wp-config.php to prevent unauthorized users from playing around with your database.
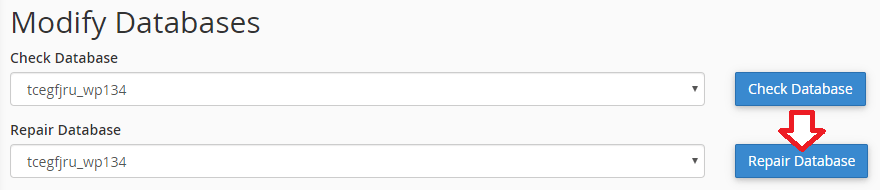
cPanel Fix
In a similar fashion, you can also try to fix the issue from cPanel.
Head over to the MySQL Databases page.
Scroll down to the “Modify Databases” section, select the database, and click the repair button.
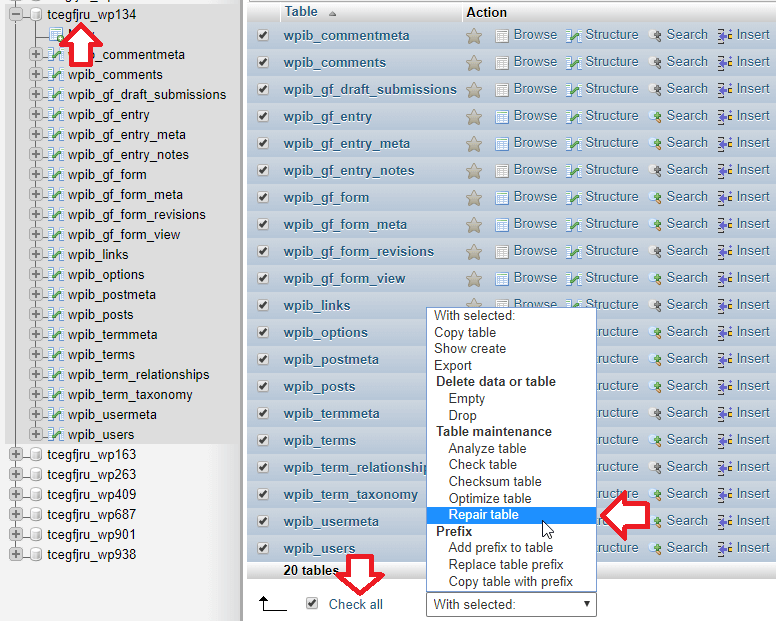
Alternatively, open PHPMyAdmin.
Choose a database and select all the tables by clicking the “Check all” box at the bottom of the page.
From the dropdown, click on “Repair table”.
If that didn’t resolve the issue, keep reading and we’ll explore two more options!
4. Create a New Database User
By now, we are like database experts!
The last tip we have that involves fiddling around in the backend, is to create a new database user.
As we know, every database has a user.
And every user is granted certain privileges to create, read, update and delete content.
While repairing your site, if you come across the access denied error there is a good chance that your user has insufficient privileges.
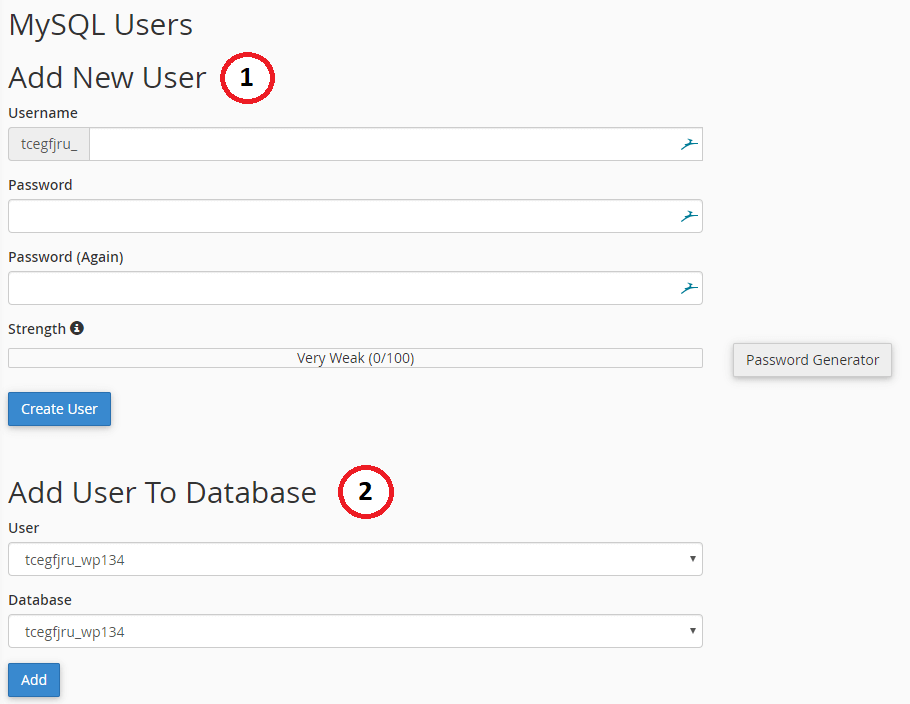
To create a new user, we’ll log into cPanel and open the MySQL application.
Creating a user is as straight forward as giving the user a name and password.
Save the password!
Now for the interesting part.
We need to add the user to a database. Simply scroll a little further down. From the dropdown, select a database, the respective user and click add.
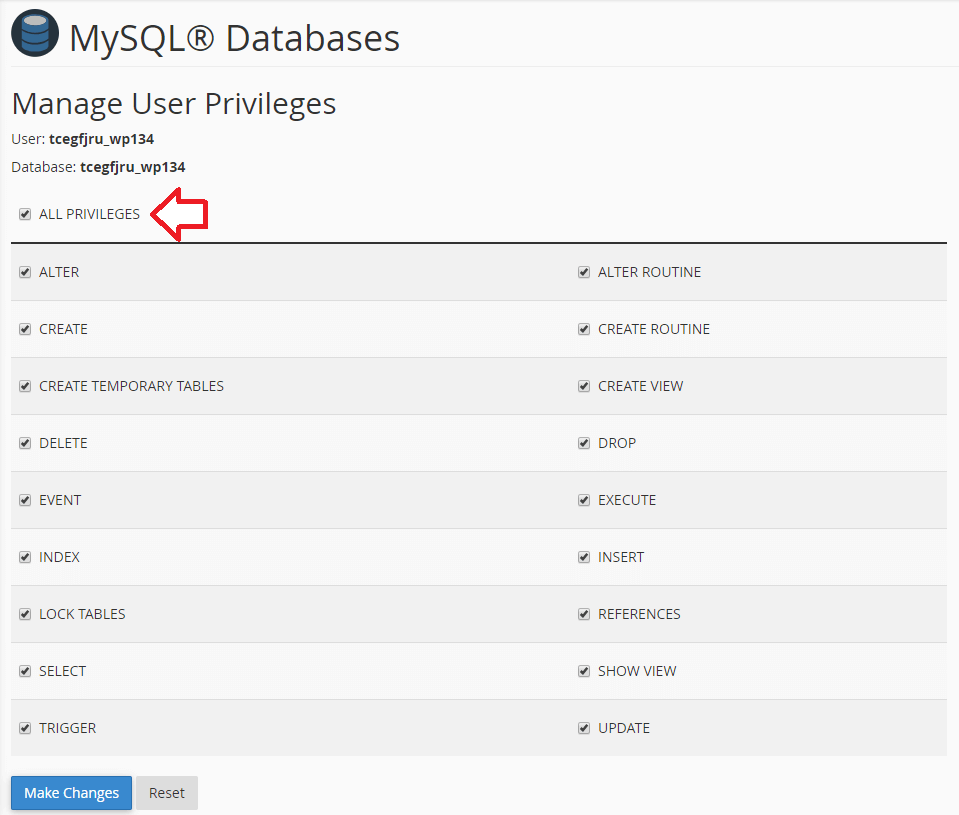
You’ll be prompted to the “Manager User Privileges”. Here, we want to grant the user all the privileges to operate the database.
5. Replace Corrupted Files
The last part of this guide is to check for corrupted files.
Sadly, if your files are corrupted, it’s more than likely that your website is hacked.
From experience, getting a site compromised is one of the worst feelings.
But just like the Error establishing a database connection, a hacked site can be fixed. We have written an extensive how-to article (D.I.Y.), and this our service page.
If you have access to the admin area (most likely you don’t), install one of the malware scanners on your website. Use the results to determine the status of your website.
If you don’t have access to your site, the concept is as follows:
Replace the broken parts of your website until the error no longer persist.
It’s a trial and error process.
Start off by:
- Replacing core WordPress files
- Deactivating your plugin files
- Restoring the default theme
If you are unfamiliar with the process, check out the how-to guide on safely – manually – updating WordPress.
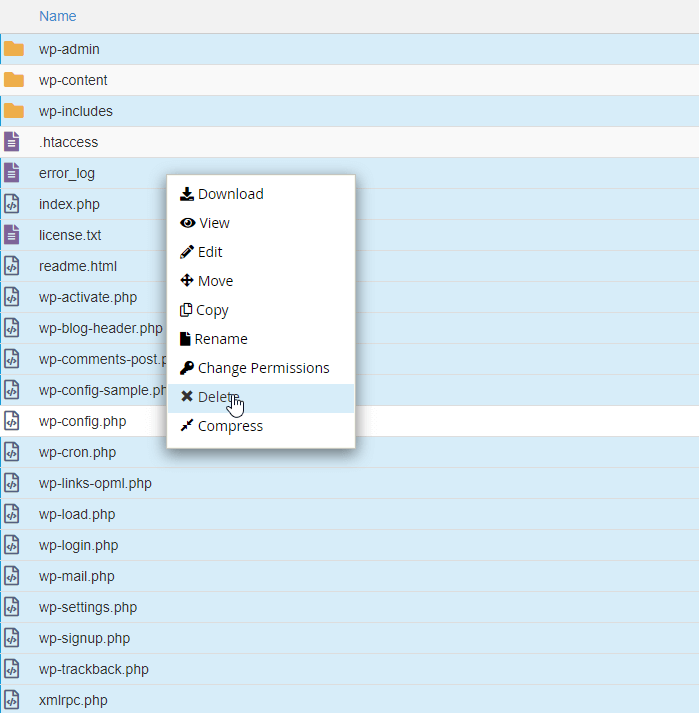
To update WordPress, delete everything with the exception of the “wp-content” directory and wp-config.php file. Replace the deleted parts with clean ones from a freshly downloaded copy of WordPress.
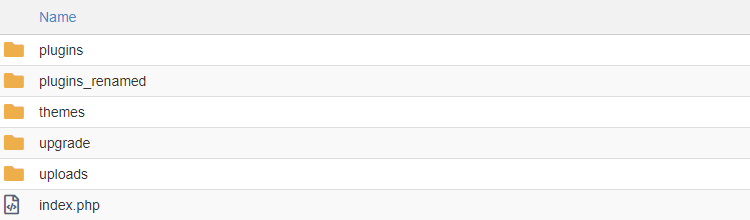
To deactivate all your site’s plugins, rename the plugins directory. Then create a new plugins directory. Drag and drop your plugins from the renamed directory to the new one, until you find the one that breaks your site.
To restore your default theme, make sure to upload a clean copy of the twenty-something theme. Then head over to PHPMyAdmin. Select the options table and enter your theme’s name in the template and stylesheet row.

By the following the above 3 steps, you should able to locate the source of the problem, delete it, and replace with working part! Much like a car mechanic 🙂
Wrapping It Up!
Fixing the “Error establishing a database connection” can be a little tricky at times.
As illustrated above, there is no clear cut way to troubleshoot an affected website.
Try out a few things, until you end up fixing the problem.
But in most cases, it’s either a hosting related issue or it’s simply a matter of incorrect login details in the wp-config.php file.
In order to avoid future incidences, make sure to perform regular backups of your database and website files. So if you ever come across the error again, all you will need to do is ping a message to your hosting provider and have a backup restored.
Over to you… Keep us in the loop!
Let us know, in the comment section below, how you fixed the “Error establishing a database connection”. Did one of our suggested methods work for you? Or did you try something else?