
The colors of your website’s links play a crucial role in your brand identity and user experience. Default WordPress link colors work fine for new sites. Yet they might not match your design vision. Changing link colors is a simple customization that significantly improves your website’s appearance.
In this guide, we’ll walk through various methods to change link colors in WordPress. You’ll learn approaches that work for both modern block themes and classic themes. We’ve created easy-to-follow techniques suitable for different skill levels. From simple customizer options to advanced CSS selectors, you’ll find the perfect method for your needs.
Let’s start by understanding WordPress link colors and why customizing them matters.
Understanding WordPress Link Colors
Link colors serve an important purpose on your website. They guide visitors through your content. They indicate which elements are interactive. They help maintain visual consistency with your brand colors.
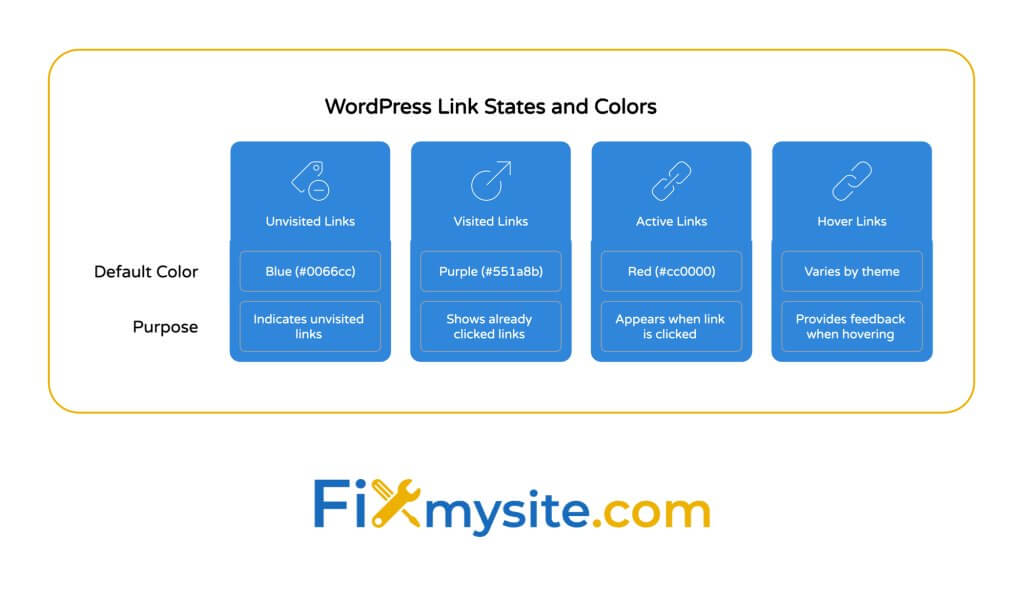
WordPress default link colors follow traditional web conventions. Unvisited links are blue (#0066cc), visited links shift to purple (#551a8b), and active links turn red (#cc0000). (Source: WPBeginner)
This table shows the default WordPress link states and their corresponding colors:
| Link State | Default Color | Hex Code | Purpose |
|---|---|---|---|
| Unvisited (a) | Blue | #0066cc | Indicates clickable links not yet visited |
| Visited (a:visited) | Purple | #551a8b | Shows links the user has already clicked |
| Active (a:active) | Red | #cc0000 | Appears briefly when a link is clicked |
| Hover (a:hover) | Varies by theme | Depends on theme | Provides visual feedback when hovering |
Customizing these colors offers several benefits for your WordPress site:
- Brand consistency – Match links to your brand color palette
- Improved readability – Ensure sufficient contrast against backgrounds
- Better user experience – Make interactive elements more obvious
- Visual hierarchy – Distinguish between different link types
- Accessibility – Meet contrast requirements for all users
Now that we understand why link colors matter, let’s look at how different WordPress theme types affect your customization options.
Block Themes vs. Classic Themes
WordPress has evolved significantly with the introduction of Full Site Editing (FSE) and block themes. This evolution changes how we approach link color customization.
Block themes provide a more user-friendly approach to customizing link colors. Through the Global Styles interface, you can modify link colors without writing a single line of CSS. The WordPress block editor includes built-in tools for styling links as part of its visual editing system. (Source: WordPress Developer Resources)
For block themes, you can change link colors by following this path:
- Navigate to Appearance > Editor
- Click on Styles
- Select Colors
- Locate the Links section
- Choose your preferred colors for different link states
Classic themes typically offer fewer built-in options for link color customization. Many classic themes lack native link color controls in their customizer settings. This limitation makes CSS adjustments necessary for changing link colors.
This table compares link color customization methods between block and classic themes:
| Feature | Block Themes | Classic Themes |
|---|---|---|
| Built-in color controls | Yes, via Global Styles | Limited or none |
| Visual color picker | Yes | Theme-dependent |
| CSS knowledge required | Minimal | Moderate |
| Customization flexibility | Good | Excellent with CSS |
| Difficulty level | Beginner-friendly | Intermediate |
Now let’s explore the different methods for changing link colors in WordPress, starting with the most user-friendly approach.
Method 1: Using WordPress Customizer
The WordPress Customizer provides a convenient way to add custom CSS to your site without editing theme files directly. This method works for both block and classic themes. The specific location might vary slightly depending on your theme.
WordPress.com users and self-hosted WordPress sites can access Additional CSS through the Customizer to make site-wide changes to link colors. You can preview changes in real-time before publishing them to your live site. (Source: WordPress.com Support)
Here’s how to change link colors using the WordPress Customizer:
- Log in to your WordPress dashboard
- Go to Appearance > Customize
- Scroll down and click on “Additional CSS”
- Add your CSS code for link colors
- View the live preview
- Click “Publish” to save changes
For basic link color changes, you can use this CSS code in the Additional CSS section:
/* Change all link colors site-wide */
a { color: #2ea3f2; }

/* Change visited link colors */
a:visited { color: #8e44ad; }

/* Change hover link colors */
a:hover { color: #27ae60; }

/* Change active link colors */
a:active { color: #e74c3c; }
This method offers several advantages:
| Advantage | Description |
|---|---|
| No file editing | Changes are stored in the database, not theme files |
| Live preview | See changes before publishing |
| Theme-independent | Changes persist even when switching themes |
| No FTP required | Everything happens within WordPress admin |
| Easily reversible | Simply delete the CSS to revert changes |
The Customizer method works best for beginners or those who want to make simple, site-wide color changes. For more targeted changes, let’s look at other CSS methods.
Method 2: Inline CSS for Individual Links
Sometimes you only need to change the color of specific links rather than all links on your site. Inline CSS provides a quick solution for these situations. It applies styles directly to individual HTML elements.
Inline CSS is applied directly to the HTML of a specific link using the style attribute. This approach is perfect for one-off styling needs when you don’t want to affect other links on your site. (Source: YouStable)
Here’s an example of inline CSS for changing a single link’s color:
<a href="https://example.com" style="color: #ff0000;">This is a red link</a>You can add inline CSS to links in several ways:
- In the WordPress Classic Editor: Switch to HTML view and add the style attribute directly
- In the Block Editor: For Paragraph blocks with links, use the HTML editing option
- In widgets or custom HTML blocks: Add the style attribute to any link tags
This table shows different inline CSS properties you can use for link styling:
| CSS Property | Description | Example |
|---|---|---|
| color | Changes the text color | style=”color: #ff0000;” |
| text-decoration | Controls underlining | style=”text-decoration: none;” |
| font-weight | Controls text boldness | style=”font-weight: bold;” |
| background-color | Adds background color | style=”background-color: #f1f1f1;” |
| border-bottom | Adds underline styling | style=”border-bottom: 1px dashed #333;” |
While inline CSS is convenient for one-off changes, it has some limitations:
- Not maintainable for multiple links (requires changing each one individually)
- Mixes content and presentation (not best practice for separation of concerns)
- Overrides may be needed for hover/active states
- High specificity can cause conflicts with other styles
For more systematic changes, let’s look at using targeted CSS selectors.
Method 3: Using Targeted CSS Selectors
When you need to change link colors for specific sections of your site, targeted CSS selectors offer the perfect balance. They sit between global changes and inline styling. This approach lets you target links in particular areas like navigation menus, sidebars, or content areas.
CSS selectors allow you to target specific elements on your WordPress site based on their HTML structure, classes, or IDs. The block editor framework includes standardized class names that you can leverage for consistent styling across your site. (Source: WordPress Block Editor Documentation)
Here are some common CSS selectors for targeting different link types:
/* Main navigation links */
.main-navigation a {
    color: #ffffff;
}

/* Footer links */
.site-footer a {
    color: #cccccc;
}

/* Content area links */
.entry-content a {
    color: #0073aa;
}

/* Widget area links */
.widget-area a {
    color: #117bb8;
}
To use targeted selectors, add these CSS rules to your Additional CSS in the Customizer, just like in Method 1.
Finding the right CSS selectors for your theme requires using browser developer tools:
- Right-click on the link you want to style
- Select “Inspect” or “Inspect Element”
- Look for class or ID attributes in the HTML panel
- Use these classes or IDs in your CSS selectors
For example, if your navigation links have a class of “menu-item-link”, you would use:
.menu-item-link {
    color: #ff6600;
}
Let’s explore some advanced CSS techniques to give you more control over your link styling.
Advanced CSS Techniques for Link Styling
Beyond basic color changes, CSS offers powerful ways to enhance your WordPress links. These techniques can help you create more distinctive and interactive link styles.
Using the !important Rule
When your CSS styles aren’t being applied because of conflicting rules with higher specificity, the !important rule can help. It overrides existing styles. While it should be used sparingly, it’s sometimes necessary when working with WordPress themes that have deeply embedded styles.
/* Force link color with !important */
a {
    color: #ff0000 !important;
}
Styling Different Link States
CSS pseudo-classes allow you to style links differently based on their state:
/* Normal state */
a {
    color: #0073aa;
}

/* Hover state */
a:hover {
    color: #00a0d2;
    text-decoration: none;
}

/* Visited state */
a:visited {
    color: #8e44ad;
}

/* Active state (when clicking) */
a:active {
    color: #d54e21;
}

/* Focus state (for accessibility) */
a:focus {
    outline: thin dotted;
}
Adding Transition Effects
Smooth transitions between link states create a more polished user experience:
/* Smooth color transition on hover */
a {
    color: #0073aa;
    transition: color 0.3s ease;
}

a:hover {
    color: #00a0d2;
}
Creating Button-Style Links
Transform regular links into button-like elements:
.button-link {
    display: inline-block;
    padding: 10px 20px;
    background-color: #0073aa;
    color: #ffffff !important;
    text-decoration: none;
    border-radius: 4px;
    transition: background-color 0.3s ease;
}

.button-link:hover {
    background-color: #005177;
}
Now let’s discuss some best practices and important considerations when changing link colors.
Best Practices & Considerations
When modifying link colors in WordPress, keep these best practices in mind. They’ll ensure your changes are effective, maintainable, and user-friendly.
Backup Before Making Changes
Before making any CSS changes, especially when editing theme files directly, create a backup. This precaution ensures you can restore your site if something goes wrong. Use a backup plugin or create a manual backup of your theme files and database.
Accessibility Considerations
Link colors must provide sufficient contrast against background colors to ensure all users can identify them:
- Contrast ratio – Aim for at least 4.5:1 for normal text and 3:1 for large text
- Non-color indicators – Don’t rely solely on color to indicate links (underlines help)
- Hover states – Provide clear visual feedback on hover
- Focus indicators – Maintain visible focus styles for keyboard navigation
Consistency Across Your Site
Maintain consistent link styling throughout your site to avoid confusing visitors:
- Use the same colors for the same types of links
- Be consistent with hover effects
- Ensure all interactive elements follow similar patterns
- Consider creating a color system for different link categories
Mobile Responsiveness
Test your link styling on mobile devices to ensure:
- Touch targets are large enough (at least 44×44 pixels)
- Hover effects don’t cause issues on touch screens
- Link colors remain readable on smaller displays
- Text remains legible when zoomed
Now, let’s troubleshoot some common issues you might encounter when changing link colors.
Troubleshooting Common Issues
Even with careful implementation, you might face challenges when changing link colors. Here are solutions to common problems:
| Issue | Possible Cause | Solution |
|---|---|---|
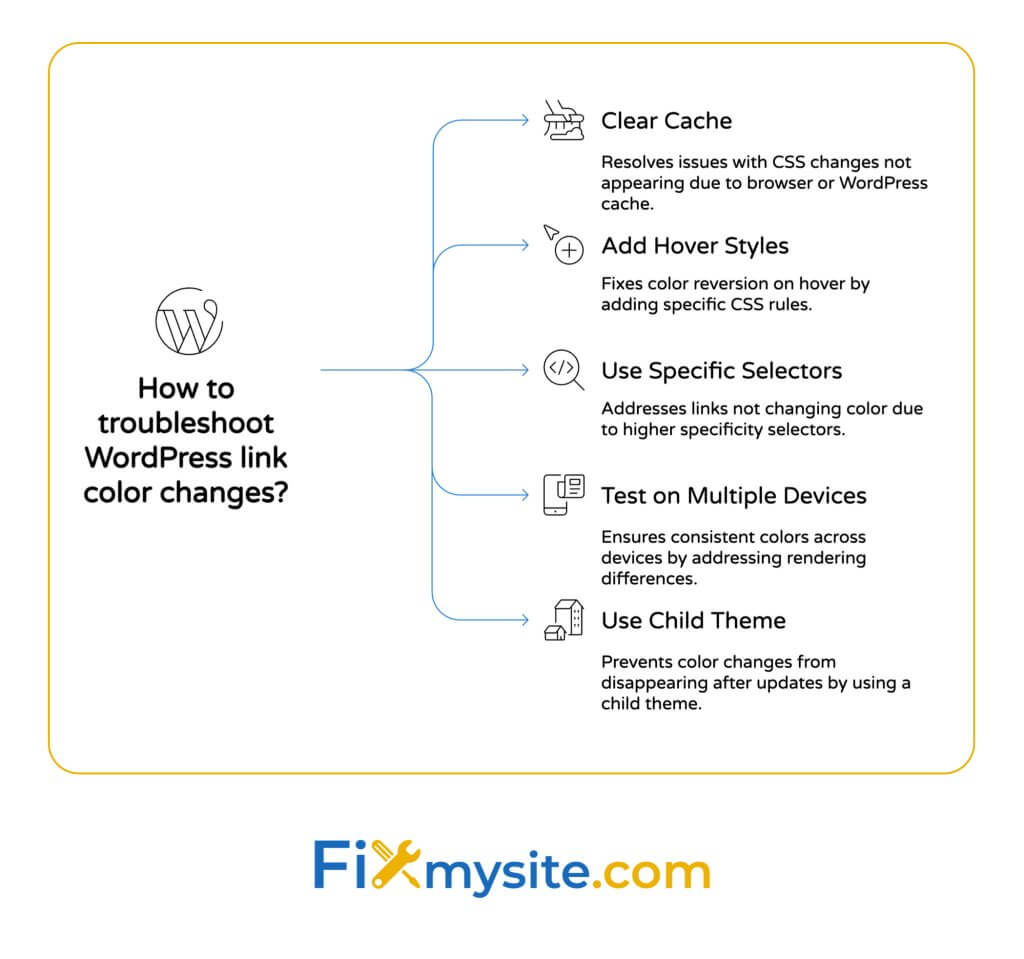
| CSS changes don’t appear | Browser cache or WordPress cache | Clear browser cache, purge WordPress caching plugins |
| Link color changes but reverts on hover | Missing hover state styles | Add specific a:hover rules to your CSS |
| Some links don’t change color | Higher specificity selectors in theme | Use more specific selectors or add !important |
| Colors look different on mobile | Device-specific rendering differences | Test on multiple devices, use standard hex colors |
| Color changes disappear after update | Changes made to parent theme files | Use a child theme or Customizer for CSS changes |
If you’re still experiencing issues after trying these solutions, the problem might be more complex. WordPress themes can have intricate CSS structures that require professional assistance to navigate.
When to Seek Professional Help
While many link color changes are straightforward, some situations call for expert assistance:
- Complex theme structures with deeply nested styles
- Conflict between theme and plugin styles
- Dynamic content with JavaScript-generated links
- Custom post types with special styling needs
- Accessibility compliance requirements
For these situations, consider seeking help from WordPress professionals. Fixmysite’s small WordPress tasks service can quickly resolve styling issues without the frustration of trial and error.

Conclusion
Changing link colors in WordPress is a powerful way to enhance your site’s branding and user experience. You now have multiple methods at your disposal. You can use the simplicity of the Customizer, the precision of targeted CSS selectors, or the convenience of block theme settings.
Remember these key takeaways:
- Block themes offer built-in link color settings through Global Styles
- Classic themes typically require CSS customization through the Customizer
- Always consider accessibility when choosing link colors
- Test your changes across different devices and browsers
- Back up your site before making significant CSS modifications
By following the methods and best practices outlined in this guide, you’ll create a more cohesive, branded experience for your WordPress site visitors through thoughtfully styled links.
Need help implementing these changes or facing a particularly challenging WordPress issue? Contact Fixmysite for professional WordPress support services. Our team specializes in customizations, troubleshooting, and optimization to keep your WordPress site running smoothly.