
We understand how overwhelming WordPress can feel, especially when you need to set up technical features like XML sitemaps. Do not worry, we are here to help you through this step by step.
WordPress has generated an XML sitemap by default since version 5.5. It sits at yourdomain.com/wp-sitemap.xml.
This built-in sitemap helps search engines find and index your content automatically. You do not need special plugins or technical knowledge to get started.
This guide walks you through finding your WordPress sitemap, understanding how it works, and using SEO plugins if you need more control. We will show you multiple methods so you can choose what works best for your site.
By the end, you will know exactly where your sitemap lives and how to submit it to Google Search Console. You will feel confident knowing search engines can properly crawl your website.
What Is an XML Sitemap in WordPress?
An XML sitemap is a file that lists all the important pages on your website. Think of it as a roadmap that guides search engines through your content.
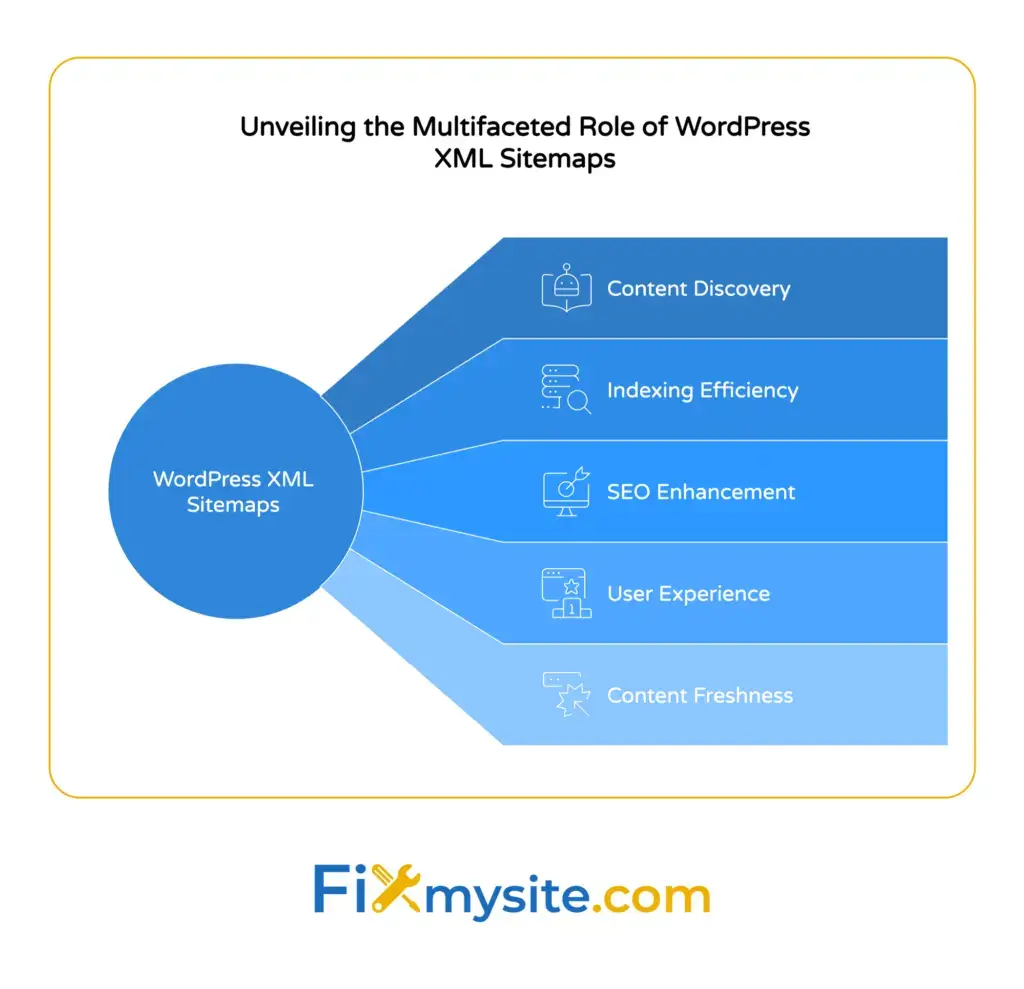
This file uses a simple format called XML that search engine bots can easily read. It tells them which pages exist, when they were last updated, and how often they change.
Your sitemap helps Google, Bing, and other search engines discover all your posts and pages. This is especially helpful if you have new content or pages that do not get many internal links.
The standard XML sitemap for WordPress appears at yourdomain.com/wp-sitemap.xml. It includes your posts, pages, custom post types, categories, and tags by default.
Search engines do not need sitemaps to find your content. But having one makes the crawling process faster and more efficient, which helps with your overall SEO efforts.
Why You Need an XML Sitemap for Your WordPress Site
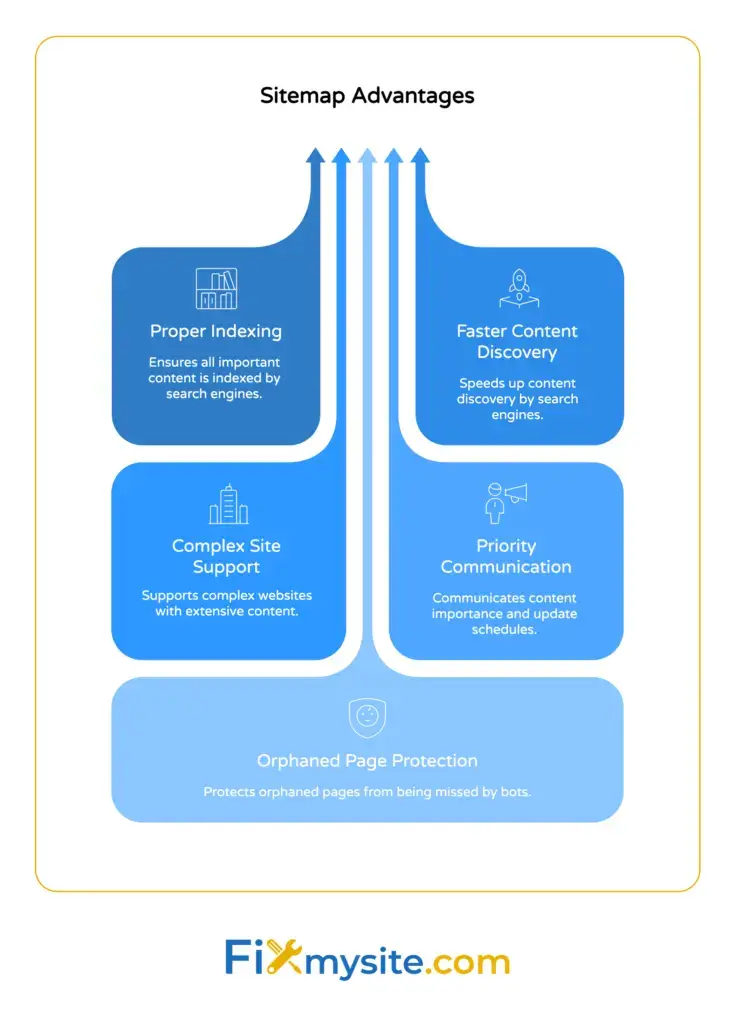
XML sitemaps give search engines a clear path to index your website properly. They reduce the chance that important pages get missed during crawling.
When you publish new content, search engines learn about it faster through your sitemap. This speeds up the time between hitting publish and appearing in search results.
Sites with complex structures benefit the most. If you have hundreds of pages or deeply nested content, a sitemap ensures nothing gets lost.
Sitemaps also communicate page priorities to search engines. They show which content matters most and how frequently it gets updated.
Without a sitemap, search engine bots rely solely on internal links to discover pages. Orphaned pages with few links might never get crawled or indexed.
Now that you understand why sitemaps matter, let’s find the one already created for your WordPress site.

How to Find Your WordPress Sitemap
Finding your WordPress sitemap takes just a few seconds. We will show you the simplest method first.
Check Your Default WordPress Sitemap URL
Open your web browser and type your domain followed by /wp-sitemap.xml. For example, if your site is example.com, visit example.com/wp-sitemap.xml.
You should see an index page listing different sitemap types. These include posts, pages, categories, and tags sitemaps.
If you see XML code or a formatted sitemap list, your default WordPress sitemap is working correctly. This means you already have a functional sitemap without any extra setup.
What to Do If You See a 404 Error
If the /wp-sitemap.xml URL shows a 404 error, your site might be running WordPress 5.4 or older. You will need to update WordPress or use a plugin to generate a sitemap.
Another possibility is that a plugin has replaced the default WordPress sitemap. SEO plugins like Yoast SEO or All in One SEO automatically override the built-in version.
Check your active plugins to see if any mention XML sitemaps in their settings. The plugin sitemap usually appears at a different URL like yourdomain.com/sitemap_index.xml.
Now that you know how to locate your sitemap, let’s look at using WordPress’s built-in option in more detail.
Method 1: Using WordPress 5.5+ Built-in Sitemap
WordPress automatically creates and updates your XML sitemap starting from version 5.5. You do not need to configure anything or install plugins.
Understanding What’s Included
The default WordPress sitemap includes posts, pages, categories, tags, and custom post types. It automatically excludes private or password-protected content.
Each sitemap type has its own URL. For example, posts appear at yourdomain.com/wp-sitemap-posts-post-1.xml.
The main sitemap index at /wp-sitemap.xml links to all these individual sitemaps. Search engines start with the index and follow links to each content type.
Limitations of the Default Sitemap
WordPress’s built-in sitemap offers limited customization options. You cannot exclude specific posts or pages without using code or plugins.
It does not include image sitemaps or video sitemaps. If you have media-heavy content, you might need additional functionality.
There are no settings in the WordPress dashboard to control the default sitemap. If you need more control, consider using a dedicated SEO plugin.
For straightforward blogs and websites, the default sitemap works perfectly fine. You can submit it to Google Search Console right away without any modifications.
If you need additional features, the next methods show how popular SEO plugins enhance sitemap functionality.
Method 2: Creating a Sitemap with Yoast SEO
Yoast SEO is one of the most popular WordPress SEO plugins. It automatically generates and manages your XML sitemap with more control than the default option.
Installing Yoast SEO
Go to your WordPress dashboard and click Plugins, then Add New. Type “Yoast SEO” in the search box.
Click Install Now next to the Yoast SEO plugin by Team Yoast. Wait for the installation to complete, then click Activate.
Once activated, you will see a new SEO menu item in your WordPress dashboard sidebar.
Enabling XML Sitemaps in Yoast
Navigate to SEO in your dashboard, then click General. Look for the Features tab at the top.
Find the XML sitemaps option and make sure the toggle switch is turned on. It should show as enabled.
Click the question mark icon next to XML sitemaps to view your sitemap URL. Yoast creates a sitemap index at yourdomain.com/sitemap_index.xml.
What Yoast Adds to Your Sitemap
Yoast SEO automatically replaces the default WordPress sitemap with its own version. This gives you much more control over what gets included.
Yoast automatically excludes non-indexable pages such as those with no-index meta robots tags from the sitemap. This keeps your sitemap clean and focused on content you want indexed.
You can control which content types appear in your sitemap. Navigate to SEO, then Search Appearance to set visibility for posts, pages, and custom post types.
The sitemap updates automatically whenever you publish, update, or delete content. You do not need to manually regenerate it.
Understanding how Yoast enhances your sitemap helps with overall WordPress SEO plugin strategy and gives you better control over search engine indexing.
Method 3: Creating a Sitemap with All in One SEO
All in One SEO (AIOSEO) provides another solid option for WordPress sitemap management. It offers similar features to Yoast with a slightly different interface.
Installing All in One SEO
From your WordPress dashboard, go to Plugins and click Add New. Search for “All in One SEO” in the plugin directory.
Install and activate the plugin by AIOSEO Team. The free version includes full XML sitemap functionality.
After activation, you will see an All in One SEO menu in your dashboard sidebar.
Configuring Your AIOSEO Sitemap
Click All in One SEO in your dashboard, then select Sitemaps. The plugin automatically enables sitemaps when you install it.
Your sitemap index appears at yourdomain.com/sitemap.xml by default. AIOSEO replaces the default WordPress sitemap with its own version.
You can customize which post types and taxonomies appear in your sitemap. Toggle options on or off for posts, pages, categories, tags, and custom content types.
Advanced AIOSEO Sitemap Features
AIOSEO lets you set custom priorities for different content types. This tells search engines which pages matter most on your site.
You can exclude specific posts or pages directly from the post editor. Scroll down to the AIOSEO settings panel and toggle “Exclude from Sitemap” when editing content.
The plugin includes support for video sitemaps and news sitemaps in the pro version. For most websites, the free version provides everything you need.
Like Yoast, AIOSEO updates your sitemap automatically when you publish or modify content. No manual regeneration required.
Many site owners choose between Yoast and AIOSEO based on interface preference. Both create reliable XML sitemaps that work well with search engines.
Method 4: Creating a Sitemap with Jetpack
Jetpack is a popular WordPress plugin that includes XML sitemap functionality among many other features. It works particularly well for WordPress.com users.
Setting Up Jetpack Sitemaps
Install and activate the Jetpack plugin from the WordPress plugin directory. Connect it to your WordPress.com account during setup.
Jetpack automatically generates an XML sitemap at yourdomain.com/sitemap.xml. You do not need to enable any settings or configure options.
The sitemap includes all public posts and pages. It excludes drafts, private content, and unpublished items automatically.
Jetpack Sitemap Characteristics
Jetpack offers fewer customization options than dedicated SEO plugins. It focuses on simplicity and automatic operation.
The sitemap updates in real-time as you publish content. There is no delay or cache to clear.
If you already use Jetpack for other features like security or backups, the built-in sitemap provides a convenient all-in-one solution. You do not need to install additional SEO plugins.
For sites that want advanced sitemap control, Yoast SEO or All in One SEO offer more options. Jetpack works best when you prefer simplicity over detailed customization.
With your sitemap created and accessible, the next important step is making sure Google knows about it.

Submitting Your Sitemap to Google Search Console
Creating a sitemap is only half the process. You need to tell Google where to find it so they can start using it to crawl your site.
Setting Up Google Search Console
Visit Google Search Console and sign in with your Google account. Click “Add Property” to add your website.
Choose either a domain property or a URL prefix property. URL prefix is simpler for most WordPress sites.
Verify ownership of your site using one of the provided methods. The HTML tag method works well with WordPress. Copy the verification code and paste it into your theme header or use an SEO plugin to add it.
Adding Your Sitemap URL
Once verified, look for Sitemaps in the left sidebar of Search Console. Click it to open the sitemaps submission page.
Enter your sitemap URL in the provided field. If you use the default WordPress sitemap, enter wp-sitemap.xml. For Yoast, use sitemap_index.xml.
Click Submit to send your sitemap to Google. You should see a success message confirming the submission.
Checking Sitemap Status
Google will process your sitemap within a few hours or days. Return to the Sitemaps section in Search Console to check the status.
You will see the number of discovered URLs and any errors Google encountered. A successful sitemap shows URLs discovered without critical errors.
If you see errors, check that your sitemap URL is correct and accessible. Make sure it returns XML code, not a 404 error.
Submitting to Google does not guarantee immediate indexing. It simply helps Google discover your pages faster as they crawl the web.
You can also submit your sitemap to Bing Webmaster Tools using the same process. More search engines means more visibility for your content.

Understanding Different Types of Sitemaps
XML sitemaps come in specialized varieties beyond the standard version. Understanding these helps if you have specific content types.
Standard XML Sitemaps
The standard sitemap lists web pages with their URLs, last modified dates, and update frequencies. This is what WordPress generates by default.
It works for most websites with regular blog posts and pages. Search engines use it to discover and index your main content.
Image Sitemaps
Image sitemaps help Google discover images on your site for image search results. They include image URLs, captions, titles, and license information.
If you run a photography site or visual blog, image sitemaps increase the chances your images appear in Google Images. Some SEO plugins include image sitemap functionality.
Video Sitemaps
Video sitemaps help search engines find and index video content. They include video titles, descriptions, durations, and thumbnail URLs.
YouTube videos embedded on your site do not need video sitemaps. But self-hosted videos benefit from having this specialized sitemap type.
News Sitemaps
News sitemaps help news websites get articles into Google News. They include publication dates, article titles, and keywords specific to news content.
Only sites approved for Google News need this specialized sitemap. Regular blogs and business sites can skip it.
Most WordPress sites do well with just a standard XML sitemap. Add specialized sitemaps only if your content type specifically benefits from them.
Troubleshooting Common XML Sitemap Issues
Sometimes sitemaps do not work as expected. We will help you identify and fix the most common problems.
Sitemap Returns a 404 Error
If your sitemap URL shows a 404 error, check your WordPress version first. Versions older than 5.5 do not include automatic sitemaps.
Flush your permalinks by going to Settings, then Permalinks in your dashboard. Click Save Changes without changing anything. This refreshes your URL structure.
If you use an SEO plugin, make sure XML sitemaps are enabled in the plugin settings. Check that the plugin is active and functioning properly.
Sitemap Shows Old or Missing Content
WordPress and most SEO plugins update sitemaps automatically. If you see old content, try clearing your site cache if you use a caching plugin.
Some aggressive caching setups cache XML files. Exclude sitemap URLs from caching in your caching plugin settings.
Check that the missing content is set to public and published. Draft posts and private pages do not appear in sitemaps by design.
Google Search Console Shows Errors
Review the specific errors in Search Console. Common issues include server errors, timeout issues, or formatting problems.
Make sure your sitemap is accessible to visitors without logging in. Test by visiting the sitemap URL in an incognito browser window.
If you see “Couldn’t fetch” errors, your server might be blocking Googlebot. Check with your hosting provider about server-level restrictions.
Fixing technical issues early prevents problems with how search engines crawl your site. If you need help with small WordPress tasks like troubleshooting sitemaps, professional support can save you time and frustration.
Maintaining Your XML Sitemap
XML sitemaps require minimal maintenance once set up properly. But a few regular checks keep everything running smoothly.
Visit your sitemap URL monthly to confirm it still loads correctly. This quick check catches potential issues before they affect search engine crawling.
Monitor Google Search Console for sitemap errors or warnings. Address any issues Google reports promptly to maintain good crawling access.
If you change SEO plugins or site structure significantly, resubmit your sitemap to Search Console. This helps Google discover the changes faster.
Keep your WordPress core and plugins updated. Updates often include improvements to sitemap generation and compatibility. For ongoing WordPress maintenance and care, consider a plan that includes regular updates and monitoring.
Most of the time, your sitemap works quietly in the background without needing attention. The automatic updates built into WordPress and SEO plugins handle the day-to-day changes for you.
Next Steps for Your WordPress Site
You now have a working XML sitemap helping search engines discover your content. This is an important foundation for your site’s search visibility.
Your sitemap works best as part of a complete SEO strategy. Consider reviewing other important elements like page titles, meta descriptions, and site speed.
If you want to go deeper, check out our guide on the complete WordPress SEO checklist for a full overview of optimization steps.
Take a moment to verify your sitemap is accessible and submitted to Google Search Console. This simple check confirms everything is working as expected.
If you run into technical issues or need help with WordPress optimization, you do not have to figure it out alone. We are here to support you through any challenges your site faces.
Need help with WordPress speed optimization or other technical improvements? Our team handles the technical details so you can focus on running your business. Get WordPress support whenever you need it.