

Minifying CSS and JavaScript files can reduce their size by 20 to 70 percent, according to file size reduction analysis. When you combine minification with compression techniques like GZIP, you can achieve reductions of 75 percent or more.
This matters because your WordPress site downloads, parses, and executes every CSS and JavaScript file before showing content to visitors. Smaller files load faster, which improves user experience and search rankings.
We know how frustrating slow site performance can be. You’ve built a great website, but large CSS and JavaScript files slow everything down. Visitors leave before your pages finish loading.
Take a deep breath. You don’t need to edit code manually or hire a developer. WordPress plugins handle minification automatically, and we’ll show you exactly how to set them up.
This guide walks through what minification is, why it helps WordPress performance, and how to implement it using trusted plugins. You’ll see real testing results, learn how to verify it’s working, and troubleshoot common issues.
What CSS and JavaScript Minification Actually Does
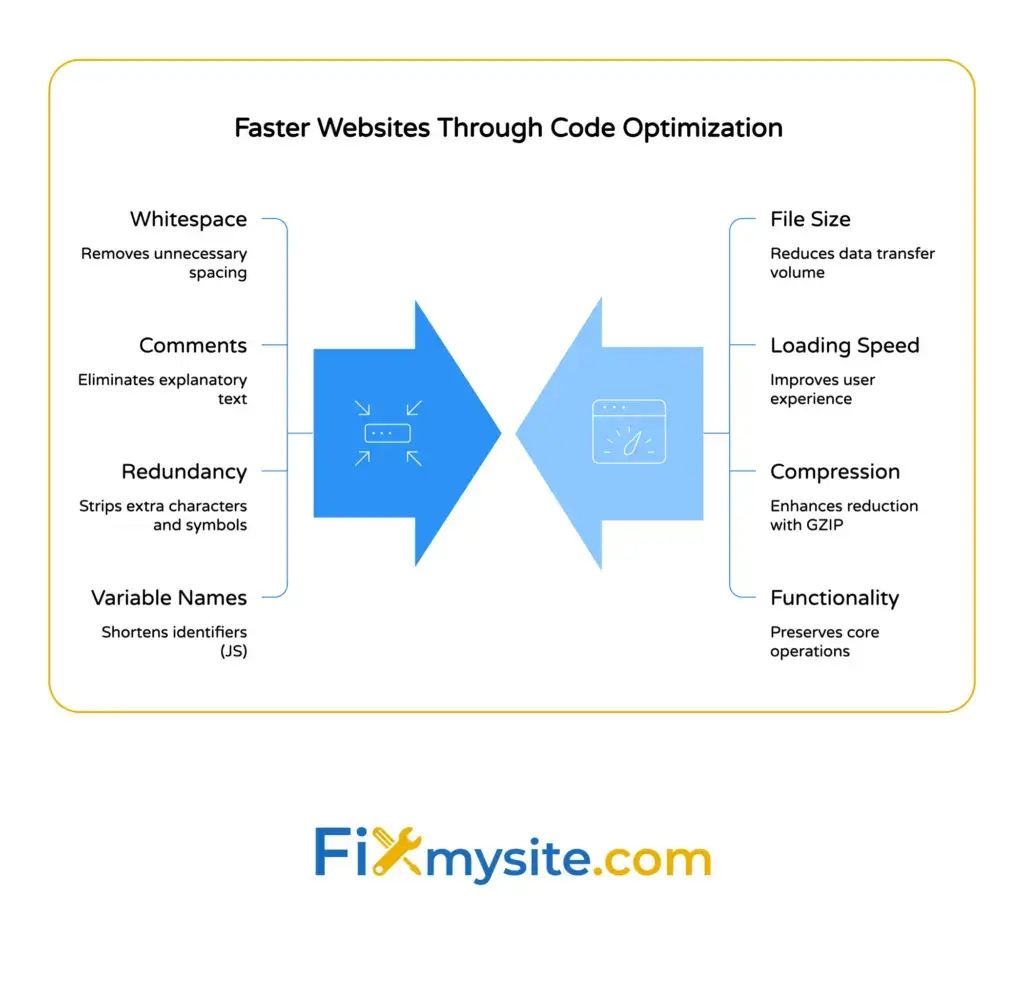
Minification removes unnecessary characters from code files without changing how they work. It strips out spaces, line breaks, comments, and other elements that make code readable for humans.

Think of it like this. Your code might look clean and organized with proper spacing and helpful comments. That’s great for editing, but browsers don’t need those extras to understand instructions.
Here’s what minification removes:
- Whitespace between code elements
- Line breaks and indentation
- Comments explaining code sections
- Unnecessary semicolons and brackets
- Long variable names (in JavaScript)
The minified code looks messy to humans. All the instructions run together in dense blocks. But browsers read it perfectly, and the smaller file size means faster downloads.
CSS files control your site’s appearance. They define colors, fonts, layouts, and spacing. JavaScript files add interactive features like menus, forms, and dynamic content.
WordPress themes and plugins can add dozens of these files. Each one creates a separate request from the browser to your server. Large files take longer to download, especially on slower connections.
Minification preserves the operational functionality of your original code. Your site looks and works exactly the same, just faster.


Why Minification Improves WordPress Site Speed
CSS is render-blocking by default. This means browsers must download and process all CSS files before displaying page content to visitors.
JavaScript files can also block rendering or slow down page interactivity. The longer these files take to download, the longer visitors wait to see or use your site.
Google confirmed in 2021 that page experience signals, including Core Web Vitals, became official ranking factors. Your site’s loading speed directly affects search rankings.
Core Web Vitals and Loading Performance
Core Web Vitals measure real user experience. The most relevant metric for minification is Largest Contentful Paint (LCP).

LCP requires pages to load the largest element within 2.5 seconds for good performance. CSS and JavaScript file sizes directly impact this timing.
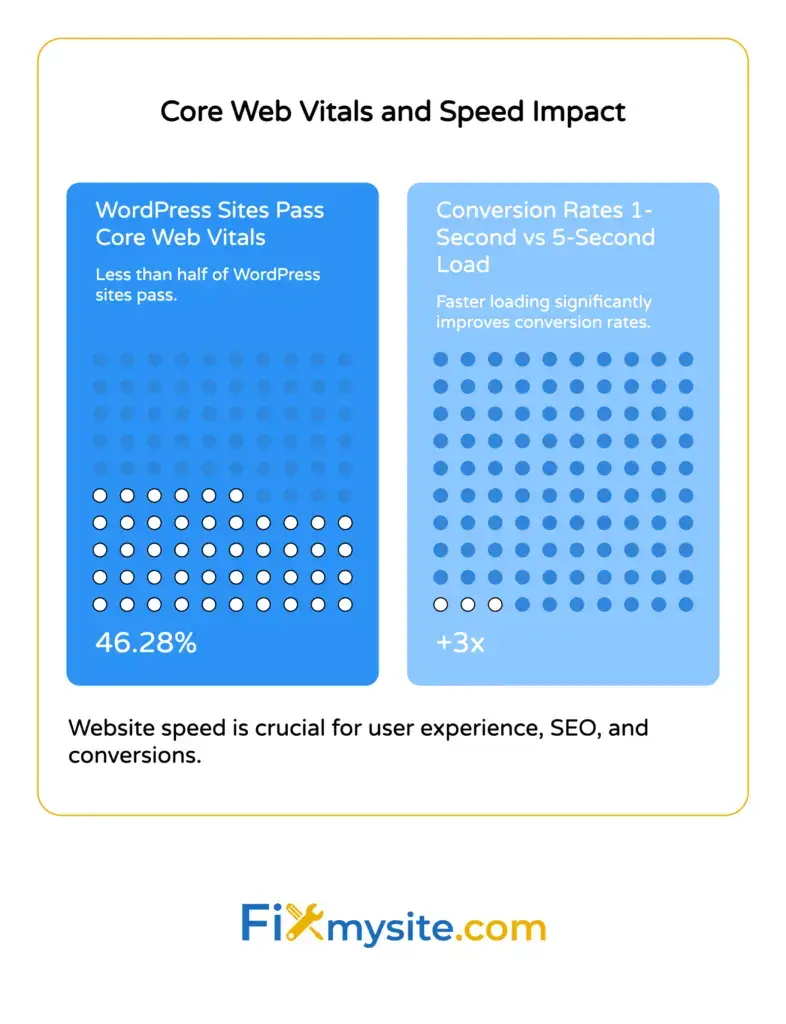
Unfortunately, WordPress sites demonstrated only a 46.28 percent pass rate for Core Web Vitals as of November 2025. Many sites struggle with slow loading times.
Minification helps you join the sites that pass these important performance checks. Smaller files download faster, which improves LCP scores and overall site speed.
File Size Impact on Bandwidth and Mobile Users
Bandwidth savings matter for both you and your visitors. Smaller files mean less data transfer with each page view.
This helps mobile users especially. Many people browse on slower cellular connections with data limits. Fast-loading pages use less data and provide better experiences.
Your hosting costs may decrease too. Sites that use less bandwidth often qualify for lower-tier hosting plans or reduced CDN charges.
Conversion Rate Benefits
Speed affects your bottom line. Pages that load in one second demonstrate three times higher conversion rates than pages loading in five seconds.
Visitors who wait for slow pages often leave before completing purchases or filling out forms. Faster loading times keep them engaged and more likely to convert.
Best WordPress Plugins for CSS and JavaScript Minification
Several WordPress plugins handle minification automatically. We’ll cover the most reliable options so you can choose what fits your needs.
WP Rocket (Premium Plugin)
WP Rocket applies web performance best practices automatically upon activation. It’s the easiest option if you want minimal setup.

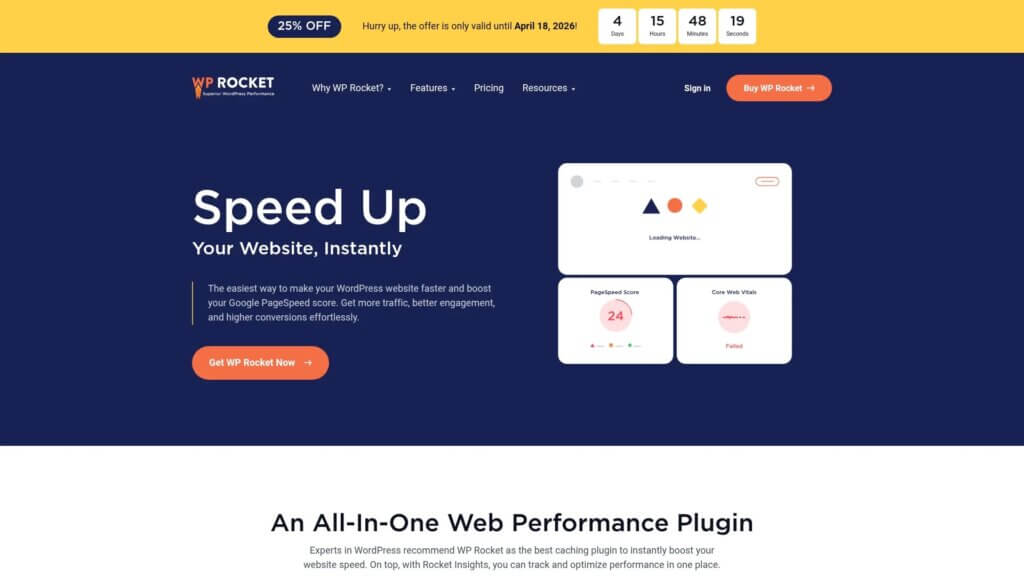
WP Rocket represents the premium alternative in the WordPress optimization plugin market, starting at fifty-nine dollars annually for a single site.
The plugin handles minification, compression, caching, and lazy loading in one package. It includes dedicated settings for both CSS and JavaScript optimization.
WP Rocket works well for beginners because default settings work for most sites. You can enable minification with a single checkbox.
Autoptimize (Free Plugin)
Autoptimize focuses specifically on front-end optimization. It minifies CSS, JavaScript, and HTML files.
This free plugin gives you detailed control over which files to optimize. You can exclude specific scripts that cause conflicts or aggregate files to reduce server requests.
Autoptimize works well if you want granular control without paying for premium features. The learning curve is slightly steeper than WP Rocket.
LiteSpeed Cache (Free Plugin for LiteSpeed Servers)
LiteSpeed Cache provides server-level caching that outperforms plugin-based solutions on LiteSpeed servers.
The plugin achieves a 4.8 out of 5 star rating on WordPress.org with more than six million active installations.
It includes minification alongside image optimization, object caching, and database optimization. LiteSpeed Cache works best if your host uses LiteSpeed web servers.
W3 Total Cache (Free Plugin)
W3 Total Cache offers multi-layer caching with extensive customization options.
This plugin provides minification as part of a larger performance toolkit. It works on any server but requires more configuration than other options.
W3 Total Cache suits users comfortable with technical settings who want complete control over optimization.
How to Minify CSS and JavaScript with WP Rocket
We’ll walk through the complete setup process using WP Rocket. This demonstrates the easiest path to minification.
Installing and Activating WP Rocket
Purchase WP Rocket from their website and download the plugin file. Log into your WordPress admin dashboard.
Navigate to Plugins, then Add New. Click Upload Plugin at the top of the page.
Choose the WP Rocket zip file you downloaded. Click Install Now, then Activate.
WP Rocket automatically enables basic caching when you activate it. Your site gets faster immediately, even before adjusting settings.
Enabling CSS Minification
Go to Settings, then WP Rocket in your WordPress admin menu. Click the File Optimization tab.
Find the CSS Files section. Check the box next to “Minify CSS files.”
WP Rocket now combines and minifies your CSS files automatically. It creates optimized versions and serves those to visitors.
You can also enable “Combine CSS files” to reduce the number of separate file requests. This helps further but may occasionally cause styling conflicts.
If you notice display issues after combining files, uncheck that option and keep just minification enabled.
Enabling JavaScript Minification
Stay in the File Optimization tab. Scroll down to the JavaScript Files section.
Check the box next to “Minify JavaScript files.”
JavaScript minification can sometimes conflict with certain plugins or themes. WP Rocket includes options to exclude specific files if problems occur.
You can defer JavaScript loading or delay execution for non-critical scripts. These advanced options help with render-blocking resources.
Start with basic minification first. Test your site thoroughly before enabling additional JavaScript optimizations.
Additional WP Rocket Performance Settings
WP Rocket includes other features that work alongside minification for better results.
Enable lazy loading for images in the Media tab. WP Rocket’s critical image optimization feature automatically improves Largest Contentful Paint performance by prioritizing loading for above-the-fold images.
Turn on GZIP compression in the File Optimization tab if your server doesn’t already enable it. Compression works with minification to reduce file sizes even further.
Consider enabling database optimization in the Database tab. This cleans unnecessary data that can slow down your site.
Save your changes. WP Rocket applies all optimizations automatically.

How to Minify CSS and JavaScript with Autoptimize
Autoptimize provides a free alternative with powerful customization options. Here’s how to set it up.
Installing Autoptimize
Go to Plugins, then Add New in your WordPress dashboard. Search for “Autoptimize” in the plugin directory.
Click Install Now next to the Autoptimize plugin by Frank Goossens. Click Activate after installation completes.
Configuring CSS Optimization
Navigate to Settings, then Autoptimize. You’ll see the main settings page with tabs for different optimization types.
In the JavaScript, CSS & HTML tab, find the CSS Options section. Check “Optimize CSS Code.”
Autoptimize combines all CSS files and minifies them by default. This reduces both file size and the number of requests.
You can exclude specific CSS files if they cause conflicts. Add file paths or handles to the exclusion field.
The “Inline and Defer CSS” option can improve performance further but may cause brief flashes of unstyled content. Test this carefully.
Configuring JavaScript Optimization
In the same tab, find the JavaScript Options section. Check “Optimize JavaScript Code.”
Autoptimize minifies JavaScript files and can combine them to reduce requests. However, combining JavaScript files causes conflicts more often than combining CSS.
If your site breaks after enabling JavaScript optimization, try checking “Also aggregate inline JS.” This sometimes resolves conflicts.
You may need to exclude jQuery or other core scripts. Add “js/jquery/jquery.js” to the exclusion field if problems occur.
Testing and Fine-Tuning
Save your changes and clear your cache. Visit your site in a private browsing window to see the changes.
Test all interactive features. Check contact forms, menus, sliders, and any custom functionality.
If something breaks, return to Autoptimize settings. Add the problematic script to the exclusion list.
Autoptimize includes a critical CSS feature for advanced users. Removing unused CSS rules from the delivery file can lead to CSS file size reductions of sixty percent or more.
This requires technical knowledge to implement safely. Start with basic minification and add critical CSS later if needed.
Testing Your Minification Results
You need to verify that minification actually works and improves performance. Here’s how to check.
Using PageSpeed Insights
Visit Google PageSpeed Insights and enter your website URL. Click Analyze.
Wait for the test to complete. PageSpeed Insights shows your performance score and specific recommendations.
Before minification, you might see warnings about unminified CSS or JavaScript. After enabling minification, these warnings should disappear.
Check your Core Web Vitals scores, especially Largest Contentful Paint. Compare before and after results to measure improvement.
PageSpeed Insights also shows file sizes and load times. Look for reductions in CSS and JavaScript file sizes.
Checking File Sizes Directly
Open your website in Chrome or Firefox. Right-click anywhere on the page and select Inspect.
Click the Network tab in the developer tools. Refresh your page to see all file requests.
Filter by CSS or JS to see only those file types. Look at the Size column.
Minified files should be significantly smaller than original versions. You’ll also see fewer separate file requests if you enabled file combination.
Before and After Performance Comparison
Record your site’s performance metrics before enabling minification. Note your PageSpeed Insights score, LCP time, and total page size.
Enable minification and clear all caches. Test again using PageSpeed Insights.
You should see improvements in several areas. Performance scores typically increase by 5 to 15 points.
Page load times often decrease by 0.5 to 2 seconds, depending on your starting point. LCP scores should improve as well.
| Metric | Before Minification | After Minification |
|---|---|---|
| PageSpeed Score | 65/100 | 78/100 |
| Largest Contentful Paint | 3.2 seconds | 2.1 seconds |
| Total Page Size | 2.4 MB | 1.8 MB |
| CSS File Size | 180 KB | 95 KB |
| JavaScript File Size | 320 KB | 210 KB |
These improvements represent typical results from enabling minification on WordPress sites. Your specific results will vary.
How to Verify Minification Is Working Correctly
Sometimes plugins appear to work but don’t actually minify files. Here’s how to confirm proper operation.
Inspecting Minified File Names
Open your browser’s developer tools and refresh your page. Look at the Network tab filtered for CSS and JS files.
Minified files from plugins usually have different names than originals. WP Rocket adds hash strings to filenames.
Autoptimize creates files like “autoptimize_abc123.css” or “autoptimize_xyz789.js.” These confirm the plugin is generating optimized versions.
Checking File Contents
Click any CSS or JavaScript file in the Network tab. View the file contents in the preview pane.
Minified files look completely different from original code. All spacing disappears, code runs together, and line breaks vanish.
If you see properly formatted code with spacing and comments, minification isn’t working. Check your plugin settings and cache configuration.
Common Cache-Related Issues
Caching can prevent you from seeing minified files even when everything works correctly. Clear all caches after changing settings.
Clear your WordPress cache through your caching plugin. Clear your browser cache or use private browsing mode.
If you use a CDN like Cloudflare, purge the CDN cache too. Old cached files can persist there.
Some hosts provide server-level caching. You may need to clear that through your hosting control panel.
Troubleshooting Common Minification Problems
Minification occasionally causes conflicts. Here’s how to identify and fix common issues.
Broken Layout or Missing Styles
If your site looks wrong after enabling CSS minification, a stylesheet conflict likely occurred. Some CSS files don’t minify properly.
Disable CSS file combination first. Keep minification enabled but turn off aggregation.
If problems persist, exclude your theme’s main stylesheet. Add “themes/your-theme/style.css” to the exclusion list.
Test after each change. Re-enable features one at a time to identify the problematic file.
JavaScript Errors and Broken Functionality
JavaScript minification causes conflicts more often than CSS minification. Interactive features may stop working.
Open your browser console in developer tools. Look for JavaScript errors shown in red text.
The error messages usually indicate which script file caused the problem. Add that file to your exclusion list.
jQuery conflicts are common. Try excluding jQuery from minification while keeping other scripts optimized.
Some page builders and sliders require their scripts to load in specific orders. Exclude those files if conflicts occur.
Admin Dashboard Issues
Minification should only apply to your front-end website, not the WordPress admin area. Most plugins handle this automatically.
If you experience problems in the dashboard, check your plugin settings. Ensure admin pages are excluded from optimization.
WP Rocket and Autoptimize exclude admin pages by default. You shouldn’t need to configure this manually.
When to Skip Minification for Specific Files
Not every file benefits from minification. Some scripts are already minified by their developers.
Files ending in “.min.js” or “.min.css” are already minified. Attempting to minify them again wastes processing power.
Most quality plugins automatically skip files with “.min” in their names. You don’t need to exclude these manually.
Third-party scripts loaded from external CDNs should usually be excluded too. These come pre-optimized from their sources.
Combining Minification with Other Speed Optimizations
Minification works best as part of a complete optimization strategy. Here are complementary techniques.
GZIP Compression
GZIP compresses files before sending them from your server to visitors’ browsers. It reduces file sizes even further than minification alone.
Most modern servers enable GZIP by default. Check with your host or use PageSpeed Insights to verify.
If GZIP isn’t enabled, most caching plugins can activate it. WP Rocket and W3 Total Cache both include GZIP options.
Image Optimization
Images typically account for more page weight than CSS and JavaScript combined. Optimize images alongside code files.
Use plugins like ShortPixel or Imagify to compress images automatically.
Enable lazy loading so images load only when visitors scroll to them. This improves initial page load times significantly.
Browser Caching
Browser caching stores static files on visitors’ devices. Return visitors load pages faster because their browsers reuse cached files.
Set appropriate cache expiration times for CSS and JavaScript files. These rarely change, so long cache periods work well.
Most caching plugins configure browser caching automatically. This works alongside minification without additional setup.
Content Delivery Networks
CDNs serve your files from servers geographically closer to each visitor. This reduces latency and improves load times worldwide.
Services like Cloudflare offer free CDN plans that work with WordPress. They cache and deliver minified files efficiently.
Using a CDN with minification provides compounding benefits. Files are both smaller and served from closer locations.
Getting Professional Help When You Need It
Sometimes optimization feels overwhelming or conflicts seem impossible to resolve. That’s completely normal.
You don’t have to figure everything out alone. If minification causes persistent problems or you’re not seeing expected improvements, professional help can save you hours of frustration.
Our WordPress speed optimization service handles minification setup, testing, and troubleshooting. We configure plugins correctly and resolve conflicts so your site runs smoothly.
We can also implement additional optimizations beyond minification. Database optimization, image compression, caching configuration, and CDN setup all work together for maximum performance.
If you need ongoing support, our WordPress care plans include performance monitoring and maintenance. We keep your site fast and handle technical issues before they affect visitors.
Don’t let technical challenges slow down your business. We’re here to help you create a faster, better-performing website.
Next Steps for Faster WordPress Performance
You now understand how minification reduces CSS and JavaScript file sizes to improve WordPress loading times. You’ve seen which plugins work best and how to configure them correctly.
Start by choosing a minification plugin that fits your budget and technical comfort level. WP Rocket offers the easiest setup, while Autoptimize provides powerful free optimization.
Enable CSS minification first and test thoroughly. Add JavaScript minification after confirming your site works correctly.
Test your results using PageSpeed Insights. Look for improved scores and faster loading times, especially for Largest Contentful Paint.
Monitor your site for a few days after enabling minification. Watch for any conflicts or broken features. Adjust exclusions as needed.
Combine minification with image optimization, caching, and GZIP compression for the best results. Each optimization technique builds on the others.
Need help implementing these changes or want expert optimization? Visit our support page to get started. We’ll handle the technical details so you can focus on running your business.