

Plugin updates broke your site? You need to rollback WordPress plugin updates immediately to restore functionality. The fastest method is using WP Rollback, a free plugin that lets you downgrade any WordPress.org plugin to a previous version in under 60 seconds. Install WP Rollback from your WordPress dashboard, navigate to the problematic plugin, click “Rollback,” select your target version, and confirm. Done.
But speed isn’t everything. You need safety too.
That panic when your site goes blank after a routine plugin update? We get it. You just wanted to keep things secure and updated, and now everything’s broken. Take a breath. You’re in the right place, and we’re going to fix this together using four proven methods. Whether you prefer automated solutions or hands-on control, we’ll guide you through each option with clear steps and safety checkpoints.
This guide covers complete rollback procedures including automated plugin methods, manual FTP approaches, staging site testing, and theme rollbacks. You’ll understand when to rollback, how to protect your data, and which method suits your comfort level best. By the end, you’ll confidently handle plugin conflicts without losing sleep.
When and Why You Need to Rollback WordPress Plugin Updates
Not every plugin update improves your site. Sometimes they break it.

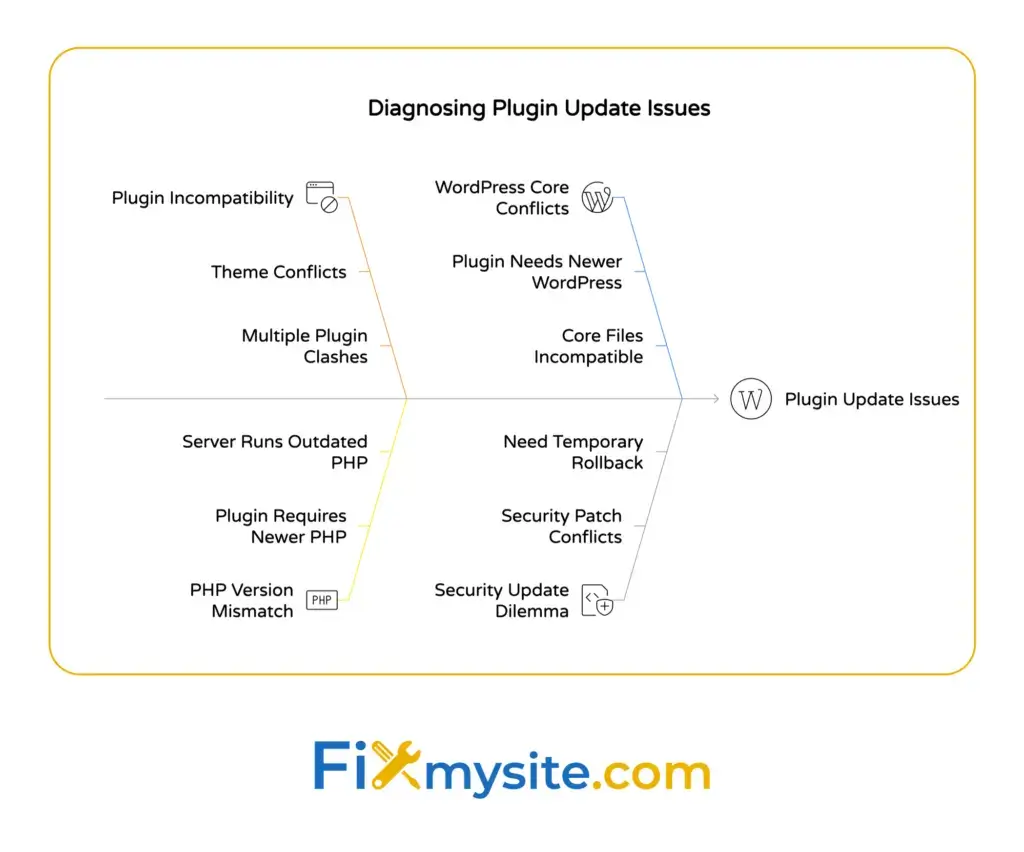
Plugin incompatibility issues are the primary reason for rolling back updates. Your site was working perfectly, you ran updates, and suddenly you’re staring at error messages or broken features. This happens more often than you’d think.
Common triggers include conflicts between your theme and updated plugins, compatibility problems between multiple plugins, or issues with your PHP version. You might see white screens, broken layouts, missing functionality, or error messages flooding your dashboard.
Here’s when you should consider a plugin rollback:
- Your site displays critical errors immediately after updating
- Essential features stop working (contact forms, checkout pages, member areas)
- Your site speed drops significantly after an update
- You notice broken layouts or missing design elements
- Admin dashboard becomes inaccessible or unresponsive
Security updates complicate this decision. Sometimes you need to temporarily rollback a security patch because it conflicts with your setup. In these cases, speed matters. Restore functionality first, then work with the plugin developer or your website repair service to find a permanent solution.
The good news? WordPress.org maintains complete version history for every plugin in their repository. This makes rolling back straightforward when you know the right method. You’re never locked into a broken version.
Before we jump into rollback methods, you need to understand one critical safety step.
Important: Backup Your Site Before Rolling Back
Never rollback a plugin without a current backup. Ever.
This isn’t optional caution. It’s mandatory protection. Manual downgrades demand careful handling to avoid breaking the site, making preliminary backups essential. Even automated rollback tools can occasionally cause problems, especially if your database changed during the update.
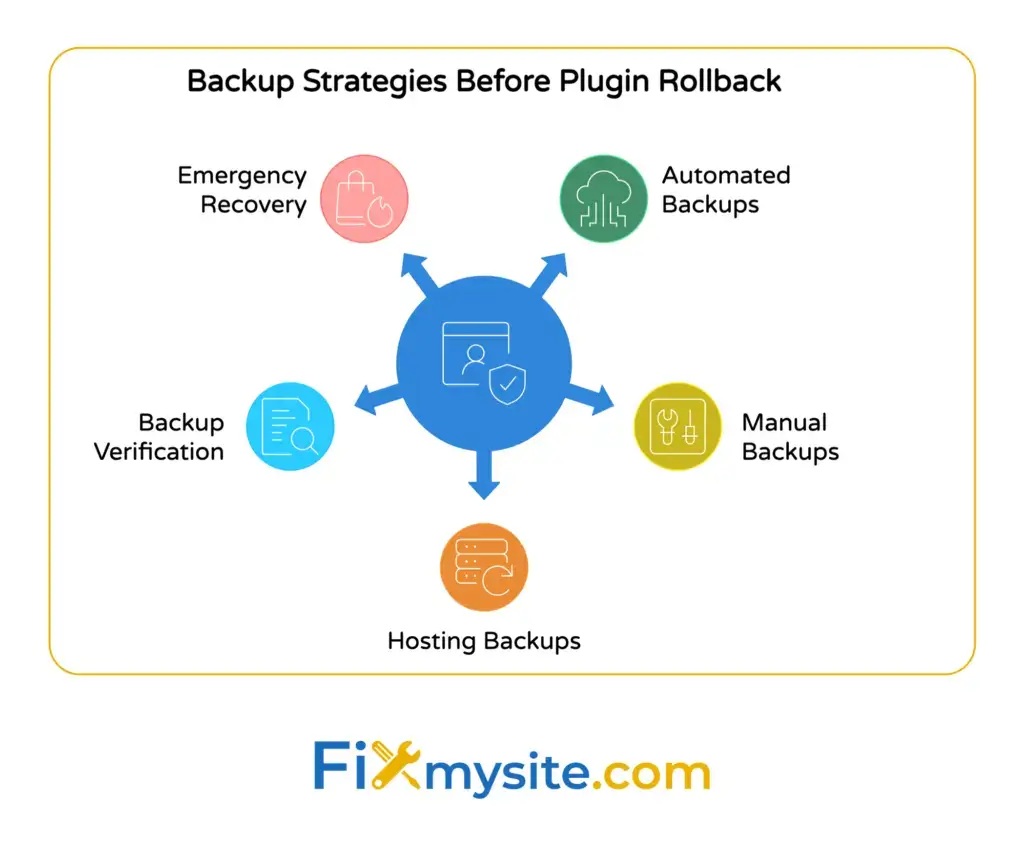
Here’s what a complete backup includes:
- Your entire WordPress database (posts, pages, settings, user data)
- All files in your wp-content folder (themes, plugins, uploads)
- Your wp-config.php file (database connection settings)
Your hosting provider might offer automatic backups, but don’t rely solely on those. Create a fresh backup right now, before touching anything. This gives you a safety net if the rollback causes unexpected issues.
Quick Backup Methods
Most backup plugins let you create on-demand backups in minutes. Popular options include UpdraftPlus, BackupBuddy, and BlogVault. These tools compress your site into downloadable files you can restore if needed.
For manual backups, access your hosting control panel. Download your wp-content folder via FTP, then export your database through phpMyAdmin. Store these files somewhere safe, not on your web server.
If your site is completely broken and you can’t access the dashboard, contact your hosting support. They can often restore from their server backups or help you access files directly.
Test Your Backup
Having a backup file isn’t enough. You need to verify it works.
Download your backup and check the file size. A complete WordPress site backup typically ranges from 50MB to several gigabytes depending on your media library. Suspiciously small files indicate incomplete backups.
Some backup plugins include verification tools that test backup integrity. Use them. A corrupted backup discovered during an emergency is worse than no backup at all.
Now you’re protected. Let’s restore your site functionality.


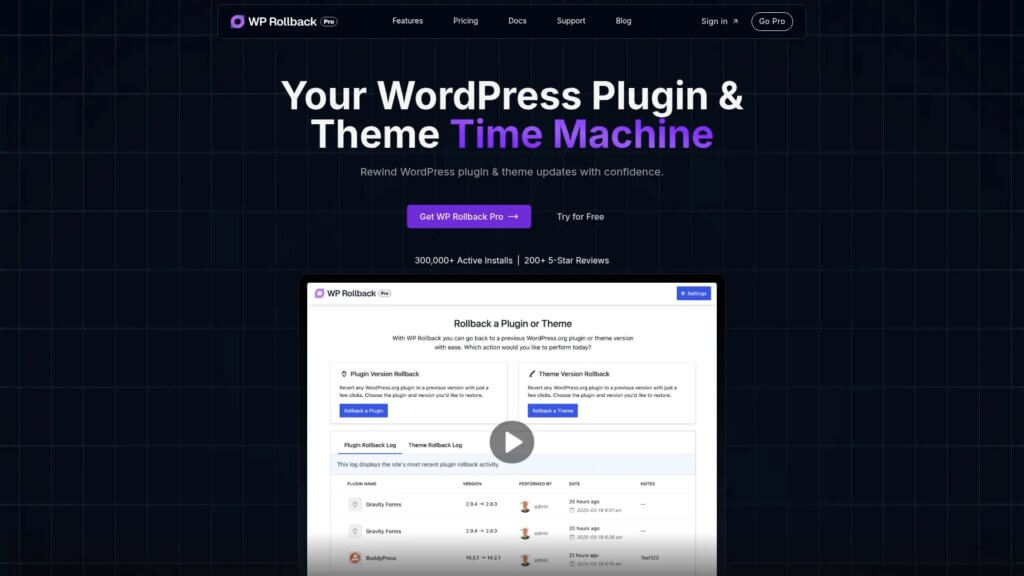
Method 1: Using WP Rollback Plugin (Recommended)
WP Rollback is the fastest, safest way to downgrade WordPress plugins. Period.
The WP Rollback plugin integrates directly into the WordPress dashboard to facilitate plugin downgrades. No FTP knowledge required. No manual file management. Just a few clicks and you’re back to a working version.
This method works exclusively with plugins from the WordPress.org repository. Premium plugins from third-party marketplaces require different approaches, which we’ll cover later.
Step 1: Install WP Rollback
Navigate to Plugins → Add New in your WordPress dashboard. Search for “WP Rollback” and install the plugin by WordImpress. Click “Activate” immediately after installation.

The plugin adds rollback functionality to every installed plugin from WordPress.org. You’ll see a new “Rollback” link appear beneath each plugin name on your Installed Plugins page.
Step 2: Select Your Target Plugin
Go to Plugins → Installed Plugins. Find the problematic plugin that’s causing issues after its recent update.
Look for the “Rollback” link directly under the plugin name. It appears next to “Deactivate” and “Settings” links. Click it.
You’ll see a screen showing all available previous versions for that plugin. WP Rollback pulls this information directly from the WordPress.org repository, ensuring you get legitimate, unmodified versions.
Step 3: Choose Your Version
Pick the version you want to install. If you’re unsure which version to choose, select the one immediately before the current version. This is usually the safest bet.
Check the release date next to each version number. If your problems started yesterday, choose the version from last week or earlier. The version history shows you exactly when each release happened.
Click the “Rollback” button next to your chosen version. WordPress will display a confirmation screen warning you about the rollback process.
Step 4: Confirm and Complete Rollback
Read the warning message carefully. WP Rollback will deactivate the current plugin version, delete it, download your selected version, and activate it automatically.
Click “Rollback” to confirm. The process typically takes 10-30 seconds depending on plugin size and your internet connection speed.
You’ll see a success message when the rollback completes. WordPress automatically activates the previous version, so your site should immediately reflect the change.
Test your site functionality right away. Check the specific features that were broken. Browse your pages. Verify everything works as expected.
When WP Rollback Won’t Work
This method has limitations. WP Rollback only works with plugins from WordPress.org repository. Premium plugins purchased from CodeCanyon, theme developers, or independent vendors aren’t available through WordPress.org.
Additionally, if your site is completely broken and you can’t access the dashboard, you’ll need to use manual FTP methods instead. We’ll cover those next.
Method 2: Manual Rollback via FTP or SFTP
Can’t access your WordPress dashboard? FTP lets you rollback plugins directly through your server files.
This method requires FTP credentials from your hosting provider and basic file management skills. Don’t worry if this sounds technical. We’ll walk through every step with beginner-friendly instructions.
Step 1: Download the Previous Plugin Version
Visit the WordPress.org plugin repository at wordpress.org/plugins. Use the search box to find your problematic plugin by name.
Click on the plugin to open its detail page. Look for the “Advanced View” link in the right sidebar. Click it to reveal the complete version history.
Find the “Previous Versions” dropdown menu. Select the version you need (typically the one before the current release). Click “Download” to save the plugin ZIP file to your computer.
Keep this file somewhere accessible. You’ll upload it to your server in a moment.
Step 2: Connect to Your Site via FTP
Open your FTP client. Popular free options include FileZilla (Windows, Mac, Linux) and Cyberduck (Mac, Windows).
Enter your FTP credentials:
- Host: Usually ftp.yourdomain.com or your server IP address
- Username: Your FTP username from hosting control panel
- Password: Your FTP password
- Port: Usually 21 for FTP or 22 for SFTP
Click “Connect” or “Quick Connect.” Your FTP client will display your server files in a file browser interface. If you see folders like wp-admin, wp-content, and wp-includes, you’re in the right place.
Step 3: Backup and Delete Current Plugin
Navigate to wp-content/plugins/ in your FTP client. This folder contains all installed plugins, each in its own subdirectory.
Find the folder for your problematic plugin. Right-click it and select “Download” to save a backup copy to your computer. This protects you if something goes wrong.
After downloading, right-click the folder again and select “Delete.” Confirm the deletion. This removes the current (broken) version from your server.
Step 4: Upload Previous Version
Extract the ZIP file you downloaded from WordPress.org. Your computer’s built-in extraction tool should work fine. You’ll get a folder containing the plugin files.
In your FTP client, make sure you’re still in the wp-content/plugins/ directory. Drag the extracted plugin folder from your computer into this directory.
Wait for the upload to complete. Larger plugins might take a few minutes. Your FTP client will show upload progress.
Once finished, the previous plugin version now lives on your server, replacing the broken update.
Step 5: Activate and Test
Log into your WordPress dashboard. Navigate to Plugins → Installed Plugins. You’ll see your rolled-back plugin listed as inactive (unless it was a must-use plugin).
Click “Activate” under the plugin name. WordPress will enable the previous version immediately.
Test your site thoroughly. Check all functionality that was broken. Browse different pages. Verify forms, shopping carts, or other critical features work correctly.
Clear your site cache if you’re using caching plugins or server-level caching. Sometimes cached versions can make it seem like changes haven’t taken effect.
This manual FTP method works for any plugin, including premium plugins not available through WordPress.org. Just download the previous version from the plugin developer instead of the WordPress repository.
Method 3: Using Backup Plugin Restore
Got a recent backup? Restoring it might be your fastest path to recovery.
This method works when you have a backup from before the problematic plugin update. Instead of rolling back just the plugin, you restore your entire site to its previous state. It’s nuclear, but sometimes necessary.
Partial Restore Option
Advanced backup plugins like BlogVault offer selective restore features. You can restore just the plugins directory or even a single plugin folder without affecting your content, database, or theme.
This “partial restore” approach gives you surgical precision. You roll back the broken plugin while keeping everything else current, including recent posts, comments, or orders.
Log into your backup plugin dashboard. Look for “Restore” or “Partial Restore” options. Select the wp-content/plugins directory or specific plugin folder you need to restore.
Choose your restore point, ideally from right before you ran the plugin update. Confirm the restore. The process typically takes 5-15 minutes depending on file sizes.
Full Site Restore
If partial restore isn’t available, full site restoration works too. Just understand that you’ll lose any content changes made after the backup date.
This means recent blog posts, comments, orders, or user registrations will disappear. Only use full restore if you haven’t made important changes since your last backup.
Access your backup plugin (UpdraftPlus, BackupBuddy, etc.). Find the backup created before your plugin update. Click “Restore” and select which components to restore: files, database, or both.
For plugin rollbacks, you typically need both files and database. Some plugins store settings in the database, and mismatched versions can cause errors.
Wait for the restoration to complete. Your backup plugin will show progress updates. Don’t close your browser or navigate away during this process.
Once finished, log back into WordPress. Everything should match your backup date, including the pre-update plugin version. Test your site functionality immediately.
If you run a busy site with frequent updates, consider combining this method with staging environment testing to prevent future rollback situations.

Method 4: Manual Rollback via cPanel File Manager
No FTP client installed? Your hosting cPanel includes a built-in file manager that does the same job.
This browser-based approach works when you can’t or don’t want to install FTP software. It’s slightly slower than dedicated FTP clients, but perfectly functional for plugin rollbacks.
Step 1: Access cPanel File Manager
Log into your web hosting control panel (usually yourdomain.com/cpanel or through your hosting provider’s client area). Look for the “File Manager” icon under the Files section.
Click File Manager to open the browser-based file browser. You’ll see your website’s complete directory structure in the left sidebar.
Step 2: Navigate to Plugins Directory
In the left sidebar, expand the public_html folder (or www, or httpdocs, depending on your host). Then expand wp-content, followed by plugins.
You’ll see all your installed plugins listed as individual folders. Each folder name typically matches the plugin’s slug (lowercase, hyphens instead of spaces).
Step 3: Download Current Version
Right-click the problematic plugin’s folder. Select “Compress” from the context menu. Choose “Zip Archive” as the compression type and click “Compress Files.”
This creates a backup ZIP file of your current plugin version. Right-click the newly created ZIP file and select “Download” to save it to your computer.
Now delete the original plugin folder by right-clicking it and selecting “Delete.” Confirm the deletion when prompted.
Step 4: Upload Previous Version
Download the previous plugin version from WordPress.org (following the same process described in the FTP method above). Save the ZIP file to your computer.
Back in cPanel File Manager, make sure you’re in the wp-content/plugins/ directory. Click the “Upload” button in the top toolbar.
Click “Select File” and choose the previous version ZIP file you downloaded. Wait for the upload to complete. The interface shows upload progress.
Step 5: Extract and Activate
After uploading, you’ll see the ZIP file listed in your plugins directory. Right-click it and select “Extract.” Choose the current directory (wp-content/plugins/) as the extraction location.
Click “Extract Files.” The cPanel File Manager will unzip the plugin, creating a folder with all plugin files inside.
Delete the ZIP file after extraction to keep your server tidy. Right-click it and select “Delete.”
Now return to your WordPress dashboard. Navigate to Plugins → Installed Plugins. Find your rolled-back plugin and click “Activate.” Test your site functionality immediately.
This cPanel method works identically to FTP but requires no additional software. It’s perfect for one-off rollbacks or situations where FTP access isn’t convenient.
How to Test Plugin Rollback on a Staging Site
Smart site owners test rollbacks before touching their live site. Staging sites let you experiment safely.
A staging site is a complete copy of your WordPress installation on a separate URL. You can break things, test fixes, and experiment without affecting real visitors. Many managed WordPress hosts include staging features built-in.
Creating a Staging Environment

Check if your hosting provider offers one-click staging. Hosts like Kinsta, WP Engine, and SiteGround include staging in their dashboard.

Look for “Staging” or “Create Staging Site” buttons in your hosting control panel. Click it. Your host will clone your entire site to a staging URL (usually staging.yourdomain.com or yourdomain.com/staging).
If your host doesn’t offer staging, use plugins like WP Staging. Install it from Plugins → Add New, then follow the setup wizard to create your staging copy.
Testing Rollback Procedures
Access your staging site using the staging URL provided by your host or plugin. Log in with your regular WordPress credentials.
Now perform the exact rollback process you plan to use on your live site. Use WP Rollback, manual FTP, or whichever method you prefer. Take notes on each step and any issues you encounter.
Test thoroughly after rolling back. Click through your pages. Submit forms. Check mobile responsiveness. Verify admin functionality. If anything breaks, you know before it affects real visitors.
Pushing Changes to Production
Once you’ve confirmed the rollback works on staging, repeat the process on your live site. The staging test gives you confidence and catches potential problems.
Some hosting platforms include “Push to Live” buttons that sync your staging changes automatically. Use these carefully. They typically sync everything, not just plugin changes.
For surgical precision, perform the same rollback steps manually on your production site rather than pushing the entire staging environment. This prevents accidentally overwriting recent content or settings.
Regular staging site usage prevents many plugin update problems. Test all updates on staging first, catch conflicts early, and keep your live site stable. This proactive approach beats reactive rollbacks every time.
How to Rollback WordPress Themes
Theme updates can break layouts just like plugin updates. The rollback process is nearly identical.
WordPress themes follow the same update and version control system as plugins. Theme updates can introduce styling conflicts, remove features you rely on, or cause compatibility issues with your plugins.
Using WP Rollback for Themes
Good news: WP Rollback handles themes too. If you installed the plugin earlier for plugin rollbacks, you already have everything you need.
Navigate to Appearance → Themes in your WordPress dashboard. Find your active theme and click “Theme Details.” You’ll see a “Rollback” button if the theme came from WordPress.org.
Click “Rollback” to see available previous versions. Select the version you need, confirm the rollback, and wait for WordPress to download and activate the older theme version.
The process mirrors plugin rollbacks exactly. WP Rollback deactivates your current theme, deletes it, downloads your selected version, and activates it automatically.
Manual Theme Rollback via FTP
For premium themes or when dashboard access isn’t available, use FTP exactly as you would for plugins.
Connect to your site via FTP. Navigate to wp-content/themes/ instead of wp-content/plugins/. Download your current theme folder as backup.
Delete the current theme folder from the server. Download the previous theme version from the theme developer’s website or WordPress.org. Extract it locally and upload the theme folder to wp-content/themes/.
Return to your WordPress dashboard. If the theme was active, it should remain active after replacement. If not, activate it from Appearance → Themes.
Important Theme Rollback Considerations
Theme rollbacks carry extra risks compared to plugin rollbacks. Themes control your entire site appearance and often include custom settings stored in the database.
Rolling back a theme might reset customizer settings, widget configurations, or custom CSS. Always export theme settings before rolling back if your theme includes export/import tools.
Some themes use theme builders that store page designs differently. Elementor, Divi, and WPBakery pages might display incorrectly after theme rollbacks if the old version lacks newer builder features.
Test everything after theme rollbacks. Check your homepage, blog archives, single posts, pages, sidebars, headers, footers, and mobile responsiveness. Theme issues affect visitor experience immediately, so thorough testing matters.
When Rollback Isn’t Enough: Professional Help
Sometimes plugin conflicts run deeper than version problems. You rolled back successfully, but issues persist.
This happens when the update triggered database changes, caused file corruption, or exposed existing compatibility issues. Your site might work, but not quite right. Strange errors appear intermittently. Features partially work.
These situations need expert diagnosis. The underlying plugin conflicts might involve multiple plugins interacting badly, theme incompatibilities, PHP version mismatches, or corrupted database tables.
Warning Signs You Need Help
Watch for these indicators that rollback alone won’t solve your problem:
- Site works intermittently after rollback, breaking randomly
- Different pages show different errors across your site
- Dashboard functionality remains partially broken
- Database errors appear in WordPress debug logs
- Similar problems occur with multiple different plugins
Don’t waste days troubleshooting complex conflicts yourself. Professional WordPress support can diagnose root causes in minutes using proper debugging tools and experience with thousands of similar situations.
Quick Professional Fixes
Professional services handle common post-rollback problems efficiently. They can repair database inconsistencies, resolve deep plugin conflicts, update PHP safely, clean corrupted files, and implement proper testing workflows.
Our team at Fixmysite specializes in exactly these situations. We’ve seen every plugin conflict imaginable. More importantly, we fix them quickly so you can get back to running your business.
Most plugin issues get resolved in under an hour. Complex conflicts might take longer, but you’ll have clear communication and realistic timelines from the start.
You don’t need to understand WordPress internals or spend hours Googling cryptic error messages. Hand it off to people who do this professionally, every day.
Preventing Future Plugin Update Problems
Smart preparation beats emergency rollbacks. Build systems that prevent update disasters before they happen.
You’ve learned how to fix broken updates. Now let’s make sure you rarely need these skills again. Prevention takes a few extra minutes but saves hours of panic and troubleshooting.
Always Backup Before Updates
Make this non-negotiable. Before clicking any update button, create a fresh backup. Automatic backup schedules are great, but manual pre-update backups provide surgical restore points.
Set up automated daily backups through your hosting provider or backup plugin. But always create an additional manual backup right before running updates. This gives you two safety nets.
Store backups both on your server and off-site. Cloud storage services like Dropbox or Google Drive work perfectly. If your server crashes during updates, you’ll still have recoverable backups.
Use Staging for All Updates
Test every plugin update on staging before touching production. This catches 95% of compatibility problems before they affect real visitors.
Create a maintenance workflow: clone to staging, run updates on staging, test for 24-48 hours, then replicate successful updates on production. Yes, it takes longer. But it prevents disasters.
Many hosting platforms make staging copies with one click. Use this feature religiously. If your host doesn’t offer staging, switch hosts or use staging plugins.
Disable Automatic Updates Strategically
WordPress enables automatic plugin updates by default. This keeps sites secure but occasionally breaks functionality. Consider disabling automatic updates for critical plugins you need to test carefully.
Navigate to Plugins → Installed Plugins. Click “Enable auto-updates” or “Disable auto-updates” under each plugin to control its update behavior individually.
Disable automatic updates for page builders, e-commerce plugins, membership plugins, and other mission-critical components. Keep automatic updates enabled for simple plugins with excellent track records.
Security plugins should generally auto-update since they protect against rapidly evolving threats. Balance convenience against risk based on each plugin’s importance to your site.
Read Changelogs Before Updating
Plugin developers list changes in release notes. These changelogs warn you about breaking changes, new requirements, or compatibility issues.
Before updating, click “View details” on the plugin update notice. Read the “Changelog” tab. Look for phrases like “breaking change,” “requires PHP,” “database changes,” or “compatibility.”
If the changelog mentions major rewrites or architectural changes, test extra carefully on staging. Big version jumps (1.x to 2.x) often introduce compatibility breaks.
Keep Everything Updated Together
Running old WordPress core versions with new plugin versions causes conflicts. Your entire stack should stay reasonably current: WordPress core, PHP version, plugins, and themes.
Check your PHP version regularly. Many hosts still run PHP 7.4 or earlier, but modern plugins require PHP 8.0+. Coordinate PHP updates with plugin updates for best compatibility.
Update themes alongside plugins. Old themes with new plugins often clash. Theme developers release updates specifically to maintain compatibility with popular plugin updates.
Don’t let your site fall years behind. Gradual updates are safer than massive jumps across multiple versions at once. Stay within one or two major releases of current WordPress versions.
Your Site Is More Resilient Than You Think
You now have four proven methods to rollback WordPress plugin updates safely. WP Rollback for speed, manual FTP for flexibility, backup restoration for nuclear options, and cPanel for browser-based control.
The next time a plugin update breaks your site, you won’t panic. You’ll quickly assess the situation, check your backup, and execute the appropriate rollback method. Your site will be working again in minutes, not hours.
But better yet, you’ve learned prevention strategies that minimize rollback needs. Staging environments, strategic automatic update management, backup habits, and careful changelog review keep your site stable even during heavy update cycles.
Your action items for today:
- Verify you have current backups (if not, create one immediately)
- Install WP Rollback plugin for emergency use
- Set up a staging environment if your host offers one
These three steps take 30 minutes total but protect you from hours of crisis troubleshooting. Do them now, before you need them urgently.
For persistent issues that survive rollbacks or complex conflicts you’d rather not troubleshoot yourself, we’re here. Our WordPress support team handles emergency plugin conflicts daily. We’ll diagnose root causes, implement proper fixes, and get your site stable again.
You’re prepared now. Your site might break occasionally, but you’ll always know how to fix it.