

Your WordPress footer might seem like just the bottom section of your website, but it’s actually valuable digital real estate. It can build trust, improve navigation, and even boost your SEO. Whether you need to update copyright information, add contact details, or completely redesign your footer, this guide will help you make those changes confidently.
WordPress powers 43.4% of all websites globally, making it the dominant content management system on the internet. (Source: WP Zoom)
With over 532 million websites built on WordPress, knowing how to customize every part of your site has become an essential skill for website owners. (Source: WP Zoom)
In this guide, we’ll walk through five different methods to change your WordPress footer. These range from simple point-and-click solutions to more advanced techniques. We’ve created clear instructions that anyone can follow – even if you’re just getting started with WordPress.
What Are WordPress Footers?
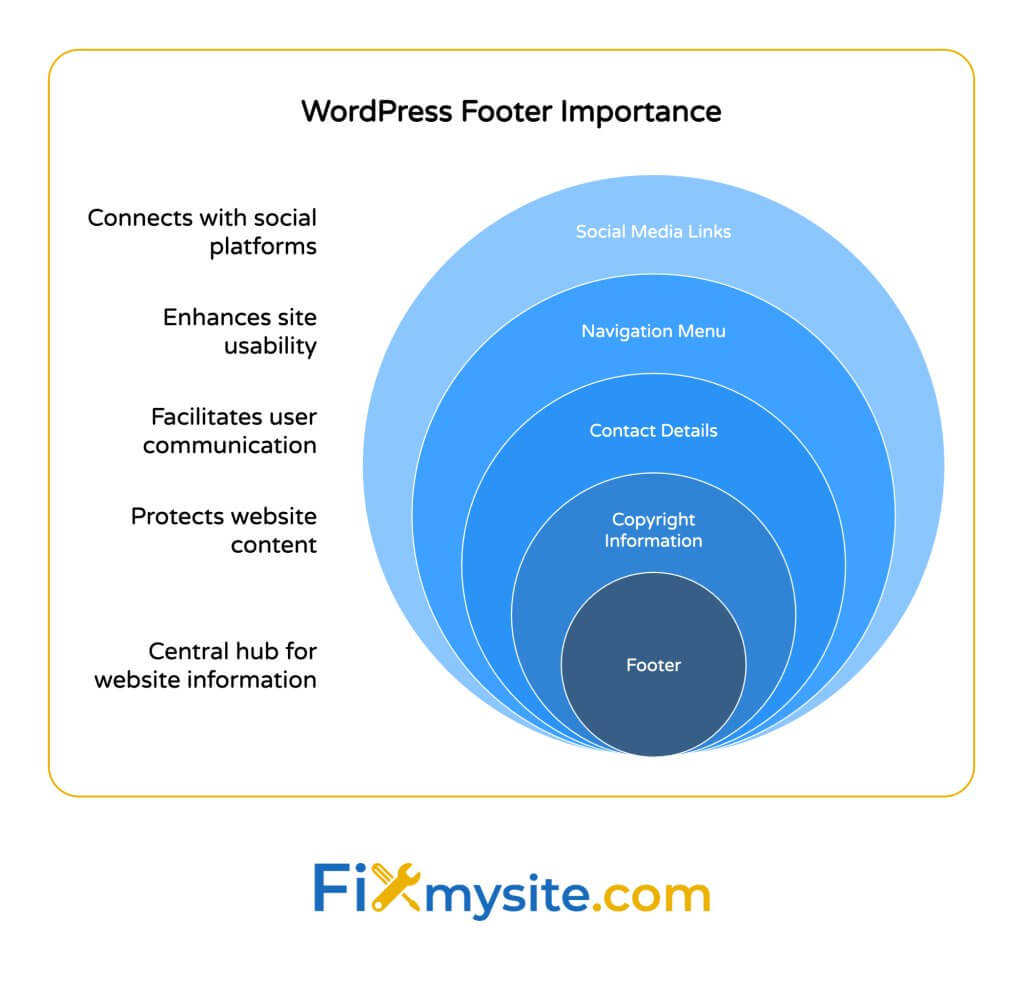
The footer is the section at the bottom of your WordPress website that appears on every page. It serves as an information hub for visitors who scroll to the bottom of your pages. Many site owners underestimate its importance.
Studies show that approximately 50% of all WordPress website traffic comes from mobile devices, where users frequently scroll to the bottom of pages. (Source: Invedus)
Your footer can contain various elements that enhance user experience. These include copyright notices, contact information, navigation menus, social media links, and more. A well-designed footer helps visitors find important information quickly.
| Footer Element | Purpose | Importance Level |
|---|---|---|
| Copyright Information | Legal protection and credibility | High |
| Contact Details | Accessibility and trust building | High |
| Navigation Menu | Improved site exploration | Medium |
| Social Media Links | Extended engagement | Medium |
| Privacy Policy/Terms | Legal compliance | High |
| Newsletter Signup | Lead generation | Medium |
This table highlights common footer elements and their importance to your website. Each element serves a specific purpose in enhancing user experience and meeting business goals.

Before You Change Your WordPress Footer
Making changes to your WordPress footer requires some preparation. Taking a few precautionary steps can save you from potential headaches later. Follow these recommendations before making any changes.
First, create a complete backup of your website. This ensures you can restore everything if something goes wrong. Over 90% of WordPress themes are mobile-responsive, so any footer changes should maintain this responsiveness. (Source: Invedus)
Next, understand what type of theme you’re using. WordPress themes fall into two main categories: traditional themes and block-based themes. Your theme type determines which footer editing methods will work best for you.
Traditional vs. Block-Based Themes
Traditional themes have been around longer and use a combination of PHP, HTML, and CSS for customization. Block-based themes (also called Full Site Editing or FSE themes) are newer and allow editing through WordPress’s visual interface.
You should also consider creating a child theme if you plan to edit theme files directly. A child theme inherits the functionality of its parent theme while allowing you to make customizations safely. This prevents your changes from being overwritten during theme updates.
| Before You Begin | Why It’s Important | How To Do It |
|---|---|---|
| Create a backup | Protects against mistakes | Use a backup plugin or hosting backup tool |
| Identify theme type | Determines available methods | Check theme documentation or Appearance menu |
| Create a child theme | Preserves changes during updates | Use a child theme plugin or manual creation |
| Check mobile appearance | Ensures responsive design | Use browser dev tools or mobile preview |
| Note current footer content | Helps restore important elements | Take screenshots or notes of current setup |
This pre-change checklist helps ensure you approach footer customization safely and effectively. Following these steps will minimize risks and set you up for success.


Method 1: Using WordPress Theme Customizer
The Theme Customizer is the most user-friendly way to change your WordPress footer. It provides a visual interface that shows changes in real-time. This method works with most modern WordPress themes.
Here’s how to access and use the Theme Customizer to change your footer:
- Log in to your WordPress dashboard
- Go to Appearance → Customize
- Look for a Footer section (may be labeled Footer, Footer Settings, or Footer Options)
- Make your desired changes to footer content, layout, or styling
- View the changes in real-time in the preview window
- Click Publish to save and apply your changes
The options available in the Theme Customizer vary depending on your specific theme. Common customization options include copyright text, footer layout, background color, and widget areas.
What You Can Typically Change Using the Customizer
Most themes allow you to modify several aspects of your footer through the Customizer. These typically include text editing, color changes, and layout adjustments. Some themes offer more advanced options than others.
You can usually edit copyright text and credits in the Customizer. Many themes also allow you to add custom HTML or shortcodes in the footer text field. This lets you insert links, basic formatting, or even small snippets of functionality.
Some themes provide color options for the footer background, text, and links. This helps you match your footer design with your overall website branding. You might also find options to adjust footer width, padding, and other spacing elements.
The Theme Customizer is ideal if you need to make simple changes without touching code. It’s perfect for beginners or anyone who wants a quick, risk-free way to update their footer. Any changes you make through the Customizer can be easily reverted if needed.
Pro Tip
If you can’t find footer options in your Customizer, your theme might use a different customization system. Check your theme documentation or look for theme-specific options in your WordPress dashboard.
Method 2: Editing Footer Widgets
Many WordPress themes include widget areas in the footer. These are flexible sections where you can add various content blocks. Widget-based footer editing is straightforward and doesn’t require any coding knowledge.
Widgets offer a drag-and-drop approach to customizing your footer. You can add multiple types of content including text, images, navigation menus, and more. This method works well for adding structured content to your footer.
How to Edit Footer Widgets
Follow these steps to customize your footer using widgets:
- Go to your WordPress dashboard
- Navigate to Appearance → Widgets
- Locate the footer widget areas (often labeled as “Footer Area 1,” “Footer Column 1,” etc.)
- Add widgets by dragging them from the available widgets section to your footer areas
- Configure each widget’s settings as needed
- Save your changes
Most themes provide multiple widget areas in the footer. This allows you to create columns of content for better organization. You can add different widgets to each area to create a comprehensive footer design.
Useful Widgets for Footers
Several widget types work particularly well in footer areas. Here are some of the most useful ones:
- Text Widget: Add custom text, HTML, and shortcodes
- Custom HTML Widget: Insert any HTML code directly
- Navigation Menu Widget: Add a menu of important links
- Gallery Widget: Display images in your footer
- Recent Posts Widget: Show your latest content
To add navigation links to your footer, first create a menu under Appearance → Menus. Then add a Navigation Menu widget to your footer area and select your menu from the dropdown. This creates a clean, organized list of links in your footer.
The widget approach gives you more flexibility than the Theme Customizer but doesn’t require technical skills. It’s an excellent middle-ground option for most WordPress users who want a customized footer without diving into code.
| Widget Type | Best Used For | Customization Level |
|---|---|---|
| Text/HTML Widgets | Copyright info, custom content, contact details | High |
| Navigation Menu Widgets | Important page links, categories, site sections | Medium |
| Gallery/Image Widgets | Logo display, award badges, visual elements | Medium |
| Recent Posts/Comments | Content promotion, community engagement | Low |
| Social Icons Widgets | Social media profile links | Medium |
| Newsletter/Form Widgets | Email signups, simple contact forms | Medium |
This table provides guidance on which widgets work best for different footer content needs. Match your business goals with the appropriate widget types for optimal results.

Method 3: Using Site Editor for Block-Based Themes
Modern WordPress themes often use the block editor system for full site editing. If you’re using a block-based theme, you can edit your footer through the Site Editor. This provides a visual, drag-and-drop experience for complete footer customization.
Block-based themes offer more flexibility and a more intuitive editing experience. You can add, remove, and rearrange blocks to create custom footer layouts without writing code. This approach bridges the gap between ease of use and powerful customization.
How to Edit Your Footer With the Site Editor
Follow these steps to customize your footer using the Site Editor:
- Go to your WordPress dashboard
- Navigate to Appearance → Editor (or Site Editor)
- Click on the footer area of your site in the preview
- Alternatively, look for a “Footer” template part in the template parts section
- Add, remove, or modify blocks as needed
- Save your changes when finished
The Site Editor gives you access to all WordPress blocks for your footer. You can add paragraph blocks for text, buttons for calls to action, social icons for your profiles, and much more. The blocks system allows for endless customization possibilities.

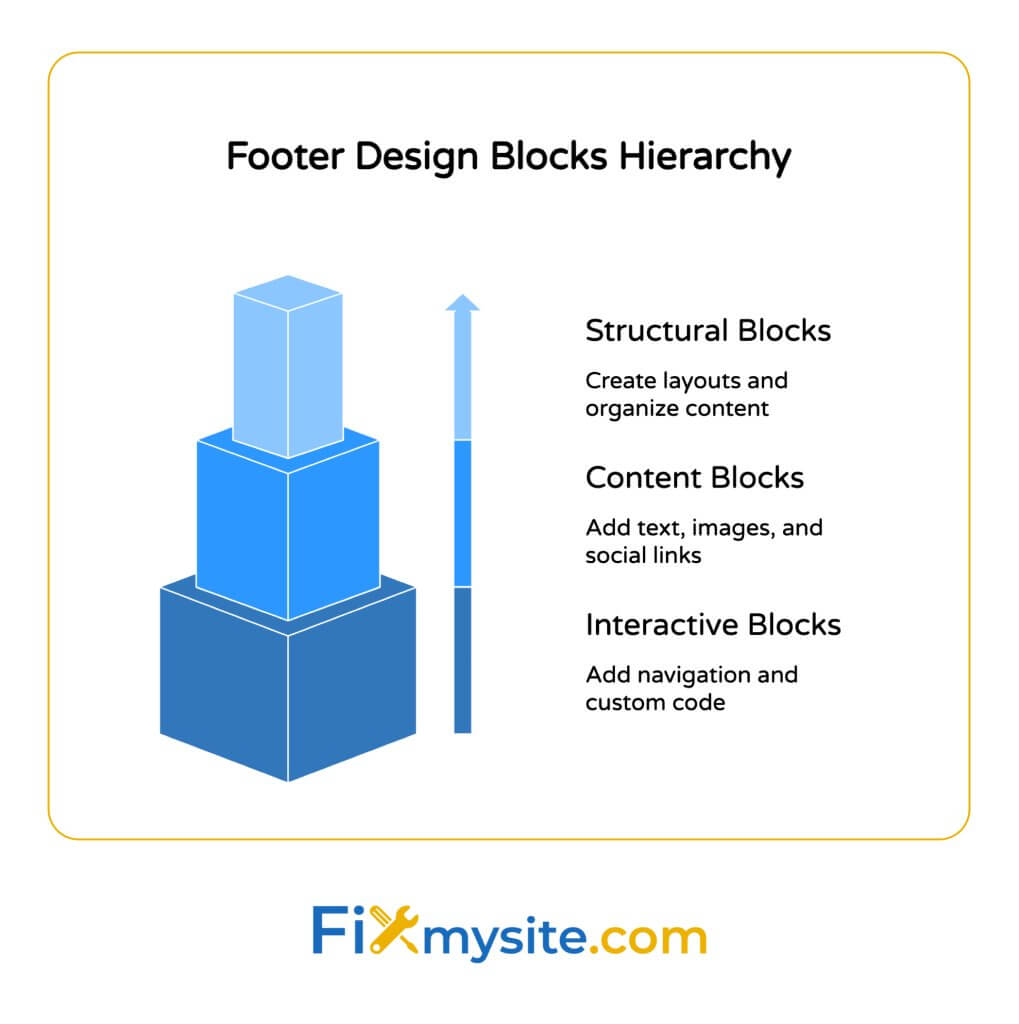
Useful Blocks for Footer Design
Several block types work particularly well in footer designs:
- Columns Block: Create multi-column layouts
- Paragraph Block: Add text content
- Navigation Block: Add menu links
- Social Icons Block: Add links to social profiles
- Image Block: Add logos or other images
- HTML Block: Add custom HTML code
The column block is especially useful for creating organized footer layouts. You can add multiple columns and place different blocks inside each one. This creates a clean, structured footer that displays information in a user-friendly way.
One advantage of the block editor is the ability to use reusable blocks. You can create a custom element once and reuse it across your site. This ensures consistency and makes future updates easier.
Important Note
The Site Editor is only available for block-based themes. If you don’t see the Editor option under the Appearance menu, your theme likely doesn’t support full site editing yet. Consider upgrading to a block-based theme or use one of the other methods described in this guide.
Method 4: Editing the footer.php File
For complete control over your WordPress footer, you can edit the theme’s footer.php file directly. This method requires basic knowledge of HTML and PHP. It provides maximum flexibility but comes with higher risk if not done correctly.
Editing theme files gives you the ability to make custom changes that might not be possible through other methods. You can modify the footer’s structure, add custom functionality, and make precise styling adjustments. This approach is ideal for developers or users with coding experience.
Safety First: Use a Child Theme
Before editing any theme files, create a child theme. A child theme inherits the functionality of its parent theme while allowing safe customization. Without a child theme, your changes will be lost when the theme updates.
Understanding WordPress security best practices is crucial when making any changes to your theme files. Always back up your site before making code changes.
How to Edit the footer.php File
Follow these steps to edit your footer.php file:
- Go to your WordPress dashboard
- Navigate to Appearance → Theme File Editor
- Select your child theme from the dropdown (if available)
- Look for footer.php in the list of theme files on the right
- Make your desired changes to the code
- Click Update File to save your changes
If you don’t see the Theme File Editor, your hosting provider may have disabled it for security reasons. In that case, you’ll need to use FTP or your hosting file manager to access and edit the theme files.
Common Footer.php Customizations
Here are some popular customizations you might want to make to your footer.php file:
| Customization | Code Location | Difficulty Level |
|---|---|---|
| Change copyright text | Look for text between © symbols or in footer credits section | Easy |
| Add custom HTML | Insert within appropriate footer div elements | Medium |
| Modify footer structure | Adjust div containers and classes | Medium |
| Add dynamic year to copyright | Replace static year with <?php echo date(‘Y’); ?> | Easy |
| Remove theme credit links | Find and delete theme credit code blocks | Easy |
| Add custom JavaScript | Insert before closing </body> tag | Advanced |
This table outlines common code changes you might make to your footer.php file. Each customization addresses a specific need and varies in technical difficulty.
Warning
Editing theme files directly is risky if you’re not familiar with code. A single mistake can break your site’s appearance or functionality. Always keep a backup and know how to restore it before making changes. If you’re uncertain, consider professional WordPress support instead.
Method 5: Using Plugins or Page Builders
For those who want extensive customization without coding, plugins and page builders offer a powerful solution. These tools provide visual interfaces for creating custom footers with advanced features. They bridge the gap between code editing and the built-in WordPress customization options.
Page builders like Elementor, Beaver Builder, and Divi allow you to create custom footer templates. You can design your footer visually using drag-and-drop interfaces. These builders offer more design freedom than the standard WordPress editors.
Popular Footer Customization Plugins
Several plugins specifically focus on footer customization:
- Elementor Pro: Create custom footer templates visually
- Footer Mega Grid Columns: Add complex column layouts to footers
Elementor Pro is particularly powerful for footer customization. It allows you to create a footer template and assign it site-wide. You can build your footer visually with dozens of widgets and style options. The process is intuitive and requires no coding knowledge.
Using Elementor to Create a Custom Footer
Here’s how to create a custom footer with Elementor Pro:
- Install and activate Elementor Pro
- Go to Templates → Theme Builder
- Click Add New and select Footer
- Choose a template or start from scratch
- Design your footer using Elementor’s drag-and-drop interface
- Click Publish and set display conditions (usually “Entire Site”)
- Your custom footer will now appear across your website
Page builders give you control over every aspect of your footer design. You can create multiple columns, add advanced elements like forms or maps, and precisely control the styling. This method is ideal if you want a unique, professionally designed footer.
| Plugin/Builder | Type | Key Features | Best For |
|---|---|---|---|
| Elementor Pro | Page Builder | Visual editor, theme builder, templates | Complete custom designs |
| Beaver Builder | Page Builder | Themer extension, responsive editing | Developer-friendly customization |
| Divi Builder | Page Builder | Visual editor, theme builder, extensive options | Design-focused websites |
| Footer Mega Grid | Footer Plugin | Grid layouts, widget areas, simple interface | Enhanced widget footers |
| Custom Footer | Footer Plugin | HTML insertion, simple customization | Basic code insertion |
This comparison helps you choose the right tool for your footer customization needs. Each option offers different capabilities and is suited to different types of users.
The plugin approach offers significant advantages in terms of flexibility and ease of use. However, it does add another layer of software to your site. This could potentially impact performance if not managed carefully. Choose reputable, well-maintained plugins to minimize this concern.
Common Footer Customization Examples
Now that we’ve covered the different methods for changing your WordPress footer, let’s look at some common customization examples. These practical applications will help you understand how to implement specific changes to your footer.
Adding Copyright Information
Copyright notices are a standard footer element. They protect your content and establish credibility. Here’s how to add or update copyright information in different ways:
Using the Theme Customizer: Many themes have a dedicated field for copyright text in the Customizer. Look for Footer settings and find the copyright field.
Using a Text Widget: Add a Text widget to your footer area and insert copyright text. To create a dynamic year that updates automatically, use HTML with PHP:
Code Example
© 2025-<?php echo date('Y'); ?> Your Company Name. All Rights Reserved.Editing footer.php: Look for the copyright section in your footer.php file and update the text. Add the PHP year code to make it dynamic.
Adding Social Media Icons
Social media icons in your footer encourage visitors to connect with you on other platforms. Here’s how to add them:
Using the Theme Customizer: Many themes have social media settings in the Customizer. Enter your profile URLs, and the theme will display icons automatically.
Using Widgets: Many themes include a Social Icons widget. Alternatively, you can use plugins like “Social Icons Widget” to add social links to your footer widget areas.
Using Block Editor: In a block-based theme, add a Social Icons block to your footer template. Configure the icons and links as needed.
Adding Contact Information
Contact details in your footer make it easy for visitors to reach you. Here’s how to add them:
Using a Text Widget: Add a Text widget to your footer and include your contact information. You can use HTML to format it nicely:
Code Example
<strong>Contact Us</strong><br>
Email: <a href="mailto:info@example.com">info@example.com</a><br>
Phone: <a href="tel:1234567890">(123) 456-7890</a><br>
Address: 123 Main St, Anytown, USA
Using Block Editor: Add paragraph blocks for each piece of contact information. You can also use the Group block to organize them together.
Adding a Newsletter Signup
Email newsletter signups in your footer can help grow your subscriber list. Here’s how to add one:
Using a Form Plugin: Install a form plugin like Contact Form 7, WPForms, or Mailchimp for WordPress. Create a simple signup form and add it to your footer using a widget or shortcode.
Using Block Editor: Some email marketing services offer dedicated blocks for the block editor. Add these to your footer template for a seamless integration.
Troubleshooting Footer Changes
Even with careful planning, things can sometimes go wrong when changing your WordPress footer. Here are solutions for common issues you might encounter.
Footer Changes Not Appearing
If your footer modifications don’t show up, try these fixes:
- Clear cache: Your browser or caching plugin might be showing the old version. Clear all caches.
- Check device: Some themes display different footers on mobile devices. Check both desktop and mobile views.
- Verify theme support: Ensure your theme supports the customization method you’re using.
- Check for conflicts: Disable other plugins temporarily to check for conflicts.
Wondering how to solve common WordPress website issues? Our comprehensive troubleshooting guide can help with footer problems and more.
Footer Layout Breaking
If your footer layout looks broken after changes, try these solutions:
- Check responsive settings: Ensure your changes work on all screen sizes.
- Verify HTML: Make sure all HTML tags are properly closed and formatted.
- Check CSS conflicts: Custom CSS might conflict with theme styles.
- Restore from backup: If all else fails, restore from your backup and try a different approach.
If you’re experiencing issues with your WordPress theme, check out our guide on fixing broken WordPress themes.
When to Seek Professional Help
Some situations warrant professional assistance:
- Your site is broken and you can’t restore from backup
- You need complex customizations beyond your technical skills
- You want a completely custom footer design
- You need to ensure your changes meet accessibility standards
- You’re working on a high-traffic or business-critical website
Professional WordPress support services can help resolve footer issues quickly and implement custom designs properly. This saves time and prevents potential problems.
Emergency Recovery
If you’ve broken your site while editing the footer, don’t panic. You can restore your WordPress site from backup or get immediate help from our WordPress support team.
Best Practices for WordPress Footer Design
Creating an effective footer goes beyond technical implementation. Follow these best practices to ensure your footer enhances your website’s user experience and meets your business goals.
Mobile Optimization
Mobile optimization is crucial for footers. Studies show that approximately 50% of WordPress traffic comes from mobile devices. (Source: Invedus)
Keep your footer mobile-friendly with these tips:
- Use a responsive layout that adapts to screen size
- Test your footer on multiple devices
- Keep tap targets (links and buttons) large enough for fingers
- Consider a simplified footer version for mobile users
Footer Design Best Practices
Your footer design should balance functionality with aesthetics. Here are key design principles to follow:
| Design Principle | Implementation Tips | Benefits |
|---|---|---|
| Visual Hierarchy | Use headings, spacing, and font weights to organize content | Helps users quickly find important information |
| Consistent Branding | Match colors and styles with the rest of your site | Reinforces brand identity and creates cohesion |
| Whitespace Usage | Add adequate spacing between elements | Improves readability and reduces visual clutter |
| Limited Content | Include only essential information and links | Prevents information overload and decision fatigue |
| Accessibility | Use sufficient contrast and proper markup | Makes content usable for all visitors, including those with disabilities |
This table outlines essential design principles for effective WordPress footers. Following these guidelines will help create a footer that serves both your visitors and your website goals.
Content Strategy for Footers
Your footer content should be strategic and purposeful. Include elements that support your website’s goals and help users. Consider these content recommendations:
Essential Links: Include links to your most important pages like About, Contact, and Privacy Policy. These pages help build trust and meet legal requirements.
Contact Information: Make it easy for visitors to reach you by including contact details. This improves user experience and builds credibility.
Call to Action: Add a focused call to action that supports your primary business goal. This might be a newsletter signup, contact button, or product link.
Social Proof: Consider adding trust elements like awards, certifications, or association memberships to build credibility.
With proper optimization techniques, WordPress sites can load up to 70% faster, creating a better user experience. Keep your footer lightweight to maintain good performance.

Conclusion
Changing your WordPress footer doesn’t have to be complicated. We’ve covered five effective methods that suit different skill levels and customization needs. From the beginner-friendly Theme Customizer to advanced code editing, you now have the knowledge to transform your footer.
Remember that your footer is valuable website real estate. It appears on every page and provides essential information to your visitors. A well-designed footer enhances user experience, builds trust, and supports your business goals.
Choose the method that best matches your technical comfort level and customization needs:
- Theme Customizer: Quick and easy text/layout changes
- Footer Widgets: Simple content blocks without coding
- Block Editor: Visual design for modern themes
- Footer.php Editing: Complete control for developers
- Plugins/Page Builders: Advanced design without coding
Always back up your website before making changes to your footer. Test your modifications on different devices to ensure a consistent experience for all visitors.
If you encounter any issues with your WordPress footer or need professional assistance, our team at Fixmysite.com is here to help. We offer WordPress support services ranging from small fixes to complete redesigns. Let us handle the technical details while you focus on your business.
Need Help With Your WordPress Footer?
Our WordPress experts can customize your footer exactly how you want it—no technical skills required on your part. Get professional help with your WordPress footer today at Fixmysite.com.